

Focus and Time Management - Tips for getting more things done
I'm the sort of person that gets distracted very easily - like a dog that is chasing a ball you've thrown at but suddenly sees a squirrel and decides to run after him instead! That's what's happening to me too. I chase one thought trying to focus and finish a specific task and then suddenly something else will come up and BOOM, I direct all my focus there, living the first task unfinished. In the end, I feel like a headless chicken running around aimlessly and not accomplishing anything during the day.
(Well, there seems to be a lot of animals in the above paragraph - dogs, squirrels and chickens - but I hope you get the picture!)
After a while I realised that I had a time management and focus issue that I had to deal with pronto! So, through the years, I started using little techniques here and there that have made a BIG difference to me and my life, as far as focusing and managing my time is concerned.
1. Meditation
Trying to manage the thoughts in my head seemed like a very daunting task! But I knew it was very important, so I decided to give meditation a try. When you start meditating for the first time, it can be very frustrating. You might think that it is not working because you're trying to focus on your breathing, and all these thoughts keep on popping up. But you have to keep doing it and in the end you will succeed! Trust me. Just don't give up.
The basic thing to understand is, that training the mind is not about eliminating the thoughts in your head, it's about sitting back and observing them from a different perspective and finding a place of calm. I'm using Headspace for my meditation daily in my morning routine for 10 minutes, and it makes such a difference to the start of my day.
2. Making Lists
I am naturally a list maker, so that is easy for me. I make lists for everything! From shopping lists, to packing lists for our weekend trip, to resolution lists - you name it. I find that it puts my thoughts in order, makes me be more organised and then I have less things to think and worry about!
3. Brain Dump Note Book
I used to have little bits of paper floating around on my desk, in my bag or in between books, with all my lists and things I wanted to remember. In the end, I tended to misplace them or lose them - which doesn't help much! So, now I always have a note book dedicated to write every little thing I want to remember. It could be anything, from the things that need to be done in the house, an interesting website, a quote etc. I just put a title on it and the date and then I'm done. Any time I need something, I know I will find it in there.
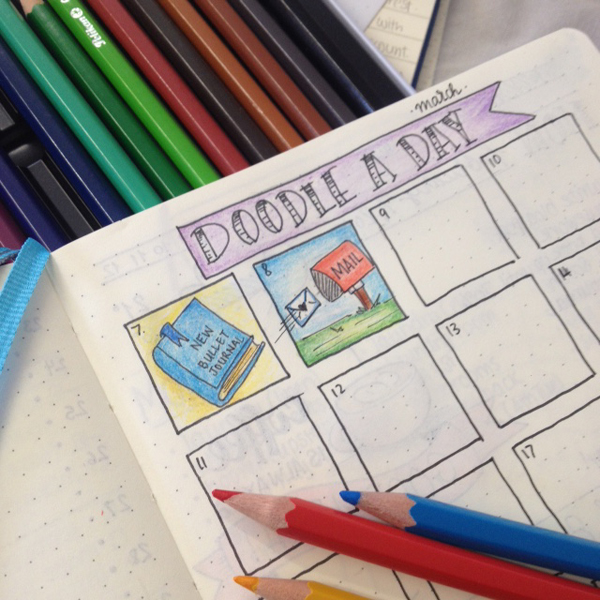
4. Bullet Journaling
Bullet Journaling is something that I've only recently started, but it has already made a HUGE difference in my life and productivity! It helps me be on top of things and be even more organised.

Bullet Journaling is a simple customisable organisation system on a notebook. You basically create your own planning layout and inserts according to your needs. All you need is a bit of creativity and a notebook. You can find more information about it in the official website.

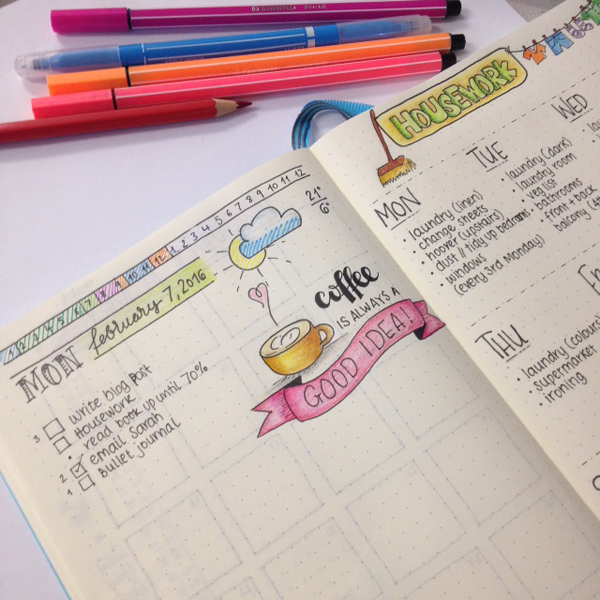
Apart from having my monthly, weekly and daily spreads that keep me focused, I also create lists that help me with the day to day tasks - like my housework list or my meal planning list as you can see above - among other things. Making things simpler and more systematic can help you worry about less things and have more time to focus on more important tasks.
5. Time Management Bar
One more thing that I've found through bullet journaling that has helped immensely! I draw two horizontal lines above my day header and in between I write down all the hours, starting with 1am and finishing with 12am. This is a line that I use in my Bullet Journal every day, where I track what I do all through that day.

I can plan my day from the night before and set a specific time frame for each task that I distinguish through colour. I've created a colour coding system that works for me, and so now I know just by looking at it where I've allocated my time during the day.
There are 2 more ways of tracking your time, that I know of: the chronodex and the spiraldex.
6. Daily Routine Time Line
This works on roughly the same principle like the time management bar above. It basically gives me a rough outline of a normal day.

That motivates me and keeps me on track, by setting a specific time frame for each task or group of tasks. For example, I know that I can exercise either in the morning between 7:45 and 8:30 or in the afternoon between 8-9:30. Or, I know that the best time for blogging is in the morning from 8:30 until 11:30, when there's peace and quiet and I can really focus on what I have to do.
That doesn't mean that I can't change things around or that I have to constantly follow this schedule. It's just an outline to help me focus my time on. See it like when you go to school and you know the schedule for each class - ie. chemisty at 10, maths at 11:30 and so on.
Again I am using the same colour coding system like in my time management bar to make things easy.
7. Set an Alarm for each Task
For me time flies by! Literally! I start doing something and then it's 3 hours later but it feels like I've only just started. Therefore I need to keep track of the time for each task. The easiest way is to set an alarm for the time you want to have this task finished. This works wonders for me - making me be more focused and work faster.
8. Take Breaks
Taking 5 minute breaks helps you reset your mind frame and refocus.
9. Block all Distractions
This is a very important step. For me usually the distractions can be my phone and social media. Find out what you consider to be a distraction for you and make sure you keep away for as long as you need to finish your tasks. You can have your distractions afterwards as a reward ;)
There's no better feeling than having ticked all your to-do's by the end of the day, and all the above certainly keep me on track. If you have any other focus or time management techniques up your sleeve, please share them with me in the comments below. Every little helps :)
Have a nice day,


My favourite bullet journal supplies
I've been getting a ton of questions lately about what supplies I am using for my bullet journaling. Especially after I posted these pictures on Instagram ( here and here ), everyone was asking what I used to create that shading. So, instead of answering each one individually, I decided to create a post where I talk about all my favourite supplies that I use at the moment.
So, relax, grab a cup of coffee and let's dive together to my happy place - the stationery world!

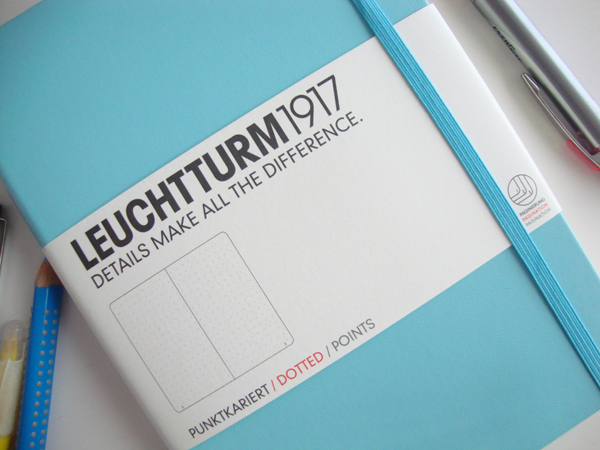
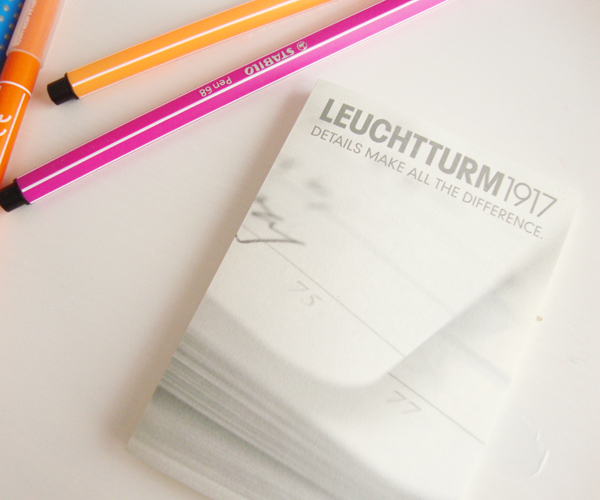
Leuchtturm1917
First stop is of course my Leuchtturm1917. Oh, I love this notebook so much! I haven't used any other (like the Moleskine or the original Bullet Journal) in order to be able to compare them, but I'm really pleased with my purchase and I love the colour <3. I am using the light blue A5 dotted one. I've already written a whole blog post about it and all it's characteristics with lots of pictures, if you want to check it out more here.
You can buy it here: Amazon
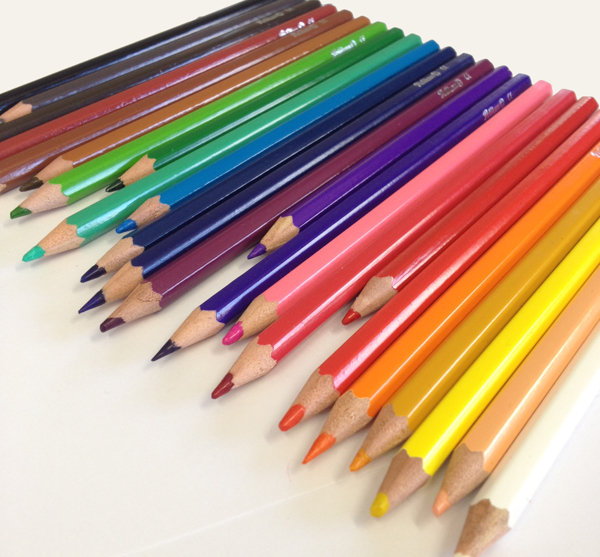
Pelikan Soft Coloured Pencils
Next are the soft coloured pencils that I'm using to do all the shading in my bullet journal. They are made by Pelikan and they come in a tin case with 24 bright and vivid colours that draw like a dream. If you're looking for colour pencils to create shading like me, make sure you choose soft pencils, so that you have a smooth application and less lines.

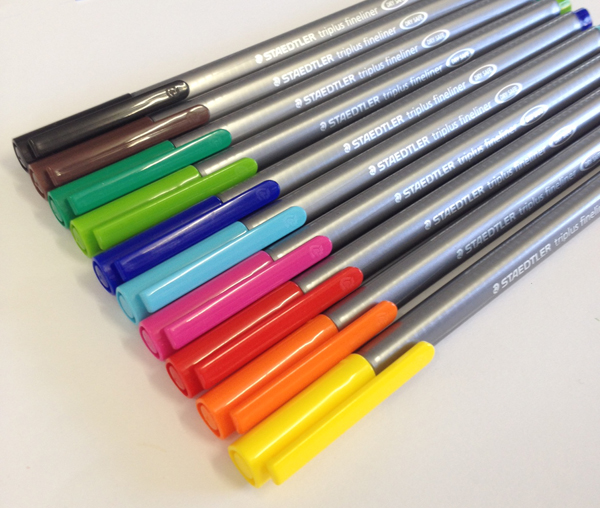
Staedtler Triplus Fineliners
These I feel have become a must in the bullet journal community, especially after Kara (from Boho Berry) has talked about them. And I have to agree - they are very, very good. With a fine tip of 0.3 and very little ghosting they are perfect for adding colour to your bullet journal on an everyday basis.
You can buy them here: Amazon
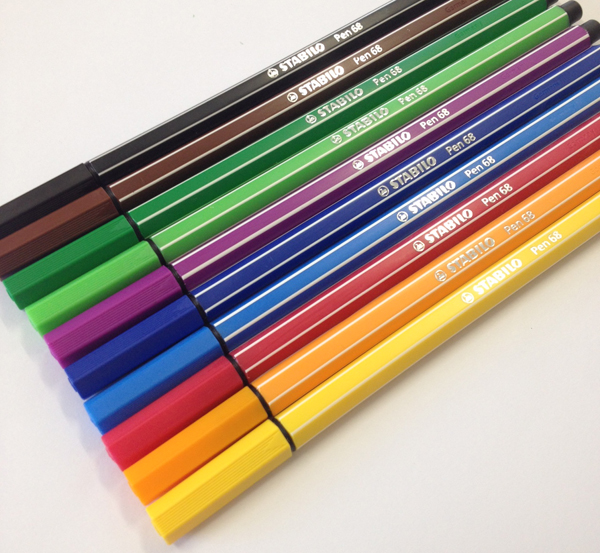
Stabilo 68 Pens
These are amazing! The colours are vivid and bright and you get very good pigmentation. They are water-based with an 1mm sturdy tip and they come in 46 colours. I have quite a few of them and I really really like them. And the best part of all is that you get only a bit of ghosting at the back of the page! I also sometimes use them before I start the shading, if I want a more intense colour in certain areas. They have a neon line that I really like as well. I also use their 2in1 pens which are equally good and you get two pens for the price of one! Especially the black one, I use it all the time.
You can buy them here: Amazon
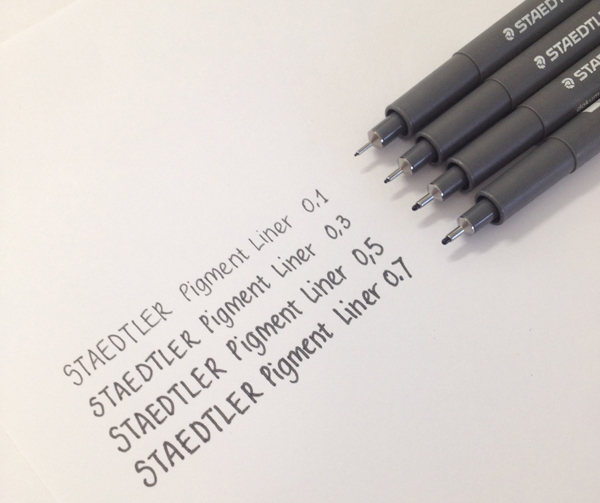
Staedtler Pigment Liners
These ones I use them e v e r y d a y! I love them! They are a bit off black - so don't expect the darkest of blacks with these babies, but I like it. They come in various tip sizes, and I have the 0.1, 0.3, 0.5 and 0.7 ones. By far my most used one is the 0.3. It's perfect for writing and drawing the lines around your sketches etc. The 0.1 is great if you want to draw something with great details. And the 0.5 and 0.7 are great for thick lines and titles. For thick lines I also use the Faber-Castell Broadpen 1554 one, which has an amazing shade of black with purple undertones.
You can buy them here: Amazon
Pens
As far as my favourite pens to write are concerned, I tend to change and use different ones all the time. I'm one of those people you see in the bookstores that tests all the pens and usually I buy 10 pens on my way out, even though I went in there to only buy a book for example!
My favourite pens right now are:
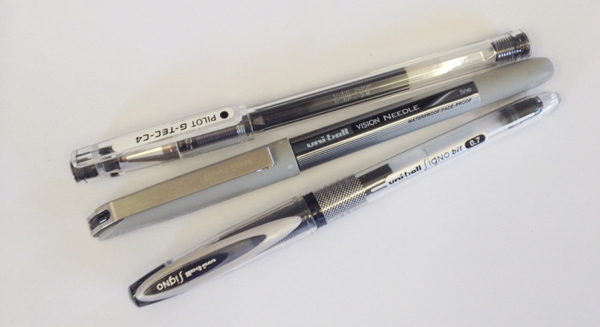
- Uniball Signo bit 0.7
This is my favourite one by far! Really nice dark black and very precise needle tip, that even though is 0.7mm writes pretty thin. Zero bleeding and only a bit of ghosting. It comes in an amazing light blue and one of the best greens I've ever used as well!
You can buy them here: Amazon
- Pilot G-Tec-C4
If you want great detail in your writing then look no further. These pens have a very smooth fine point with no smears and almost no ghosting. Just perfect! Only a few times I noticed that when you start to write, the ink might not flow as well and you might need to write on a piece of paper to get it started. But apart from that they're excellent. I have the blue colour as well that I like.
You can buy them here: Amazon
- Uniball Vision Needle 0.7
This one I like because of the tip but also because of the very different shade of black you get. It's a combination of black and grey ombre. That's the only way I can describe it. :)
You can buy it here: Amazon
Pencils
This list would not be complete if I didn't include my favourite pencils that I use everyday. I always use a pencil first in my drawings and sometimes I prefer to write in pencil too. I find that my handwriting looks better in pencil sometimes.
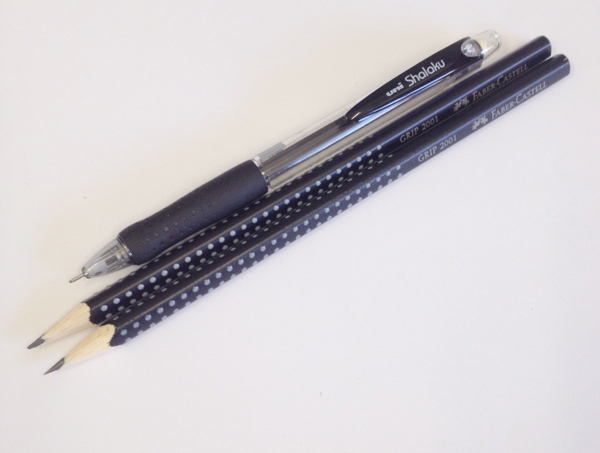
- I usually tend to draw with an HB pencil, for softer lines. The Faber-Castell ones are great and I really like the grip they have.
- When I write or I want more dark lines I use a 2B pencil. Again, I choose the Faber-Castell ones because I really like them.
- And last but definitely not least is my Uni Shalaku mechanical pencil that I absolutely love! It has the perfect grip and it's just so comfortable when I write. I have a lot of different mechanical pencils but I ALWAYS tend to reach for this one. I use it with the Faber-Castell Super-Polymer leads 0.7HB
Of course, as a proper stationery addict my wishlist is quite big, and since I've started my bullet journal it gets bigger and bigger! My next purchases will definitely be the Tombow Dual Brush Pen Art Markers, the Faber-Castell PITT artist pens, and the Sakura Pigma Micron Pens.
I would LOVE to know your favourite supplies and stationery that you use for your bullet journal. So, make sure you let me know in the comments bellow ;)
Have a nice day


Weekly Spread Ideas for Bullet Journals
Being a bullet journal newbie, you find yourself in the beginning being bombarded with various styles and ways of doing things. You get inspired by your favourite Instagram accounts, or from posts you find on facebook groups (like this one) etc. But in the end, I guess you just have to figure out what works for you and what doesn't. It's a simple case of trial and error. That's what has happened to me, especially with my weekly spreads.

Being a bullet journal newbie, you find yourself in the beginning being bombarded with various styles and ways of doing things. You get inspired by your favourite Instagram accounts, or from posts you find on facebook groups (like this one) etc. But in the end, I guess you just have to figure out what works for you and what doesn't. It's a simple case of trial and error. That's what has happened to me, especially with my weekly spreads.
Weekly spreads are an important part of my monthly planning. Especially with the kids and all the activities and the events they go to, I knew from the beginning that I had to find a weekly spread to accommodate everything - Personal, Kids/Family, Blogging, Events/Appointments and so on.
So, the quest for the perfect weekly spread begun!
My first spread looked like this:

I took inspiration from the latest video I watched on Boho Berry's YouTube channel, where she was talking about the weekly spreads she has been using. After I made some adjustments to fit my needs, I created what you can see in the picture above. I've created a FREE Printable of the above spread for you, both in coloured and black and white version.
JOIN THE GANG!
Subscribe now to my Newsletter to download the FREE Printable.
Plus get access to the Resources Library!
I guess it was ok for a first attempt and I liked that I could see everything that was going on during each day at a glance. However, while I was using it during that week, I noticed some things that were not working as well as I thought.
For example, the first column titled 'Appointments/Events' ended up being the dumping ground! I was using it for everything that didn't match any of the other categories. I thought that using boxes in front of each task/event made everything look crowded and cluttered. I also found that the space allocated for each day was too small and therefore in some instances I could not fit all the tasks that I had. Lastly, I thought that I was not using effectively all the space available on the two pages (like the space next to the month-title).
So, on week no.2 I changed things around a bit:

I moved everything up, using as much of the space as possible. And I also made the boxes bigger, so that I had more room to write all the daily tasks/events. I changed the title on the first column to 'Appointments/Misc' so that I have an excuse now to dump everything there :) and I started using dots instead of boxes in front of every task. I also used dashed lines to separate each day in order to make everything to look a bit lighter.
I have to admit that it looked much better and also it was more functional than the previous spread. However, again I found some things that bothered me and that I wanted to change - again!
Me being the only vegan in the family, means that I have a different menu from the rest! So I wanted space to note down what I am cooking each day for me and for the family. In the 'Goals/To-do' column, I was writing everything - personal and work related - and that felt a bit confusing at times. Also, I still wanted to have daily spreads as well, and having everything on my weekly spread somehow made the daily ones redundant...

So, I changed it again!
First of all, I made a master weekly housework to-do list, that basically has all the things that I usually do on each day every week. That way I don't have to write everything down again and again.

I created two columns on the first page for my 'Appointments/Misc' and my 'Blog' that are separated with the dates. That way I have lots of room and it makes everything look neater.

On the other page, I separated the 'Meals' category into two columns (one for my meals and one for my family's) and I also did the same for the 'Goals' one (one for personal and one for my blog).
Lastly, I created a 'Notes' category at the bottom of the page where I write tasks and appointments that I'm going to transfer to next week's spread.
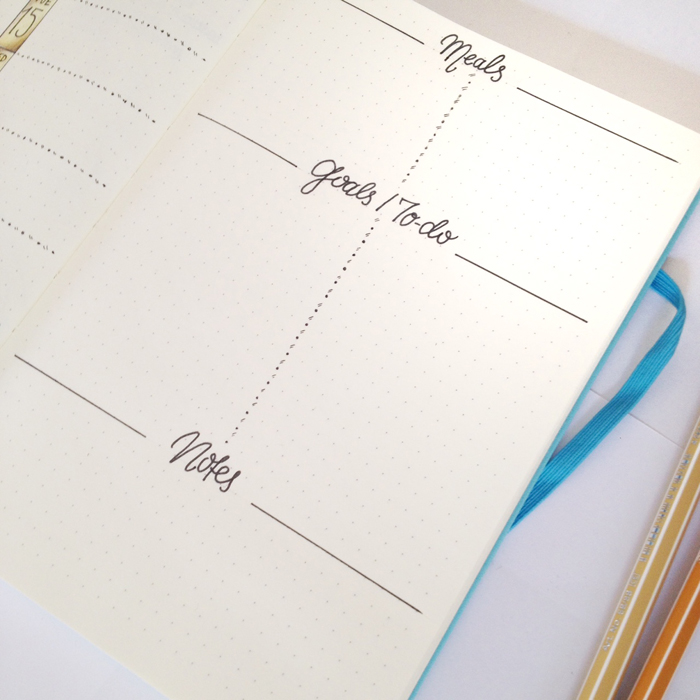
I think this looks cleaner and less cluttered, and hopefully it's going to work even better than the previous ones! ;)
I would love to see your weekly spreads to get more inspiration! Please make sure you leave a link in the comments below. Which aspect of your bullet journal did it take you quite a while to make it work for you?

>> If you want to see my favourite Resources that I use every day with my Bullet Journal, click here to find out what I love to use. For more inspirations for your bullet journal, you can follow my Pinterest or my Instagram account.
Have an amazing day!
Morning Dance - Start your day by choosing to be Happy

Today I come to you with some amazing dance moves and a lot of swing! For the past 6 months I've implemented something into my morning routine that has affected my day in a very positive way and I'd like to share it with you.
And that is dancing!
Right after I wake up in the morning, I put on my headphones (I don't think my family would appreciate a full blast of Bruno Mars at 6 o'clock in the morning!) and I turn my bathroom into the dance floor. For approximately 5 mins I dance like no one's watching and I create my own choreography right in front of my bathroom mirror.
'By consciously starting your day focused on gratitude and joy, you'll find that your whole life will begin to sparkle.' (Pam Grout - 'E-Cubed')
I know what you're thinking: at 6 in the morning I can't keep my eyes open, let alone start dancing like crazy in the bathroom. That's how I was feeling when I first read about it in Pam Grout's book 'E-Cubed'. But I promise you, if you try it for 2-3 days, you'll be hooked!
That's because those 5 minutes will affect the rest of your day in such a powerful and positive way, that you'll look forward to your next morning dance.
'Using the first five minutes of your day to feel good is like programming a destination into your GPS, like fixing your eye on the spot where you want your golf ball to land.' (Pam Grout, 'E-Cubed')
The theory behind this according to Mrs. Grout's book is that the more fun you have, the better life works.
So, my morning routine right now looks something like this:
Meditate for 10 mins.
Stretch and give thanks to the Universe for another beautiful day.
'When you rise in the morning, give thanks for the light, for your life, for your strength. Give thanks for your food and for the joy of living.' (Tecumseh, Native American Leader)
Leuchtturm1917 - My new Bullet Journal

I never thought that something so small like a notebook could have such a big impact in my life, but it's true!
I've always been a big planner and journal enthusiast, with little notebooks and calendars to note down all the appointments, events and interesting things that happened throughout the day. But no planner that I've ever bought was exactly how I wanted it. It might not have had enough space for me to write on or doodle like I tend to do, or it might not have had the sections that I needed for my every day notes and so on. I then turned to Etsy, in order to find the perfect planner for me. However, I still didn't find what I was looking for and also I'm not fond of having my notes on loose paper or in binders. So, while I was looking around, I stumbled upon a video on YouTube by Kara where she was talking about her Bullet Journal and my world changed! (yes, it was that dramatic!!!)
But what is a Bullet Journal?
It's an analog system for the digital age. It helps record the past organise the present and plan for the future. It can be your to-do list, sketchbook, notebook and diary and all the above.

That's how the creator of this system, Ryder Carroll, describes it in his very informative website that you must visit to see all the information and the detailed videos that thoroughly explain his system.
I knew straight away that this was the perfect system for me, so I obviously had to get that bullet planner. You can use any notebook you want with this system, or you can get the original Bullet Journal from their website. However I am a girl of colour, and I wasn't very font of the black notebook. That's when I discovered the magical and colourful world of Leuchtturm1917 notebooks!
Don't let the name deter you - I can't even pronounce it for the life of me! Fellow planner and journal enthusiasts - I'm introducing you my new love, my new Leuchtturm1917 notebook!
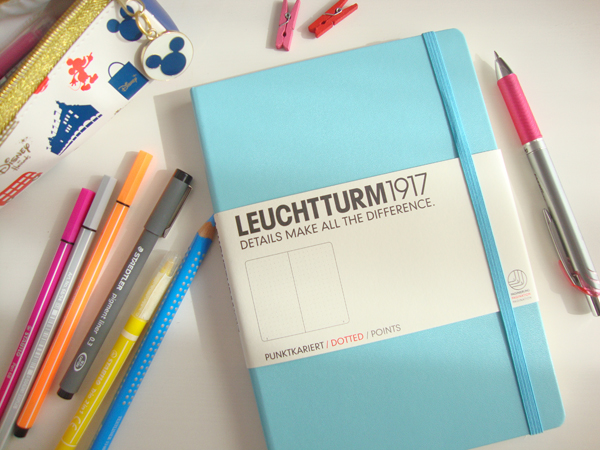
Oh, it's poetry! I chose the light blue colour and the size is A5 (dimensions 145x210mm). For me this is the perfect size - not too big and still compact to carry with you every day. You can also get it in A4, A6 and A7 sizes.

I prefer the dotted one, but it also comes in 3 other styles - plain, ruled and squared.
It comes in 17 different colours, and between you and me, I want to get all of them. (Don't tell my husband though!)
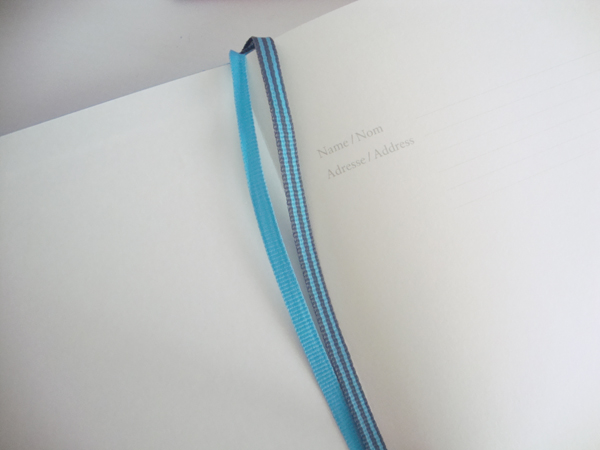
It closes with an elastic band that I really like, because I tend to have little notes and pieces of paper usually in between pages, and not one but two page markers.
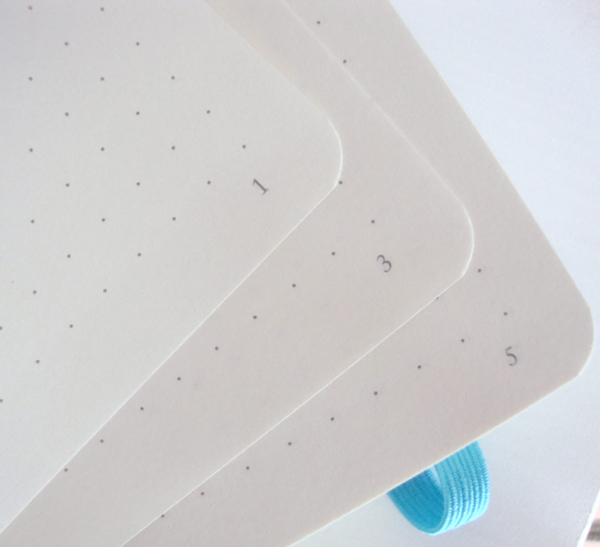
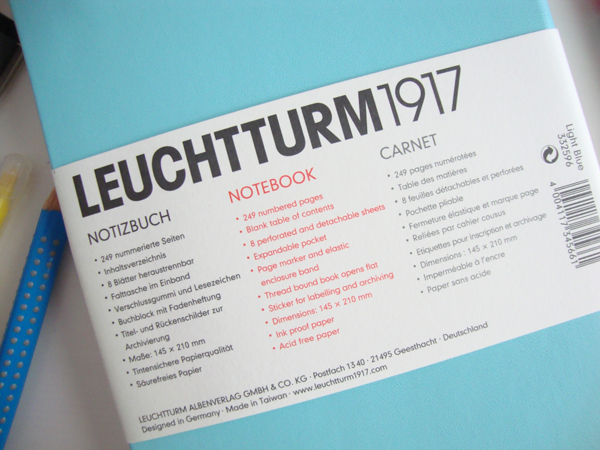
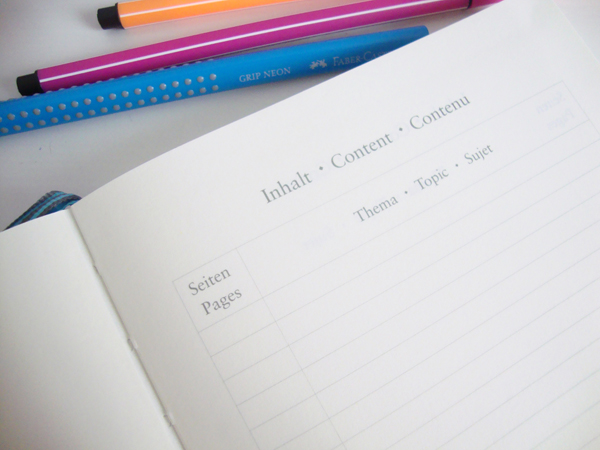
It has 249 already numbered pages, which helps a lot with the bullet journal system. And at the front there are 3 pages with a blank table of contents, so you can fill them in as you go along.
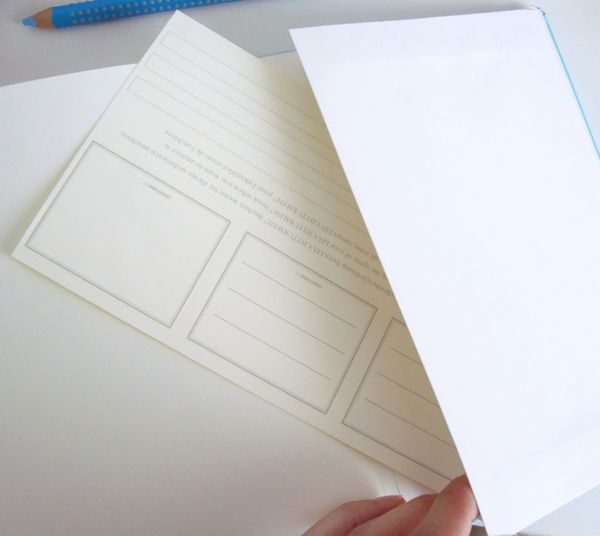
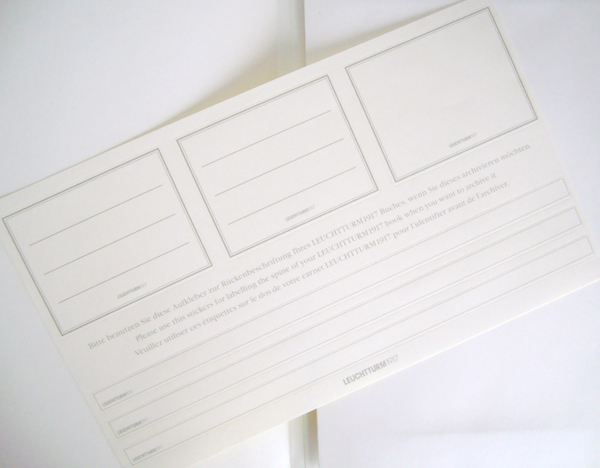
One more cool feature that it has, is an expandable pocket at the back. Now all my little notes and pieces of paper have a home! :)
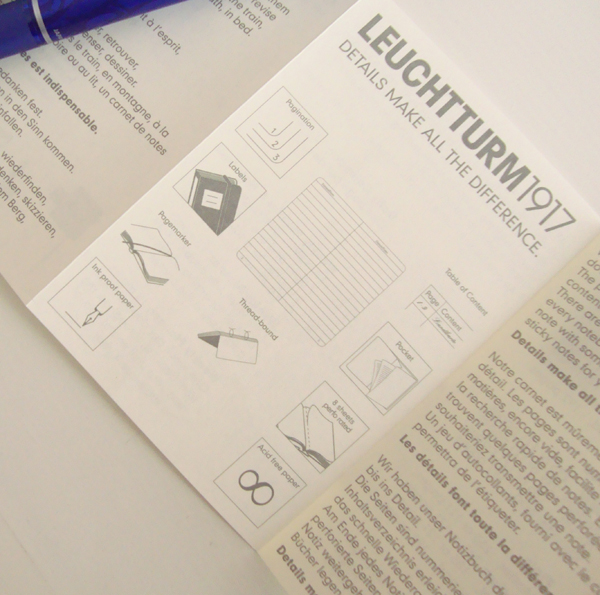
The Leuchtturm1917 is a thread bound book that opens flat - very handy when you write or sketch things - with ink proof and acid free paper. That means that you very rarely get bleeding through the paper. You can however get some ghosting, but that doesn't bother me at all.
You can also join my Newsletter!

How to choose your guiding word for the year.

I will start this post by admitting that I am an obsessive list maker. Lists help me make sense of everything around me, stay organized and put in order the chaos that exists in my head. They make me feel more productive and there's no better feeling that having ticked all your to-do's by the end of the day.
I love making lists, whether it is the groceries list, the packing list for our weekend trip or my resolutions list. Especially that last one has been one of my favourites. During the last days of December, I would be making all these lists with plans and resolutions for the next year. I would tackle every area of my life, note down all the things I want to change, and then I would go and create a massive goals list for it.
During the past 2-3 years I've taken this to the next level, where I would make my resolutions' list twice a year: at the end of the year and on my birthday. I thought, since my birthday is in May, I would split the year almost in half, and then narrow down my resolutions for each half separately, thinking that it would make it easier to reach my goals.
However, this year I came to the startling conclusion that resolutions don't work for me!
I tend to over analyze every aspect of my life, creating too many lists and putting my self too many goals that most of the times felt overwhelming and impossible to achieve.
This year I decided to do things differently and make a positive change in my life.
I chose one word for the next 365 days.
A single word that sumps up the essence and the focus of my life for the rest of the year. One word that will guide me and that will be constantly reminding me of what I want to achieve during this year. A word that will act as a promise and that will hold me accountable to the decisions I'll make for the next 365 days. One word that will motivate me and inspire me along the way.

This year I'm choosing the word 'challenge'.
I want to challenge myself in all aspects of my life. I want to take chances and risks and not to over analyze things so much. I want to push myself to the next level and get out of my comfort zone. I also want to take on as many challenges as I can. From my book challenge on Goodreads, to challenging myself to run 5km in a months' time - the sky is the limit! This little word will remind me to not be afraid and it will be powerful enough to push me forward during the times that I get cold feet and I start having second thoughts.
Of course that doesn't mean that I don't have my lists of to-dos for the year. But they're more focused now around my one guiding word of the year.
It took me a while to narrow it down to one single word. I have to admit it was a bit overwhelming in the beginning. There are just so many different words that you can choose from, so many possibilities. But, even though it took me a while, when I did find my word, it felt right. I remember I was having a shower (I tend to have the best ideas while I'm in the shower lately!) and I just thought of the word 'challenge' and it just clicked. It was the perfect word for me.
But how do you define and choose your one word of the year?
Perhaps you already know your word. But even if you don't, there are a number of ways that can help you find that special word that you'll commit to for the next 365 days.
You can get inspiration from the words in your favourite quotes. Write down the quotes or sayings that you love and just focus on the words that mean the most to you. You can even check out my 'Words' folder on Pinterest for more ideas.
Go to websites like OneWord365 or MyOneWord and get inspiration from there.
Or you may have read a book that had affected you in the past and you get your inspiration from that.
You should also start paying attention to everything that's been happening around you. I believe that the Universe leaves shuttle hints here and there and in a way it is guiding you towards the word that's just right for you.
However, if you still can't find your guiding word, then you can follow the three little steps that I took, that helped me narrow it down to one single word.
Step 1.
Take a few minutes and write down what you want to achieve in the next 365 days. What you want to change. Areas in your life that you want to improve.
Be specific. Be clear to what you want.
Ask yourself:
- What do I want to feel this year?
- What changes do I want to see in my life?
- What new experiences do I want to include in my life?
- Why do I want these things in my life?
- How can I make them happen?
Step 2.
Write one word next to each sentence you're written above - a word that describes or sums up each goal or change.
Then write all these words in a new piece of paper.
Step 3.
Spend some time focusing on that list. Come back time and time again and see which one of these words stands up more to you. Which one can be used for each one of your goals.
The important thing is to realise that there is no right or wrong. It's your word.
Discover the big impact one small word can make to your life.
So what word will you choose for 2016? Will you be brave and commit to just one word? If yes, please share your word in the comments so that we can connect. Together we can make a change in our lives!


How to Optimize Images for Twitter

In order to create the best blog post, you should combine excellent content and equally amazing images. Pictures are extremely important. Eye-catching graphics and photos are one of the best ways to catch the attention of your followers on social media and to also attract new audience to your site from Instagram, Pinterest, Facebook, Twitter etc. When you post high quality, original images, there's more of a chance that they'll be repinned, retweeted, or/and shared. That means more traffic driven back to your blog.
When you post an image on Twitter, it shows a preview right in your feed without having to click on any links - which is quite cool. However, the in-stream preview is a section of your image that Twitter automatically chooses to display.
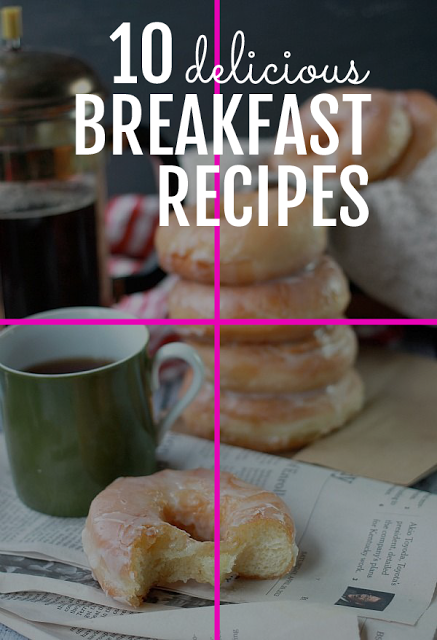
Twitter’s in-stream preview is 440 pixels wide and 220 pixels tall (a 2:1 ratio).
That means that if your image's dimensions are not of a 2:1 ratio, parts of the top and bottom of your image will be cut off.


Mmmmm.... not ideal if you ask me! You can still see part of the delicious donuts, but I've completely lost my text which is very important to show what the post is all about.
So, how can you optimize your images to look good in the Twitter preview?

There are a number of ways to make sure that the in-stream preview doesn’t leave out the best parts of your picture.
- Make sure your image dimensions are a 2:1 ratio.
Even though that solves all your problems and all of your image will appear in the in-stream preview every time, however it can be quite restricting in the case you ever decide to use a portrait or a square image.
So, in that case you should:
- Pre-figure what will show in the in-stream preview.
You can easily do that by following these steps:
Find the center of your image.
Find the 2:1 ratio of your image, in other words the dimensions of the in-stream preview.
To do that you'll have to divide your width by 2.
So for example, the dimensions of the image above are 600x878. If I divide the width (600) by 2 then the 2:1 ratio of the image shown in the preview will be 600x300.
That means 150px above and 150px below the horizontal line that crosses the center of your image.
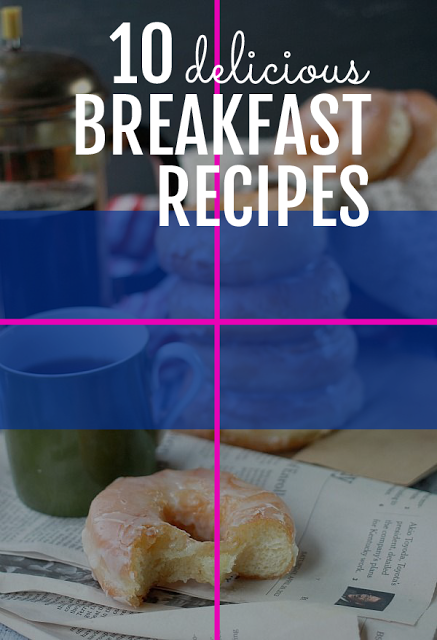
What I like to do, is create a new layer with the dimensions of the in-stream preview that I've just calculated and place it on my image. I usually choose a nice vibrant colour, but I like to also make it around 55% opaque so that I can still see what part from my original image will be shown.
Then I move my text around so that it falls in the blue rectangle. At this point I might have to do some adjustments in size or change the font depending on the image.
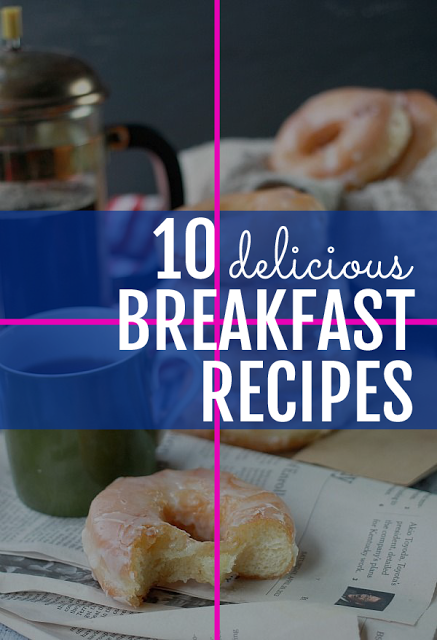
Finally, I remove all the lines and the blue layer and I'm left with the perfect image for my post that is Twitter optimized!
Now, when I post this image on Twitter I get this:
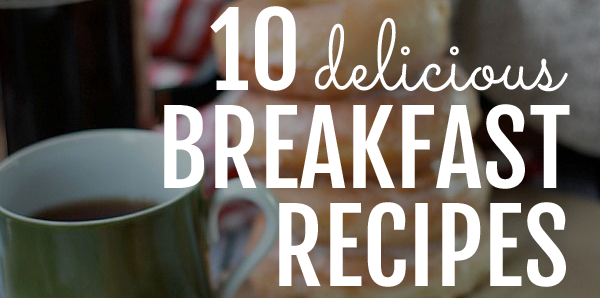
Which is a million times better than what I had before!

Images: 1 // 2