
How to use Acrylic Paint in your Bullet Journal
I love using colour in my bullet journal. Colourful pages make me happy, put a smile on my face and funny enough help me focus more on the tasks I need to complete during the day. (weird, I know, but totally true!)
My regular tools that I like to use with my bujo, are my Pelikan coloured pencils and my Tombow markers. (Click here to see the list of all my favourite resources) However, I recently purchased a box of acrylic paints and I wanted to experiment with them in my bullet journal.
Acrylic paint generally is a difficult medium to use, especially in journals with thin pages, without getting them ruined. Usually, the pages get wrinkled and damaged and the end result is not as neat and pretty.
After doing some research online, I found that the solution to this is to place as less paint as possible on the page. And in order to achieve that, all you have to do is to use a plastic card. (* light bulb moment! *)
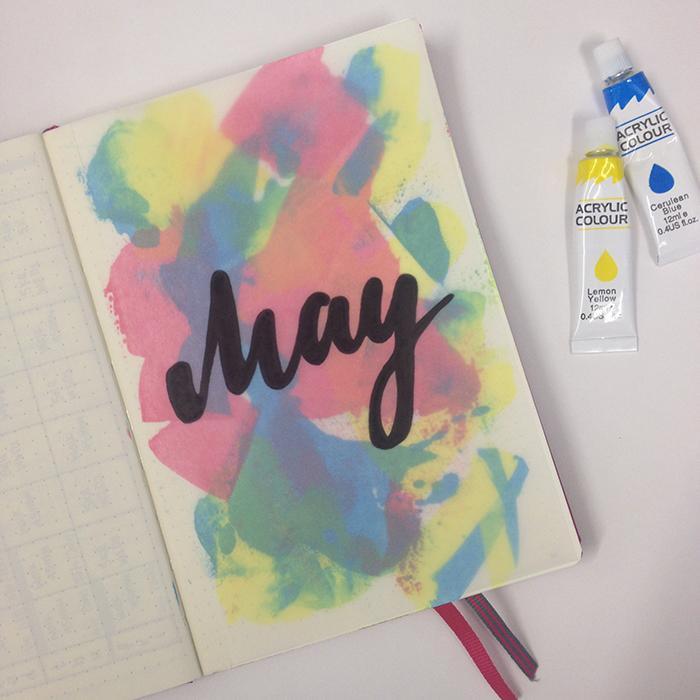
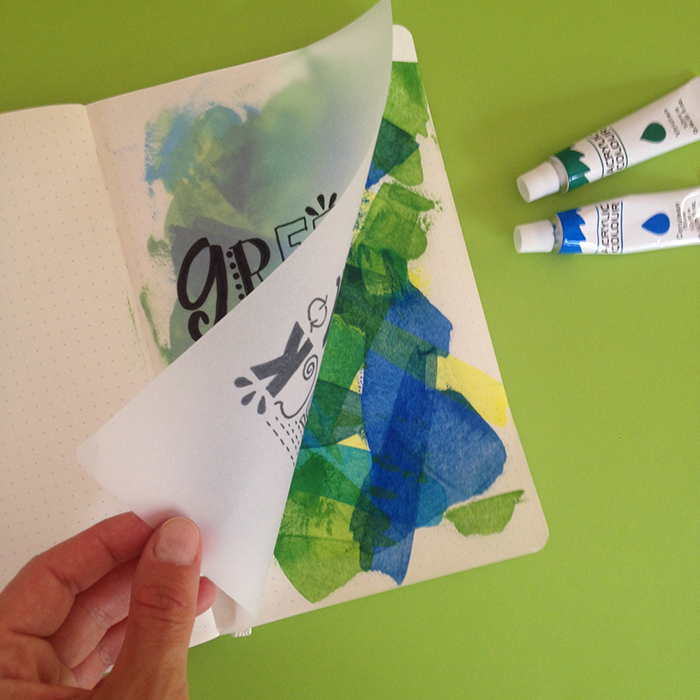
So, I started playing around and I’m in love with the result! I used this technique to create the front page of my May Set Up in my bullet journal.
How to create an abstract background with acrylic paints in your journal:
Before you start:
Choose the colours you want to use. Keep in mind that when a colour goes over the other, they will naturally create another shade. So, I’d advice to not use more than 3-4 colours.
Start with the lightest colour first. It’s easier to cover it, if you choose to change things around. A darker colour is usually more difficult to make changes on.
Don’t think about it. Just start creating and you’ll be amazed at what you’ll create ;)
What you’ll need:
Your journal, your acrylic paints and a plastic card.
How to do it step by step:

- Take your card and add a small amount of acrylic paint.

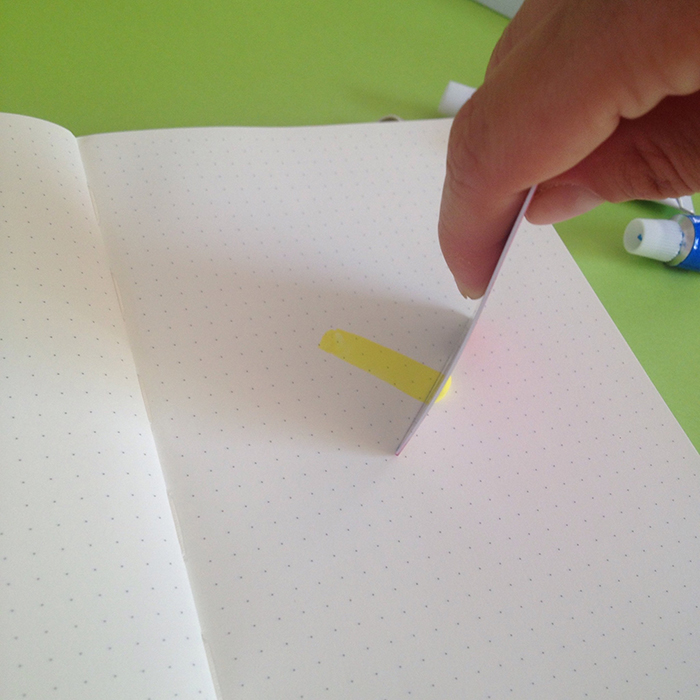
- Hold your card vertically on the page and drag along towards you.
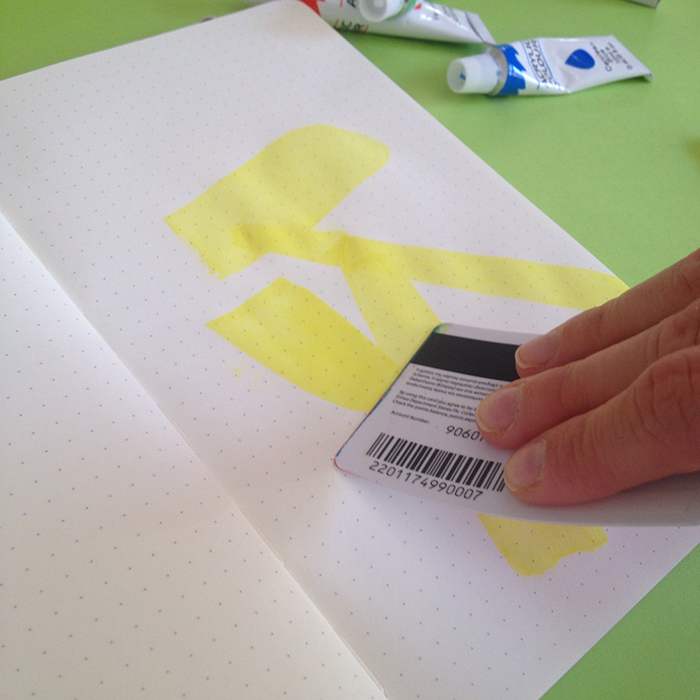
- Change the angle of the card to change the amount of paint you add on the page. The more upright and vertical you hold the card, the less paint you’ll get on the page. The more you tilt the card, the more the paint you’ll get.
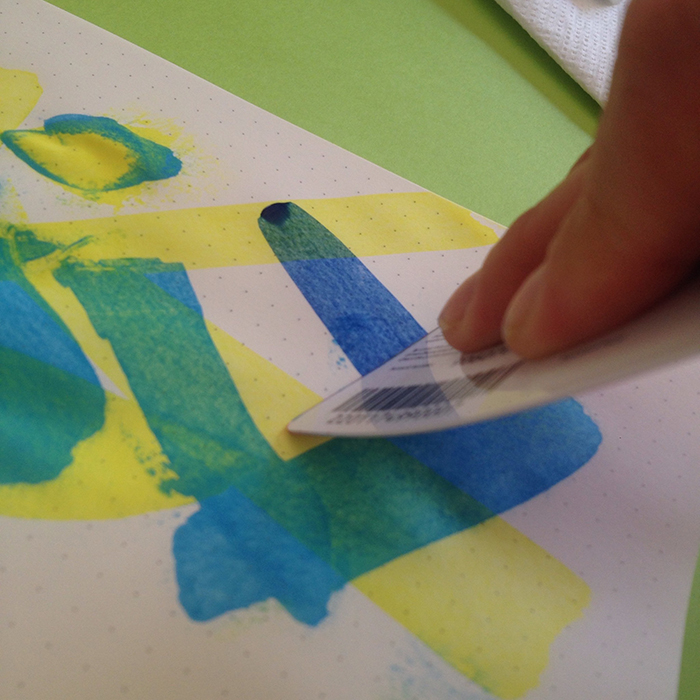
- Once you’ve finished with one colour, clean the edge of the card with some paper and add then next colour.

- Continue until you’re satisfied with the result.
- Give it 5-10 minutes to dry. Pat it with your fingers carefully to check.
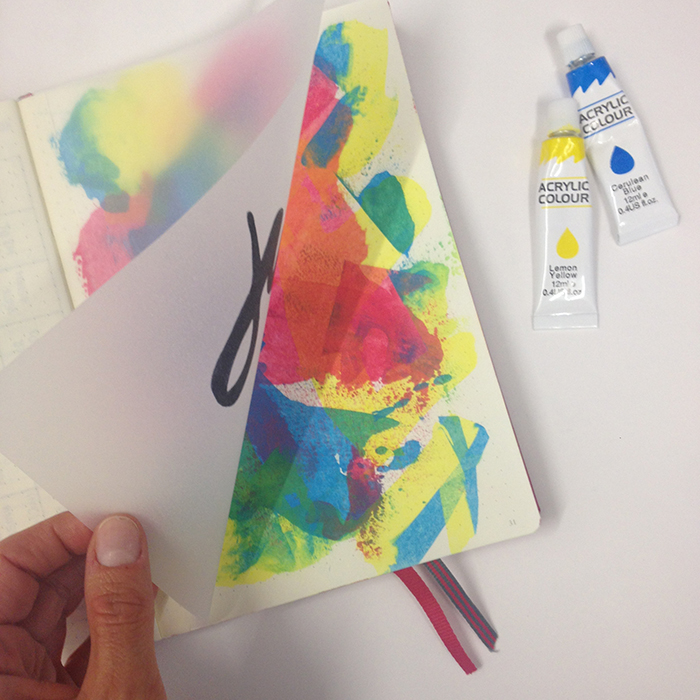
To add the tracing paper overlay:
You’ll need some tracing paper, double sided sticky tape and a marker.

- Measure the dimensions of your page and cut the tracing paper accordingly. I personally prefer the tracing paper to be a bit smaller than the actual page, so I made it approx. 2mm smaller on each side.
- Check that everything is correct and you’re happy with the dimensions of the page.

- Since it’s a tracing paper, you can copy anything you want on it. Go online, and find doodles, quotes or anything else you want to add to it. Print it and copy it on your tracing paper. (For this page, I copied a design by Kathy R. Jeffords). Of course, you can also be creative and make one of your own designs :)
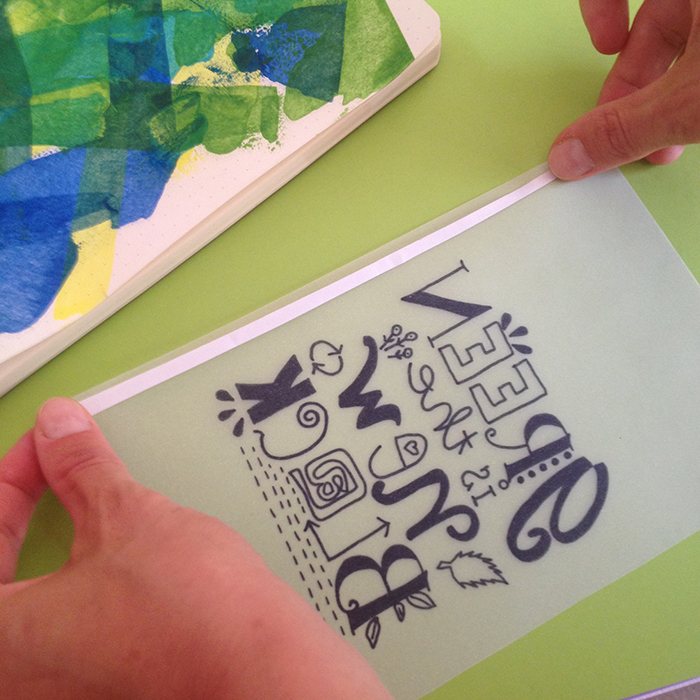
- Once you’re happy with the page, turn it around and add the double sticky tape on the edge. (be careful to do it on the right edge! - believe me I’ve been there and done this mistake myself!)
- Hold the page from both ends and stick it as close to the inside of the journal as possible, making sure it sticks properly with no bumps.
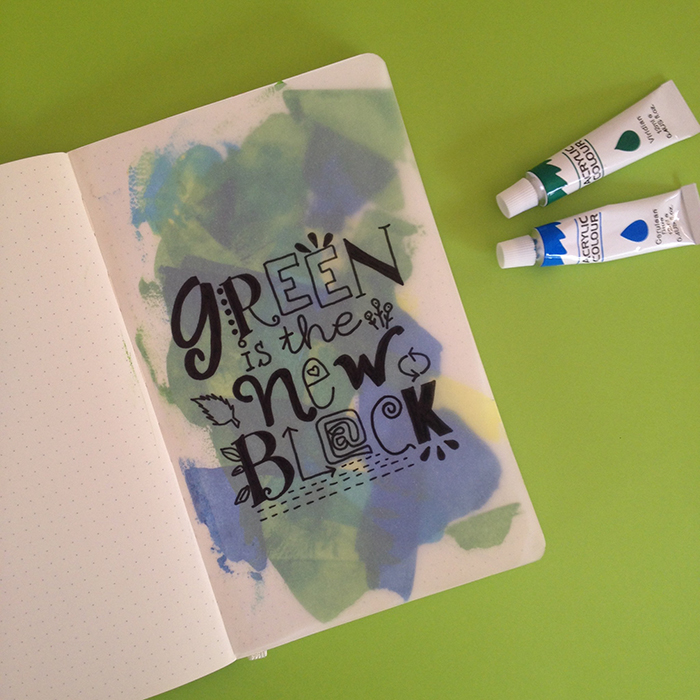
- Sit back and admire your creation!
If you try this technique in your journal, make sure to share with me your creations ;)
Have fun!
Christina x
I was thinking of creating Colouring Secrets: an e-course that will cover tips and techniques on how to colour using coloured pencils, markers and watercolours.
If you'd be interested in a fun and affordable ($20) e-course on colouring, enter your info below and I'll notify you when it launches!
COLOURING SECRETS E-COURSE
If this is a product you'd be interested in buying, enter your email below and I'll notify you when it launches!