

My Blog Bullet Journal set up
I've talked about this in the past, and I truly believe that it's better to have one bullet journal for everything. It's easier to keep everything in one place and therefore it's less likely to get confused and frustrated going back and forth various journals. So, you might be surprised that I have created a bullet journal specifically for my blog.
I've talked about this in the past, and I truly believe that it's better to have one bullet journal for everything. It's easier to keep everything in one place and therefore it's less likely to get confused and frustrated going back and forth various journals. So, you might be surprised that I have created a bullet journal specifically for my blog.
The reason I wanted a separate notebook for that, was because I wanted a place to keep certain information and spreads that don't really change and so that I don't have to recreate every time I change a notebook. So, my to-do lists and my monthly planning for both my personal and professional life are done in my main bullet journal, while this new one will keep track of affiliations, website information, blog post ideas etc.
So, I'd like to show you how I've set up my blog bullet journal.
I decided to use my Jane's Agenda notebook that I've reviewed here.

I believe that a disc bound notebook is perfect for what I want plus it gives me the flexibility to change the order of the pages, create categories and generally change pages if I don't like them any more.
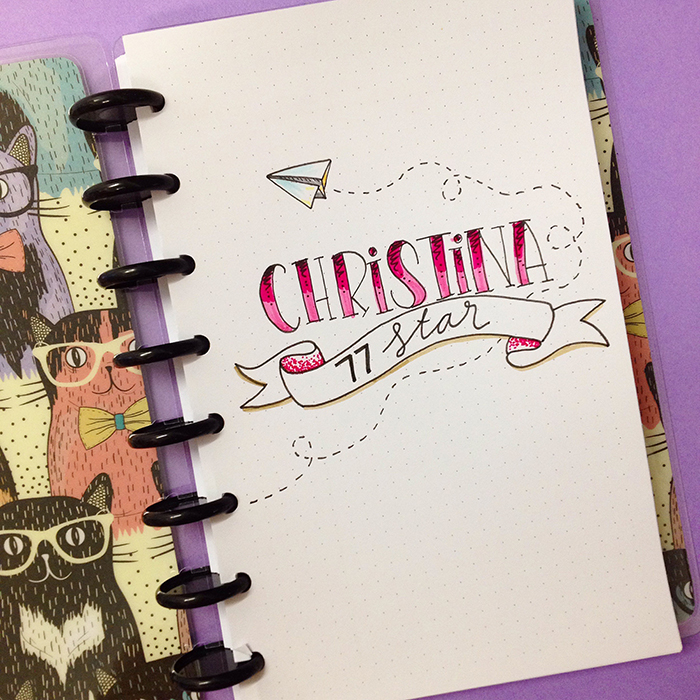
I added my logo on the first page - christina77star. And I love how it turned out. I have to say that the quality of this paper is a m a z i n g!

I had to create an index page, so I opted for something very simple. I only created one page since it's a disc bound notebook and I can add any more pages I want as time goes on.
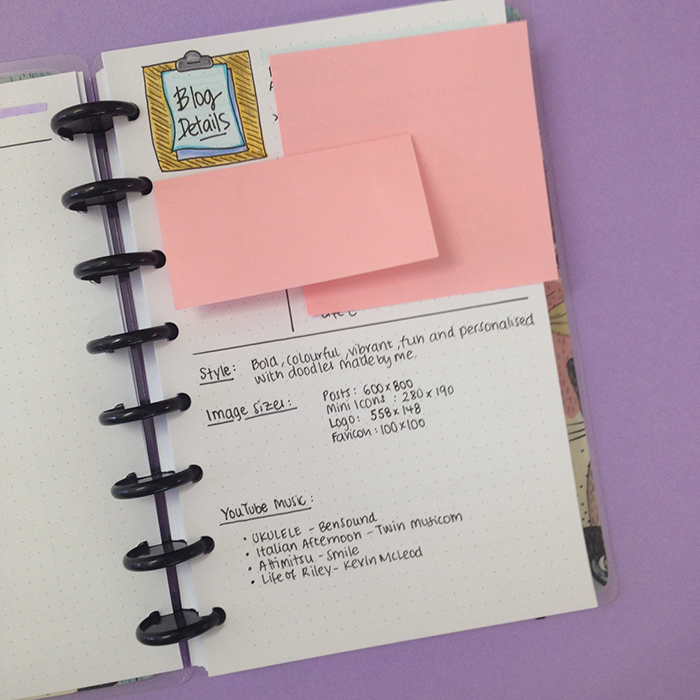
Then I have a page with all the blog information. Some description paragraphs, SEO, Fonts, Social Media information, Image size, the codes of the colours I'm using for my brand etc. Some of the information I wasn't very comfortable sharing with you, so I had to cover them up.
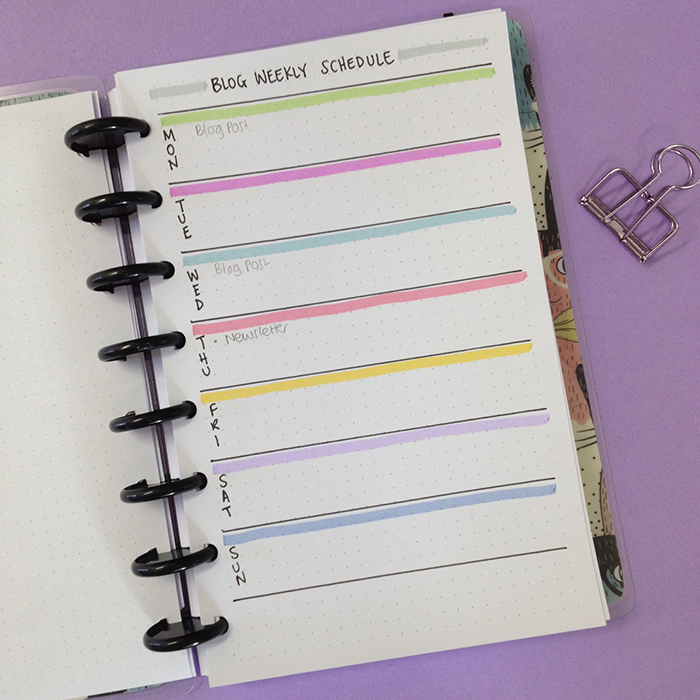
Next comes my Weekly Schedule. This is a page where I want to plan general actions i.e. how often I upload a post, or when I send my Newsletter etc. It is a schedule so that there is a program of my actions which helps me stay on top of things.

The next page is my Brain Dump page - because every journal needs one! This is a catch it all page for everything I need to remember that doesn't have a specific page for it. :)
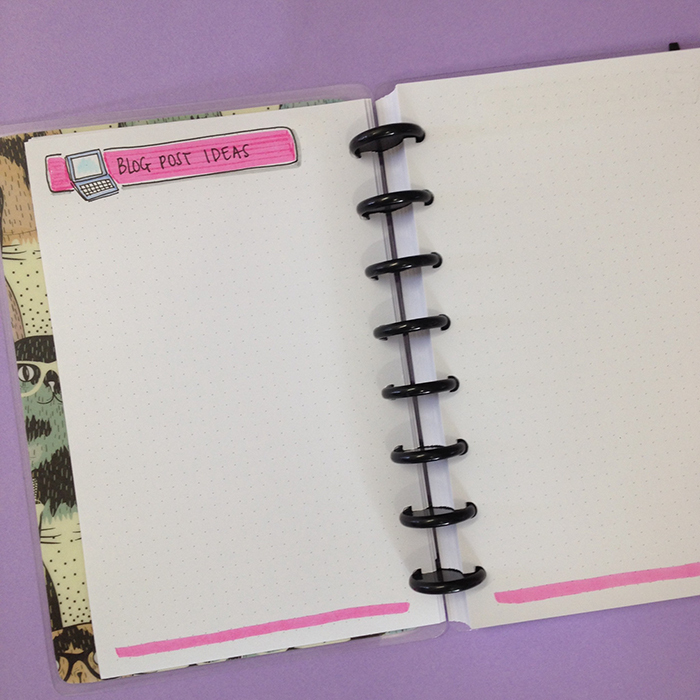
Then we move on to the Blog Post Ideas spread. I have so many ideas for blog posts that I need to keep a list of them and tick them off as I go along. What I like, is that I can always add pages when these ones are filled up.
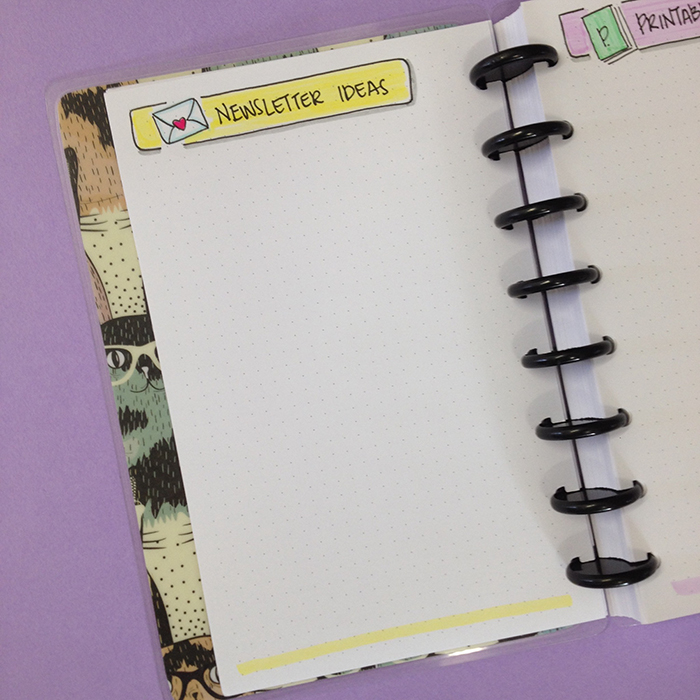
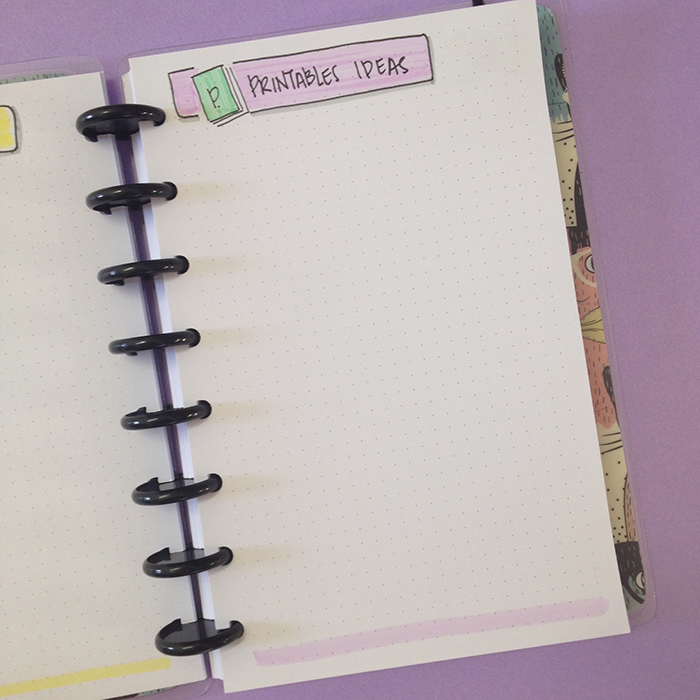
Then comes a page for my Newsletter ideas and one for the printables I want to create and share with you.
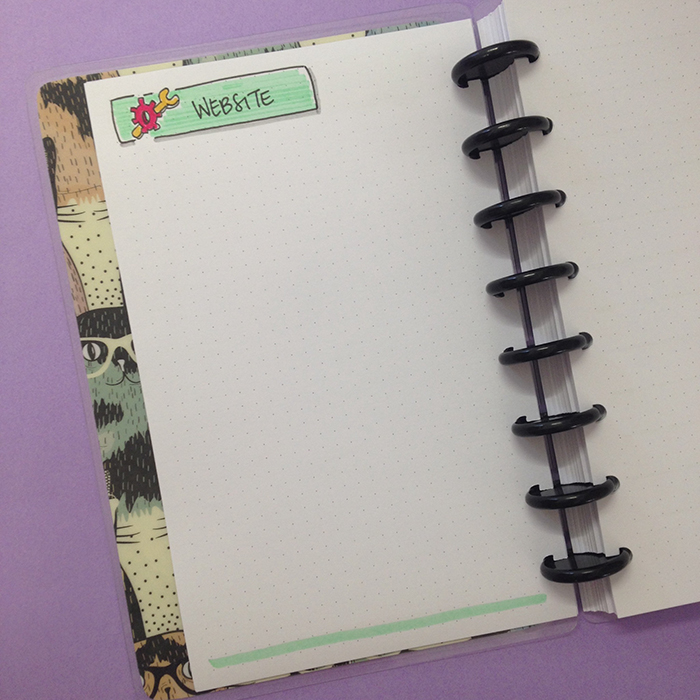
The next spread is about my Website's Maintenance. It's the things I need to do on it aesthetically, or if I want to add a new page, and generally any changes I want to make on it will go on this page. So, when I have the time I can come here and see what needs to be done.
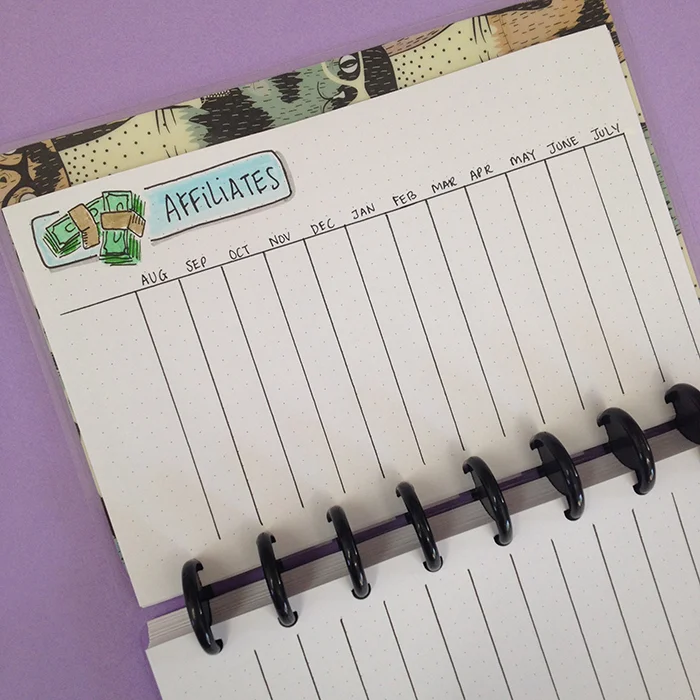
Next comes my affiliates page. I like to keep track of how much money I make from each company/website I'm affiliated with. So, I created a table with all the months and a long list on the left hand side to write the names of the affiliates.

The next page is a very important one. It has all my blog's statistics. Every month I like to keep track of page views, followers and generally everything that shows me how my blog and my social media accounts are doing.
In the other pages I keep my Finance Spreads as well as my Monthly reviews.
I love how everything turned out and as I mentioned before, I really like the flexibility of the disc bound notebook.
How about you? Do you keep a separate bullet journal for your business or school? Do you have a blog bullet journal? What other pages have you added? Share with me in the comments below ;)
Visit Jane's Agenda Website and use the code CHRISTINA10 to get 10% off. This is valid for one use per customer.


Jane's Agenda - Review
I was lucky enough to be contacted by Jane from Jane's Agenda to review one of their notebooks, and of course I said yes! As a bullet journalist I'm always keen on checking out dotted grid notebooks and Jane's Agenda has been on my list for some time now. For the purposes of the review, and for you to have a better understanding of this notebook, I'll be comparing it to the Leuchtturm1917 that I've been using for a while now.
So, let's jump right in the review :)

The notebook arrived within 20 days (which is pretty good for Cyprus!!) in a lovely parcel all wrapped up in that bright fuchsia paper that put a smile on my face right away.
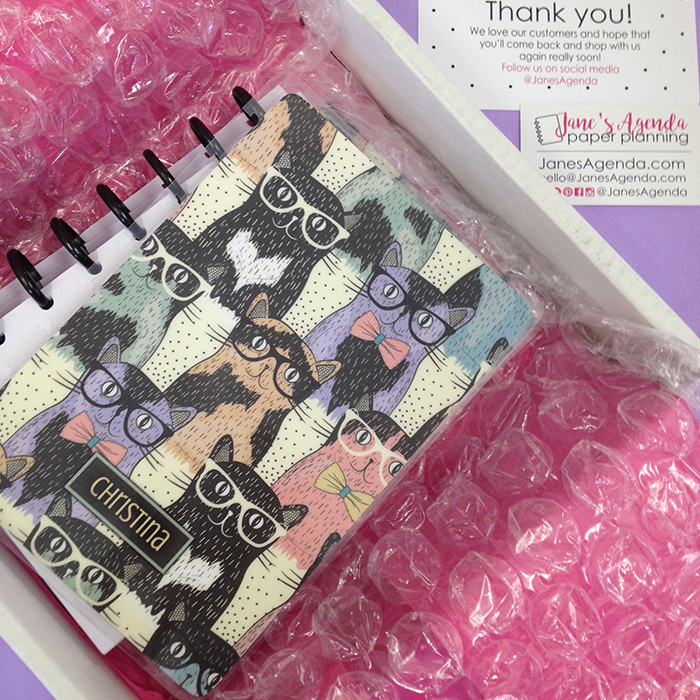
The notebook was very nicely protected and wrapped in bubble wrap. (Don't you just love bursting those bubbles??? I find it so therapeutic!). The pages were all set up for me with the discs, so I only had to add the front and back covers.

I've chosen the design 'Nerdy Cats' in a Junior size (which is 5.5 x 8.5 inches) and comes with 8 Punches. I thought that the cats were adorable and I instantly fell in love with this design. But there's loads of other designs for you to choose from on their website.
The covers are laminated with heavy weight 10 mil laminate and have rounded corners, which I really like. I have to say that they do feel quite sturdy.

I also got to personalise the notebook a bit, by adding my name on the cover, which I thought was a nice touch. I've noticed that other designs had different fonts.

There is also a black elastic band that's a bit thinner than the one you find at the Leuchtturm1917 notebooks, and it doesn't feel as strong.

You can also choose the binding, between a discbound or spiral style. I went ahead and chose the discs, because I'm not a big fan of the spiral notebooks. For the junior size you get 8 black plastic discs.

You can also choose the style of the paper - between dots, lines or graph. All styles are 0.20 inches apart, which for the dotted style is exactly the same that you find in the Leuchtturm1917 notebooks. The pages are bright white, instead of that cream tone that the Leuchtturm1917 have. I seem to prefer this one better, to tell you the truth, because I find that the cream shade can affect the way the colours look some times. So, I really like that.
Also the quality of the paper is very good. It is a 32lb bond heavy weight paper (120 gsm, also known as 80lb text weight). That is so much better that the Leuchtturm1917 one that comes in 80 gsm.

You can also choose the number of pages you want. You have a choice between 140 and 250. I decided to go with 250, because I wanted the notebook to be nice and full, and I'm really glad that I did.

I like that when you open the notebook, the front cover design appears on the back of the front and the back cover as well, instead of it being blank. And I have to admit that I'm very surprised with the quality of it and how easy the pages turn on the discs. This is something that bothered me with some of the other disc bound notebooks that I've tried before, where the pages got stuck a bit when you were turning them.
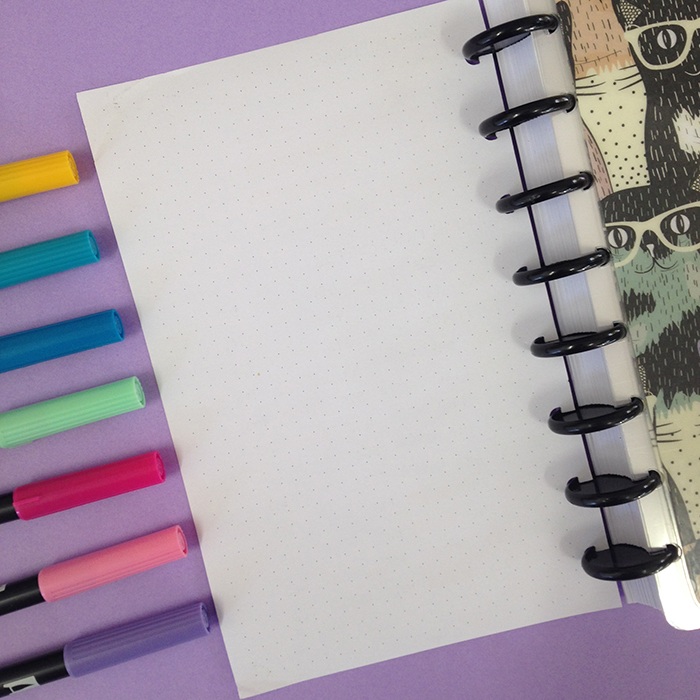
The next test would be to actually try the pages. In all my notebooks I create a test page at the back, in order to see how the paper reacts with various pens.

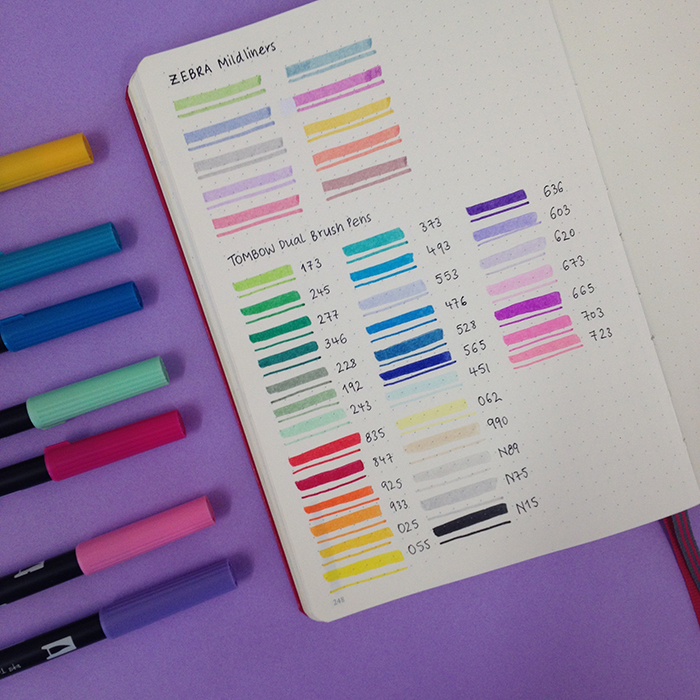
I've decided to test my Zebra Mildliners and some of my Tombow Dual Brush Markers. I love how vibrant the colours look against the white paper, and I have to tell you the markers were gliding on the it. I love it!
This is the back of the page, where you can see.... absolutely nothing! Impressed!!!!
For you to understand how good this is, take a look at my pen test page in my current Leuchtturm1917 notebook. (image below)
And now look at the back of that page:

I hope that you can see the difference and that you are as excited as I am!
The Junior size disc bound notebook from Jane's Agenda with 250 dot grid pages retails at $35.95 + shipping.
Now let's see the pros and cons of the discbound Jane's agenda compared to the Leuchtturm1917 notebook.
Pros
- You can change the order of the spreads without ruining the notebook or having to start over. (Very VERY good for those of you that are scared of making mistakes and ruining your notebooks)
- You can keep the same spreads and just change the daily / weekly / monthly pages as you go along.
- You can create sections with collections and therefore have a more organised notebook.
- You can add various styles of pages (doted, lined etc.) in the same notebook.
- You can print your own pages.
- You can use the quality of paper you want.
- It is more economical, as you don't have to buy a new notebook every time, you just need to add new pages.
- You might need to buy a punch to create the holes on the pages you want to add.
Cons
- The size of the paper is a bit smaller. (even though you can print your own pages and still fit in 145 x 210 mm pages like the Leuchtturm1917 has).
- Cylinders in the middle. That has been my biggest negative of the disc bound system. That is because, you can't create a continuous two-page spread. (even though you can take the two facing pages out of the notebook, place them on a table and create the spread on them before adding them back in, but still you don't get the same result)
- No numbered pages.
- No index
- Can be a bit flimsy, because of the nature of the binding.
- No rounded corners on the pages.
- The metal eyelets that are used on the back cover to hold the elastic ribbon in place are protruding a bit.
- No page markers
- No back pocket
All in all I am really REALLY pleased with the quality and style of the Jane's Agenda notebook and I literally can't wait to start creating in it. I've also tried some of the pens that I use daily in it and oh my, they just glide on the pages. Beautiful! I am planning to transfer my blogging bullet journal in this notebook and of course I'll share with you the whole set up once I'm done.
Visit Jane's Agenda Website and use the code CHRISTINA10 to get 10% off. This is valid for one use per customer.
Have you used a disc bound notebook before? What are your thoughts? Have you tried any of the notebooks from Jane's Agenda? Let me know in the comments below :)

