

My Bullet Journal Planning Routine
Having lots of spreads and pages in your bullet journal that help you with your day to day planning can sometimes be a bit confusing or you might find that you forget to check a page at one point. I try to keep on top of everything I create in order to help me with my future planning, but making a list to make sure you don't forget anything is always a good idea ;)
I break my planning into monthly, weekly and daily speads. That way I can keep track of any tasks, projects, appointments and so on. I also have a yearly spread with all my plans and goals for the current year, but I don't have to change that during the year.

-- MONTHLY --
So, my planning starts in the beginning of every month. I take a look at the previous month to see what I have accomplished and where I am now. Then I take a look at my yearly goals to see what I want to achieve by the end of the year and what needs to be done to get there. Lastly, I take a look at my Level 10 Spread , adjust the levels if needed and again see what I want to change and improve in my life and ways to do that.

All the above help me to choose which goals I want to tackle this month. And then I set up my monthly spread in my bullet journal where I write everything down. I tend to change my spread from time to time. I look at the previous month and see what has worked and what hasn't and then make the necessary changes. Or I might be inspired by a spread I've seen on Pinterest for example, and I might want to give that a try.
-- WEEKLY --
Moving on to my weekly planning, I create steps for each of the monthly goals I mentioned above, and then spread them in the time frame of the 4 weeks ahead. I decide which steps need to be done first according to importance, and I create my weekly spread in my bullet journal.
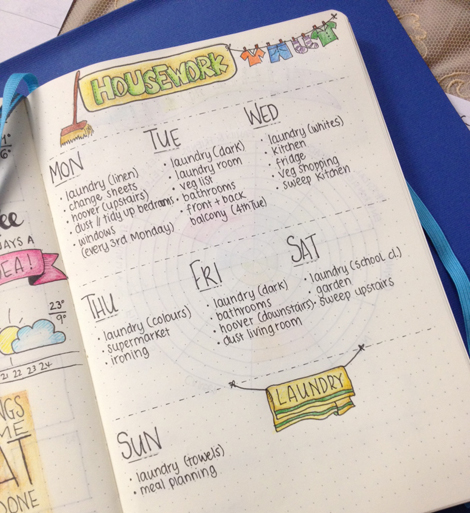
To help me with the reoccurring weekly tasks and so that I don't keep on repeating myself, I created a page for my housework routine and also a page for my blogging routine. That way I know what I have to do for these two categories every week, no matter what.
-- DAILY --
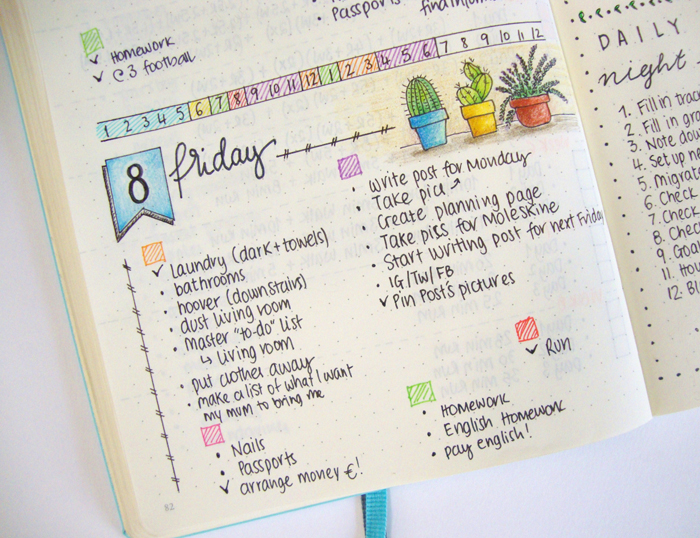
For my daily tasks I start from the night before. I fill in my trackers and my gratitude log , as well as any challenges that I might have done for the day. Then I go on to set up my new daily spread taking inspiration from my 'banner ideas' pages.


I've created a Free Printable for you with a few of the above daily date ideas.
Coming back to my planning, I then look at the day before and see if I have left any tasks that I haven't finished. If I do, then I migrate them to tomorrow's daily spread. The migrated tasks are marked then with an arrow and the cancelled tasks with an X.

Then I look at my Calendex to see if I have any appointments, bithdays etc., and I note them down as well. The next step is to take a look at my monthly and weekly spreads to see if I've noted something there that needs to be done specifically the next day. If not, then I will choose 1-2 steps from my goal setting list to add to my daily tasks. I also check my housework and blogging routine pages to see what I have to do for tomorrow.
I've decided to put coloured boxes on top of the tasks. Each coloured box indicates a specific category (i.e. housework, kids, exercise, blogging etc.) and it also indicates the time I've allocated for each category on my time line. That way I see where I am during the day, and choose from that set of tasks what to do.
The following morning I'll review the tasks that need to be done that day, note the most important ones and add anything if needed. During the day I will tick off any tasks that are completed.

>> If you want to see my favourite Resources that I use every day with my Bullet Journal, click here to find out what I love to use.
So, that's my planning routine with my bullet journal. It might seem a lot of steps to some, but I'm so used to it, that it doesn't bother me at all. And it's not a lot of work anyway. I can honestly say that I haven't been more productive since starting this planning routine. How do you plan your day?


Bullet Journal: My April Set Up
April is here and that means a brand new set up for my bullet journal. Exciting stuff!!! All through the month I've been seeing what works and what doesn't and also what other changes I want to make, so today I'll share with you my new layout which is slightly different from March.

April is here and that means a brand new set up for my bullet journal. Exciting stuff!!! All through the month I've been seeing what works and what doesn't and also what other changes I want to make, so today I'll share with you my new layout which is slightly different from March.
The first big difference is that I've decided to create
two separate monthly spreads
- one personal and one for my blog. I've been contemplating for some time now, as to whether I should have a different bullet journal for my blog or not. But I've decided to give it another month, and instead to try and separate the two with different spreads.
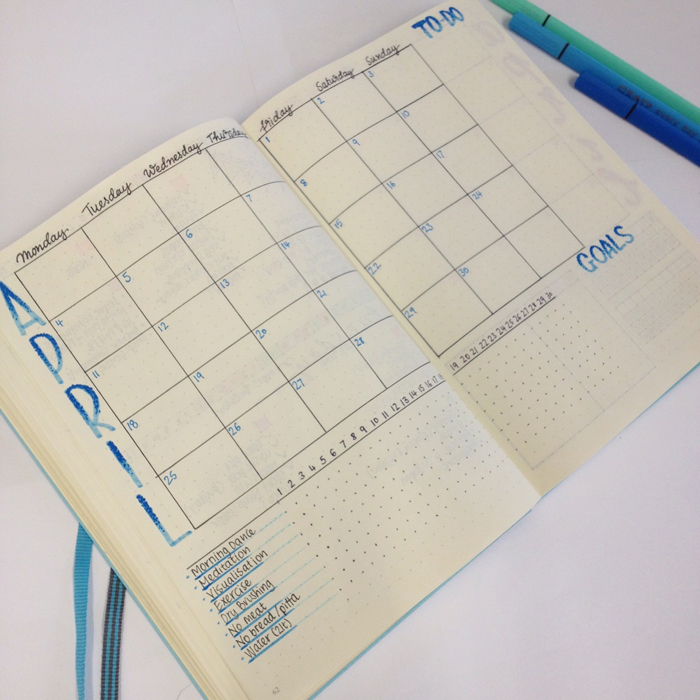
So the first one is my
personal monthly spread
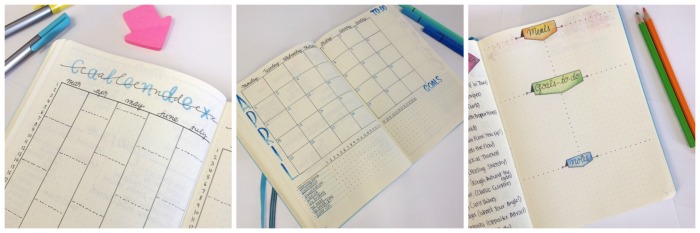
. I tried to fit in as many things as possible in the two page layout. I needed the monthly view, because I like to take notes and plan ahead things, and this way I can see the whole month at once. Also, I moved the tracker on this page and I included only the personal things that I want to track this month. I realised that during March I wasn't going back to my tracker page every day, so I was forgetting to note down things. The end result is a quite empty tracker, even though I promise you I had been good most of the days. :) Lastly, I added to two sections for my goals and my to-dos for this month.
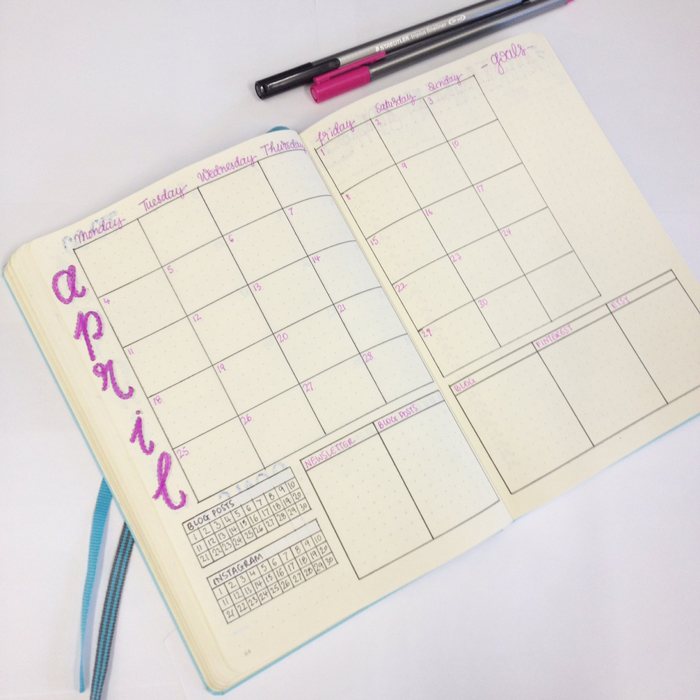
The second one is the
monthly spread for my blog
. I've changed up some things in this one. Again I like the monthly view because I can plan my blog posts, any seminars or webinars I want to attend and so on. I added two trackers on the bottom left corner, where I only track my blog posts and my instagram uploads - just to see how consistent I am this month. Next to those, I added 5 boxes separating the 5 key areas I want to focus the most this month:
, my blog posts, my blog/website, Pinterest and my Etsy store. I find that I focus and work better when I divide things in categories. Lastly, on the top right corner I added a column for my monthly goals for my blog.
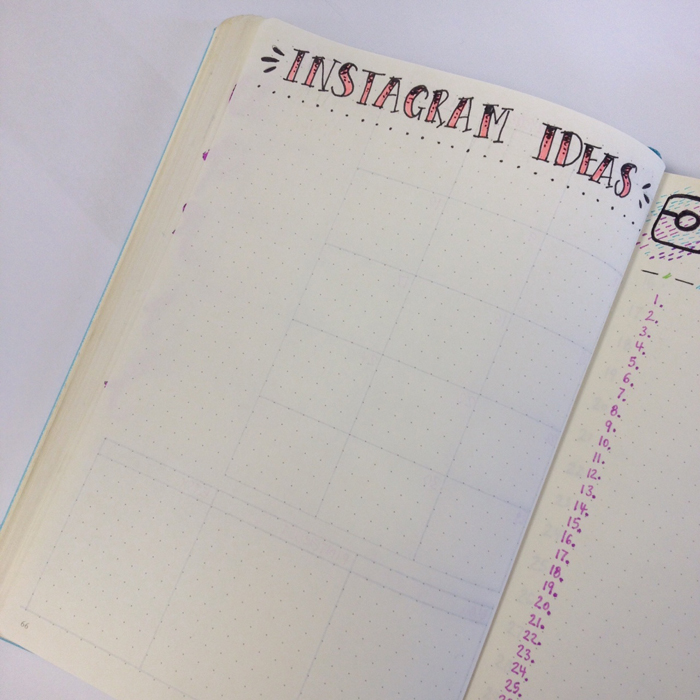
You've noticed that I didn't add any section for Instagram in my monthly spread. That is because Instagram has two whole pages to itself this month! One page is for all the ideas I have and I want to create for IG.
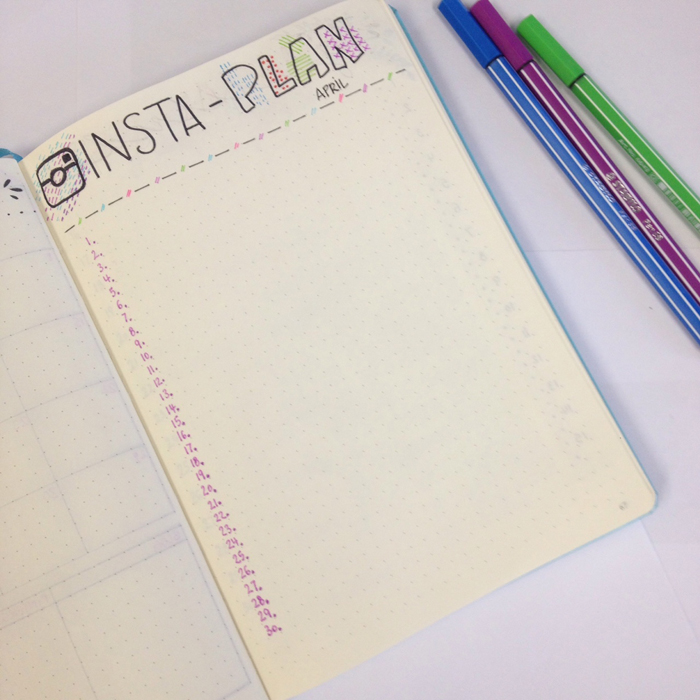
And the other one is called Insta-Plan where I plan and write what I want to upload for Instagram each day of the month. That way I can plan ahead and create all the things I want. I got this idea from Sarah from
and her guest post she wrote for
.
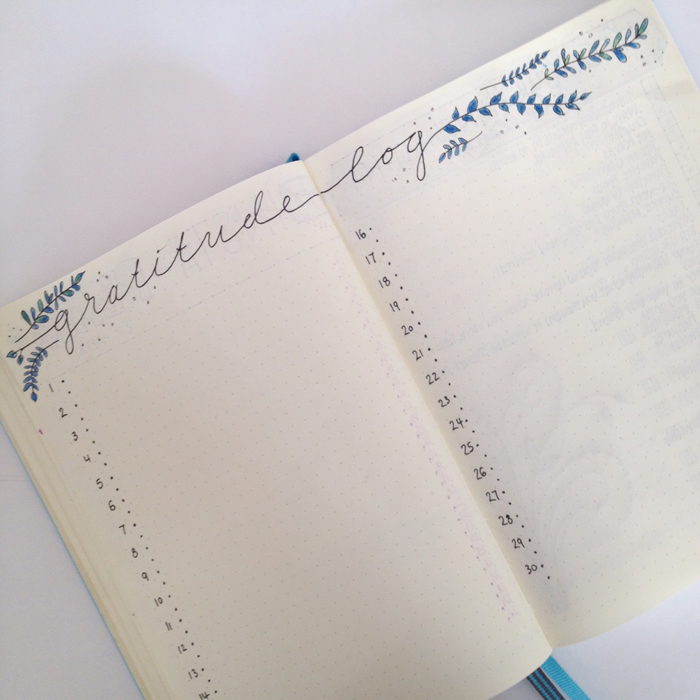
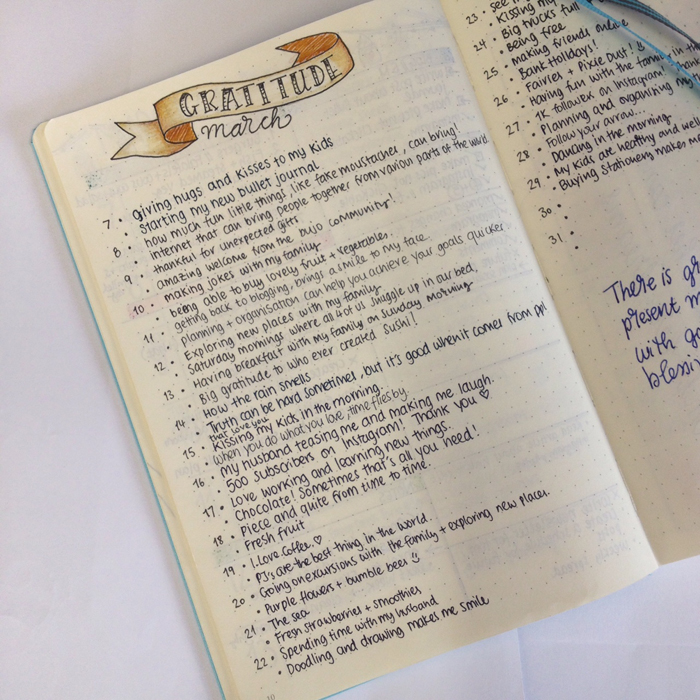
Next is my gratitude log which I love and of course I had to include in this month's set up as well. Tried to change the colours a bit and decided to write everything in blue this time.
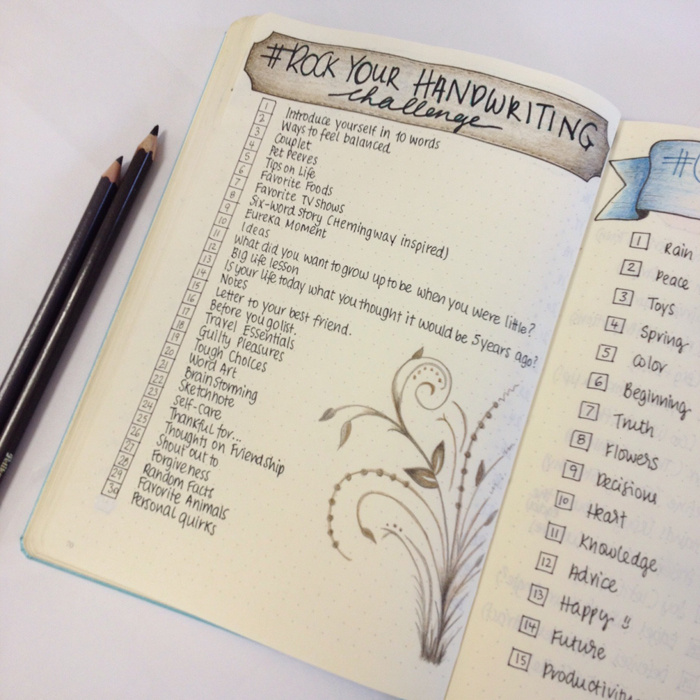
This month I decided to focus on my handwriting and my handlettering. I've ordered some
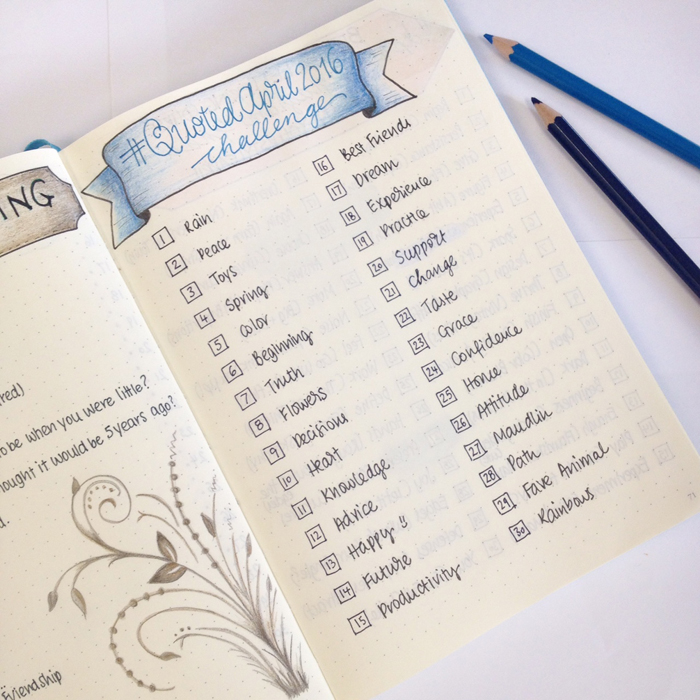
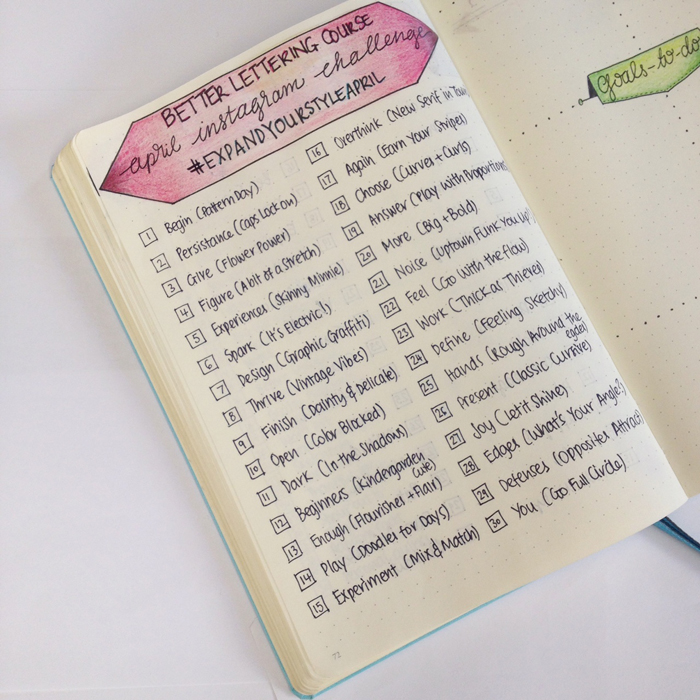
and I can't wait to start playing with them. And what better way to get inspired and keep up with it other than taking part in some challenges? I've chosen 3 challenges this month:
Rock Your Hand Writing
,
Quoted April 2016
and
Expand Your Style April
.
Lastly but not least is my weekly spread for the first week of April. It is essentially the same one like last week's, I just changed a bit the labels and the separation in order to add some colour.
So there you have it! This is my set up for April and I'm super excited for this month! I'm sure it's going to be full of adventure, nice surprises and excitement! Have you made any changes in your monthly set up?

One Month Bullet Journaling: What I've Learned
If you've been following my blog for a while now, you must have noticed that I have a small addiction as far as my bullet journal is concerned! Put it plainly, I'm obsessed!!!

If you've been following my blog for a while now, you must have noticed that I have a small addiction as far as my bullet journal is concerned! Put it plainly, I'm obsessed!!!
Before I go on, a quick reminder of what Bullet Journaling is, for anyone that doesn't know:
It's an analog system for the digital age. It helps record the past organise the present and plan for the future. It can be your to-do list, sketchbook, notebook and diary and all the above.

That's how the creator of this system, Ryder Carroll, describes it in his very informative website that you must visit to see all the information and the detailed videos that thoroughly explain his system.
For me, bullet journaling has been an amazing experience so far! I found that it made me be more organized and focused on the tasks that needed to be done. It makes me be more creative and I also find it to be very therapeutic. At the same time, it worsens my addiction for pens and stationery - if that was possible!!!
A PEAK INTO MY BULLET JOURNAL
I'll add here some pictures of a few of the pages that I've created in my bullet journal this month. I can't show everything, but I've made a selection of the ones that I haven't shown before and that I really like. :)
After the 3 index pages the first page you come up to is one of my favourites. It's my word of the year and my mission statement. I like to come back to it and remind myself what my focus should be on this year.

I also decided to add a 'Useful Numbers' page. Moving to a new country means learning everything from scratch, including all the emergency//useful numbers :) It puts my mind at ease to know that I have this page in my bullet journal, plus my kids are old enough now to know what to do in case of an emergency.

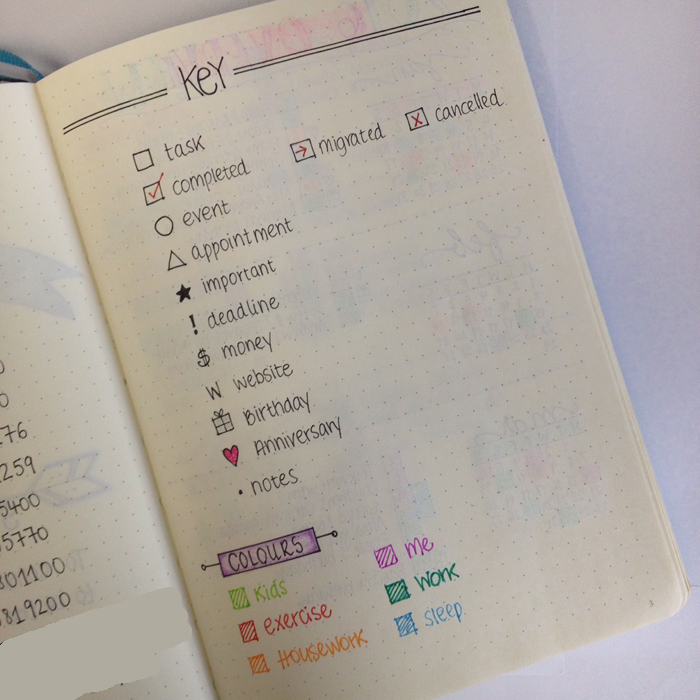
A key page is one of the basic pages that you're supposed to add in your bullet journal. It basically shows the symbols and the colours you use in your bullet journal to indicate different things. While I've been using it I realised that some things were not working for me. For example, now for the tasks I prefer to use a dot instead of the box, because I found that all those little boxes made my pages look too crowded. I've also changed some of the colours because they didn't work for what I wanted (especially the turquoise I used for 'work' was bleeding through the pages so it had to be changed ASAP!).
One of my most favourite pages in my bullet journal is my gratitude log. When I started writing it, I wasn't sure what to add to it every day. But pretty quickly I tuned into it and now I can't wait every night to think through of my day and add the two things that I'm most grateful of.
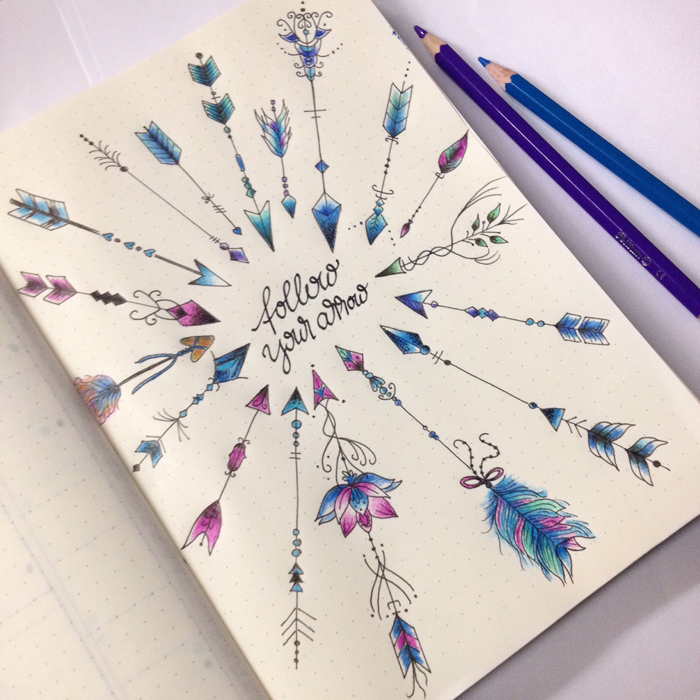
For my first month I also decided to create a doodle a day page, where I would draw something that reminds me of that day. It's been really fun and I love how colourful it looks.

I have been uploading lots of pictures with the progress of my bullet journal as I'm filling it in, so don't forget to check out my Instagram and Facebook accounts. You can also join my Newsletter!
THINGS THAT I'VE LEARNED
Even though I've been bullet journaling for only a month, some things became apparent to me straight away.
- Just Start
My bullet journal arrived a bit late in the post and the month had already started. So I was contemplating in the beginning whether to wait for the next month so that I start on the 1st, or not. I'm very happy that I started when I did and my advice to you is to just start! Don't wait. I promise you, you'll love it!
- Keep it Simple
When you first start bullet journaling, you might find yourself in the beginning being bombarded with various styles and ways of doing things. That can make you feel a bit overwhelmed and you might don't know where to start. Just keep things simple and start slowly. You don't have to add everything in your bullet journal straight away. There is no right order. What I did, was that I made a list of the things that I'd like to include in my bullet journal, and I've been adding them as I go along. The basic thing for me was to have a yearly, monthly, weekly and daily spread, so that I don't miss appointments and keep up with my everyday life. The rest can be added slowly.
- Trial and error
You just have to try and adjust the different methods available to suit your needs. That way you'll figure out what works for you and what doesn't. It's a simple case of trial and error. That's what has happened to me, especially with my weekly spreads. And if nothing works for you the way you want it, then create your own!
- Get Inspired
There is so much inspiration and creativity on line, it's unbelievable! You only have to do a search and you'll be amazed. By far, Instagram and Pinterest are the best places for BJ inspiration! The following IG accounts are some of my favourite: @boho.berry , @passion.themed.life, @maryj13, @tinyrayofsunshine, @therevisionguide, @write_it_on_the_wall, @wundertastischdesign ... and the list goes on!
- Community
There is an amazing bullet journal community out there, ready to welcome you and help you along the way! If you're interested in bullet journaling then you should totally check out the Bullet Journal Junkies group on Facebook.

- It doesn't have to be perfect
Whether your lines are not straight or you've made a mistake while writing down your daily spread, just don't worry about it! It happens.
You either use Pentel Presto and erase it or just ignore it like I did!
- Have Fun! :)
Enjoy your time while bullet journaling!
This pretty much sums up my first month with my bullet journal. Can't wait to start setting up for April. ;)

Weekly Spread Ideas for Bullet Journals
Being a bullet journal newbie, you find yourself in the beginning being bombarded with various styles and ways of doing things. You get inspired by your favourite Instagram accounts, or from posts you find on facebook groups (like this one) etc. But in the end, I guess you just have to figure out what works for you and what doesn't. It's a simple case of trial and error. That's what has happened to me, especially with my weekly spreads.

Being a bullet journal newbie, you find yourself in the beginning being bombarded with various styles and ways of doing things. You get inspired by your favourite Instagram accounts, or from posts you find on facebook groups (like this one) etc. But in the end, I guess you just have to figure out what works for you and what doesn't. It's a simple case of trial and error. That's what has happened to me, especially with my weekly spreads.
Weekly spreads are an important part of my monthly planning. Especially with the kids and all the activities and the events they go to, I knew from the beginning that I had to find a weekly spread to accommodate everything - Personal, Kids/Family, Blogging, Events/Appointments and so on.
So, the quest for the perfect weekly spread begun!
My first spread looked like this:

I took inspiration from the latest video I watched on Boho Berry's YouTube channel, where she was talking about the weekly spreads she has been using. After I made some adjustments to fit my needs, I created what you can see in the picture above. I've created a FREE Printable of the above spread for you, both in coloured and black and white version.
JOIN THE GANG!
Subscribe now to my Newsletter to download the FREE Printable.
Plus get access to the Resources Library!
I guess it was ok for a first attempt and I liked that I could see everything that was going on during each day at a glance. However, while I was using it during that week, I noticed some things that were not working as well as I thought.
For example, the first column titled 'Appointments/Events' ended up being the dumping ground! I was using it for everything that didn't match any of the other categories. I thought that using boxes in front of each task/event made everything look crowded and cluttered. I also found that the space allocated for each day was too small and therefore in some instances I could not fit all the tasks that I had. Lastly, I thought that I was not using effectively all the space available on the two pages (like the space next to the month-title).
So, on week no.2 I changed things around a bit:

I moved everything up, using as much of the space as possible. And I also made the boxes bigger, so that I had more room to write all the daily tasks/events. I changed the title on the first column to 'Appointments/Misc' so that I have an excuse now to dump everything there :) and I started using dots instead of boxes in front of every task. I also used dashed lines to separate each day in order to make everything to look a bit lighter.
I have to admit that it looked much better and also it was more functional than the previous spread. However, again I found some things that bothered me and that I wanted to change - again!
Me being the only vegan in the family, means that I have a different menu from the rest! So I wanted space to note down what I am cooking each day for me and for the family. In the 'Goals/To-do' column, I was writing everything - personal and work related - and that felt a bit confusing at times. Also, I still wanted to have daily spreads as well, and having everything on my weekly spread somehow made the daily ones redundant...

So, I changed it again!
First of all, I made a master weekly housework to-do list, that basically has all the things that I usually do on each day every week. That way I don't have to write everything down again and again.

I created two columns on the first page for my 'Appointments/Misc' and my 'Blog' that are separated with the dates. That way I have lots of room and it makes everything look neater.

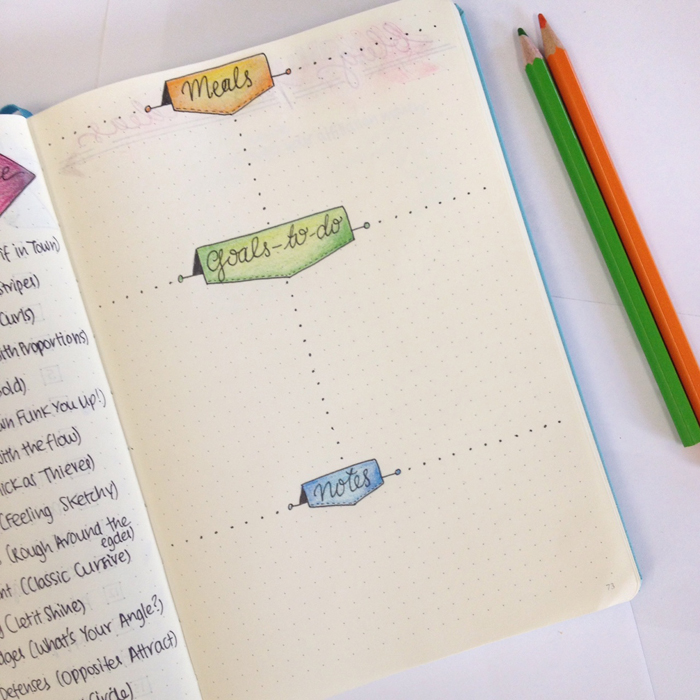
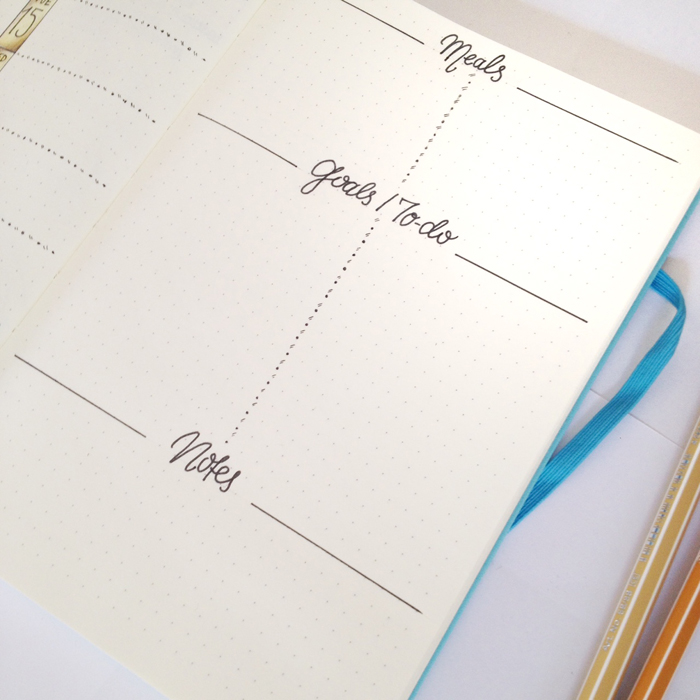
On the other page, I separated the 'Meals' category into two columns (one for my meals and one for my family's) and I also did the same for the 'Goals' one (one for personal and one for my blog).
Lastly, I created a 'Notes' category at the bottom of the page where I write tasks and appointments that I'm going to transfer to next week's spread.
I think this looks cleaner and less cluttered, and hopefully it's going to work even better than the previous ones! ;)
I would love to see your weekly spreads to get more inspiration! Please make sure you leave a link in the comments below. Which aspect of your bullet journal did it take you quite a while to make it work for you?
>> If you want to see my favourite Resources that I use every day with my Bullet Journal, click here to find out what I love to use. For more inspirations for your bullet journal, you can follow my Pinterest or my Instagram account.
Have an amazing day!