
How to make your own stickers for your bullet journal
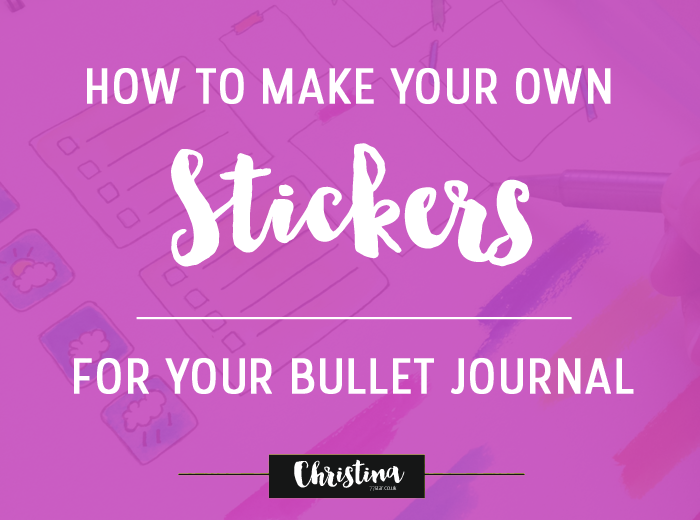
Today I'll share with you the way I make my own stickers to use in my bullet journal. It's for those days that you just don't have enough time to doodle anything at all, but you still want to have fun and be creative with your journal. Of course you can use the same technique to make any type of stickers you want.
What you'll need:
- White Paper - I used Sketch Paper because I wanted to use watercolours with my stickers.
- Black Pen to draw the shapes you want.
- Watercolours and a paint brush - You can also use coloured markers if you want.
- Avery Clear Sticker Project Paper
- Scanner and Printer
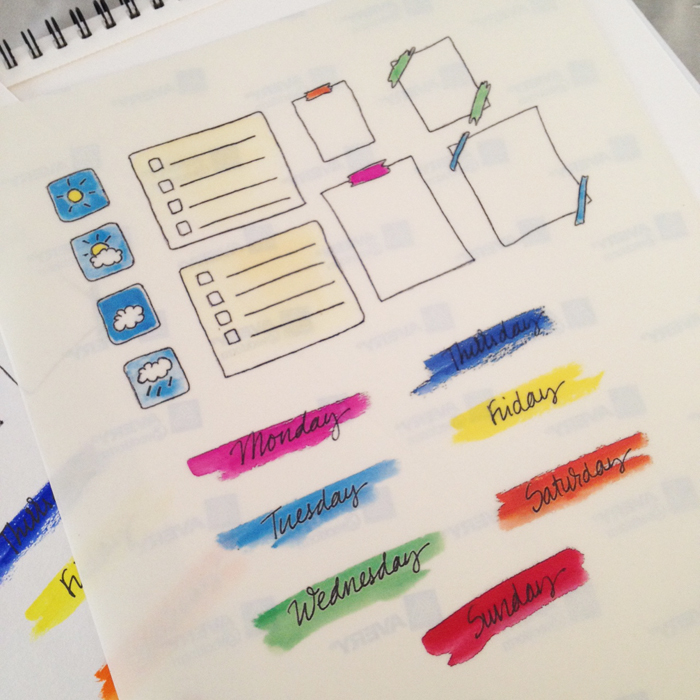
The first thing you need to do is to take a piece of white paper and make all the doodles that you think you'll need. I made some weather icons, because they can be time consuming sometimes, the days of the week with some colourful background and some fun little tick boxes, as well as some plain paper pages that you can utilise in many ways.

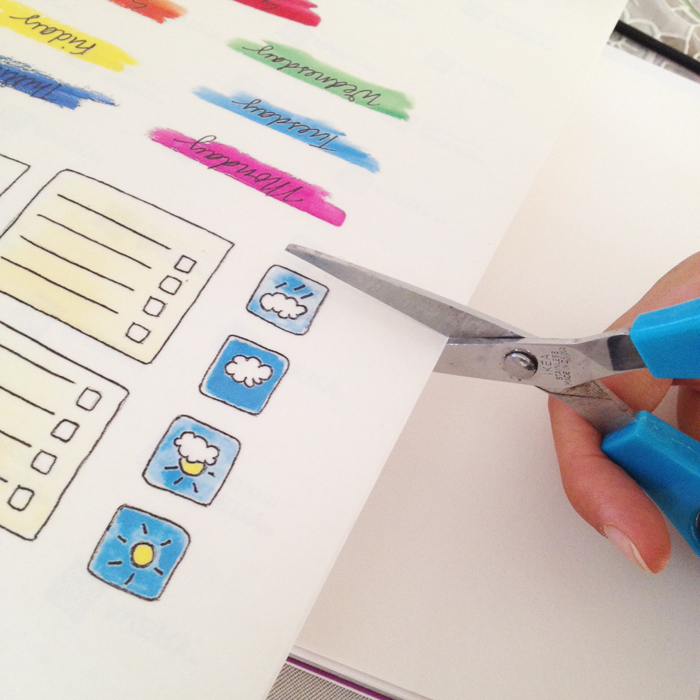
Once you are happy with all the doodles you've created, you'll need to scan the page and then print it on a self adhesive sheet. I used the Avery Clear Sticker Project Paper (8.5"x11"), but you can also use white sticker paper. It's really up to you. I just like to have the same colour as my notebook's pages.
Then, every time you need to use one, you can cut it with the scissors and you're done!
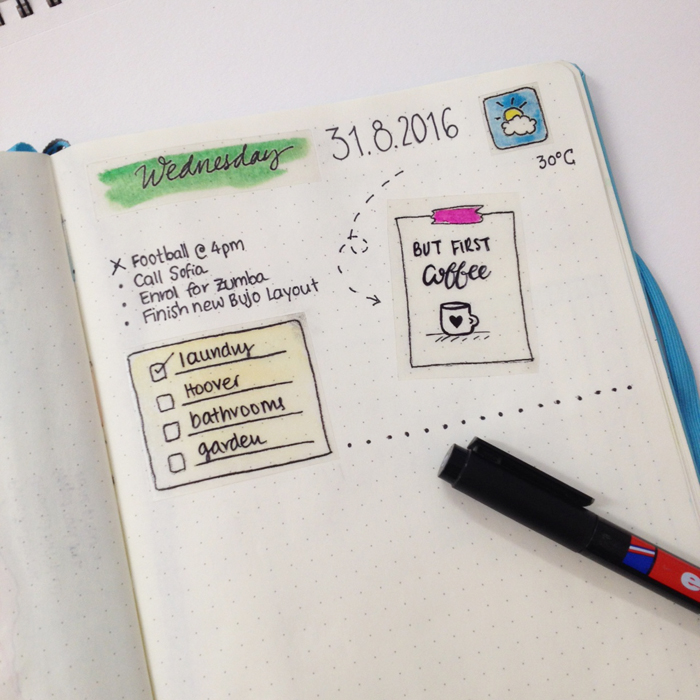
Making your daily spreads is going to be so much quicker and easier now for those days thay you just can't spare any time on being creative with your bullet journal.
** You'll need a permanent marker to write on the stickers :) **
Join now my newsletter and get the FREE Stickers Printable. Plus get access to the Library of Free Resources.


Bullet Journal: My September Set Up
After an amazing summer, September is here and I couldn't be happier! I've got a brand new Bullet Journal to play with (I've chosen the orange one this time) and a new monthly set up. :)
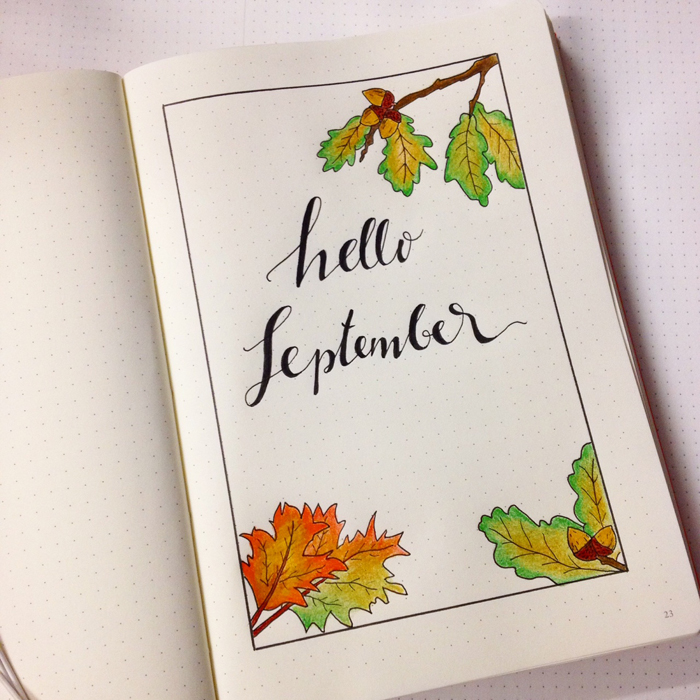
This month I started my layout with a page to welcome the new month. I chose an autumn theme with leaves and acorns (even though it's burning hot here in Cyprus!).

After an amazing summer, September is here and I couldn't be happier! I've got a brand new Bullet Journal to play with (I've chosen the orange one this time) and a new monthly set up. :)
This month I started my layout with a page to welcome the new month. I chose an autumn theme with leaves and acorns (even though it's burning hot here in Cyprus!).
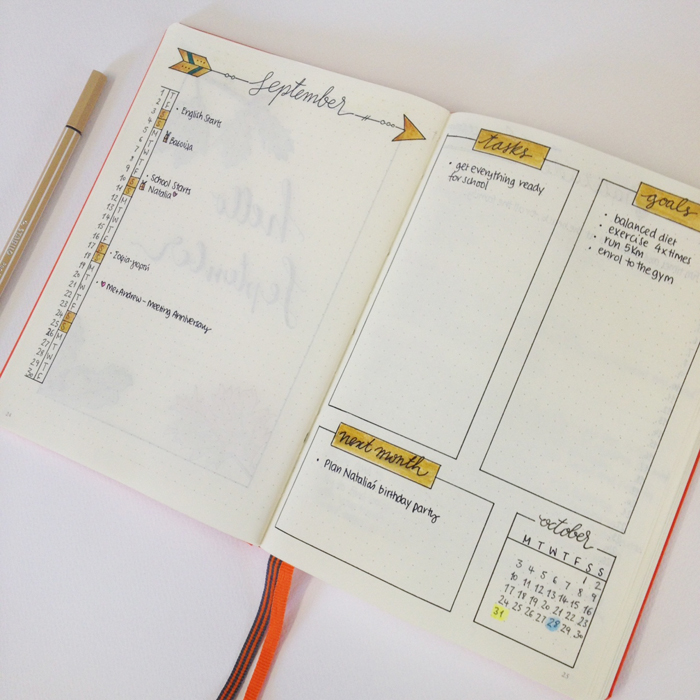
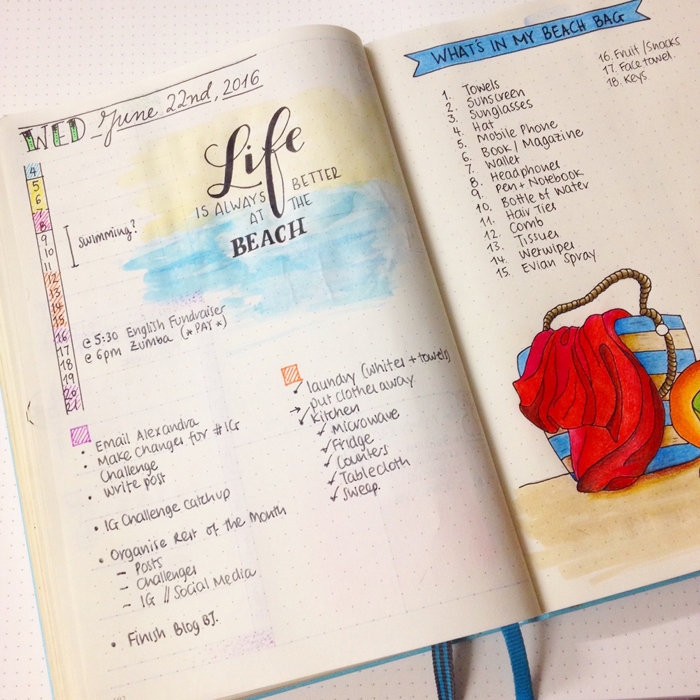
For my monthly spread, I decided to go back to one of my favourites that I used in the past. On the left page is a monthly log, where I note down any birthdays, holidays, events or appointments planned for this month, and on the right page I write all the tasks I need to do and all the goals I want to achieve this month (I'm still thinking through all the things I want to add in this section, so it looks a bit bare right now). At the bottom of the page I made a section for next month's plans, as well as an October mini calendar.
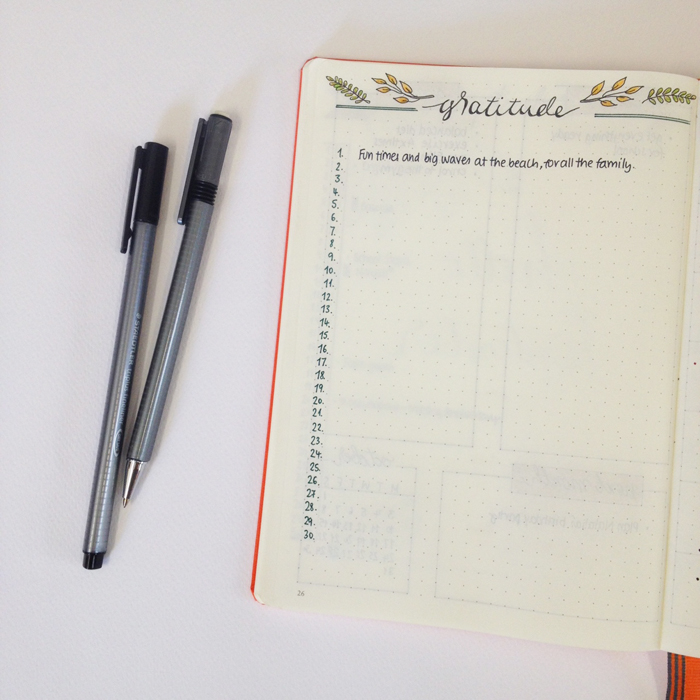
Moving to the next page, I started again my gratitude spread. I loved it when I was doing that before, but during the summer I just didn't have the time for it. But now that I'm back, I thought to add it in my September spread.
The last part of my layout for September is my weekly spread. It starts on the 5th, since I already had a weekly spread set up in my previous bullet journal for the first 4 days of the month.
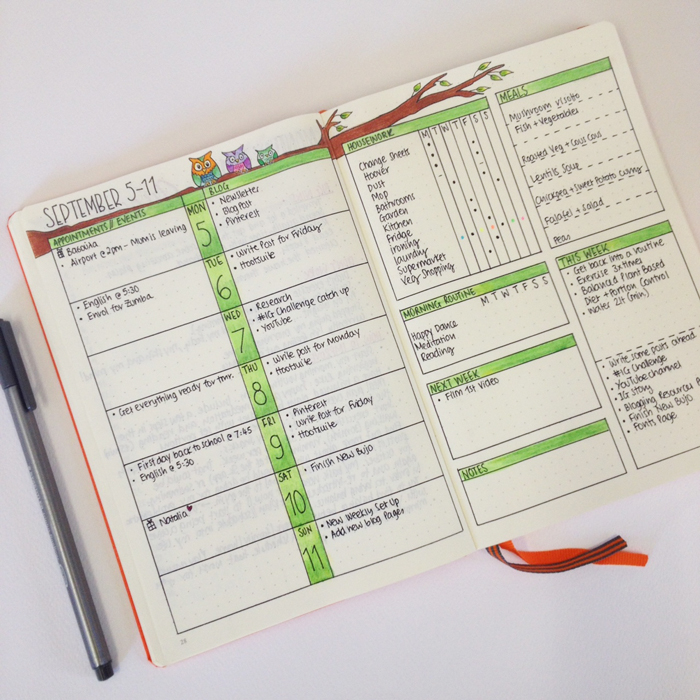
On the left page I am using a layout I had before, with two columns: one for events/appointmens and one for my blogging tasks. On the right page, I'm trying something a bit different for this week and I really hope that it works for me, cause I love the way it looks. I created a section for my housework in the form of a tracker. I was inspired by the lovely Helen @helencolebrook (don't forget to visit her website as well!).
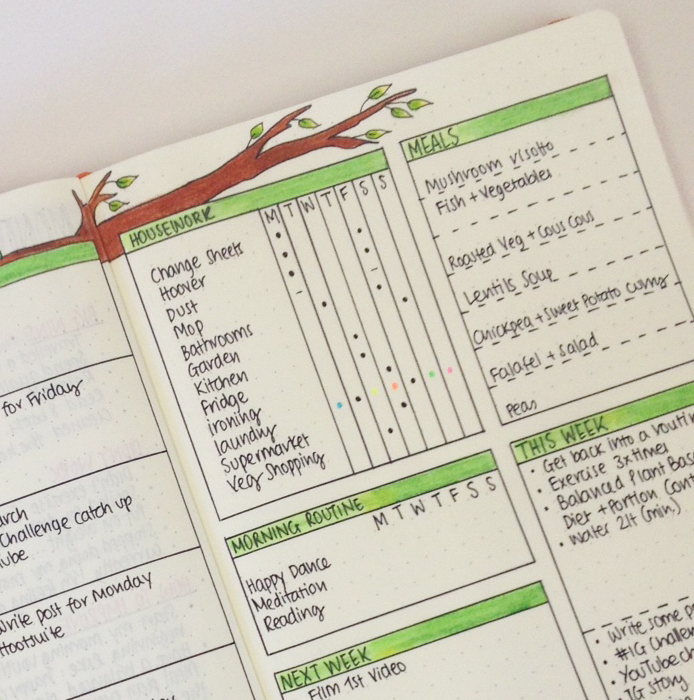
I wrote all the housework tasks for this week and created columns for each day of the week, so that it's easier visually to see what needs to be done each day. In those columns, I added some dots when these tasks should take place during the week. - is for only if it's needed and the colourful dots show me what type of laundry I need to do that day. :) Once I finish each one of the tasks, I'll simply put an X on it.
I've also included sections for my Morning Routine, that I really want to come back into, Notes, my weekly Meals as well as a section for what to do Next Week. I've also added a section for the things I want to achieve This Week - personally as well as for the blog. I love this part, because it helps me focus and plan ahead my week.
Lastly, there's always a two page spread for the Instagram #doodlewithus challenge, but right now I haven't drawn anything on it ;) If you want more information about the challenge, have a look at this post.
I love the way everything looks and I can't wait to start filling things in! Have you tried anything new in your bullet journal for this month?

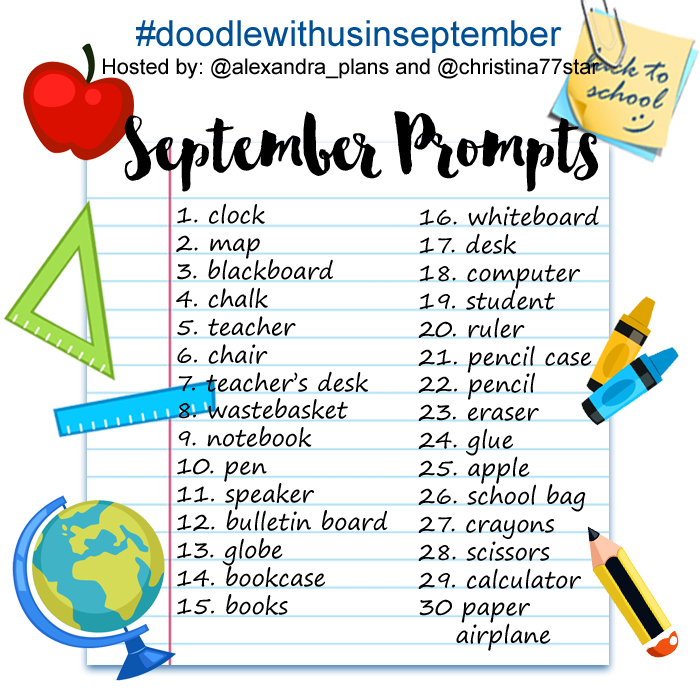
Instagram Challenge #doodlewithusinseptember
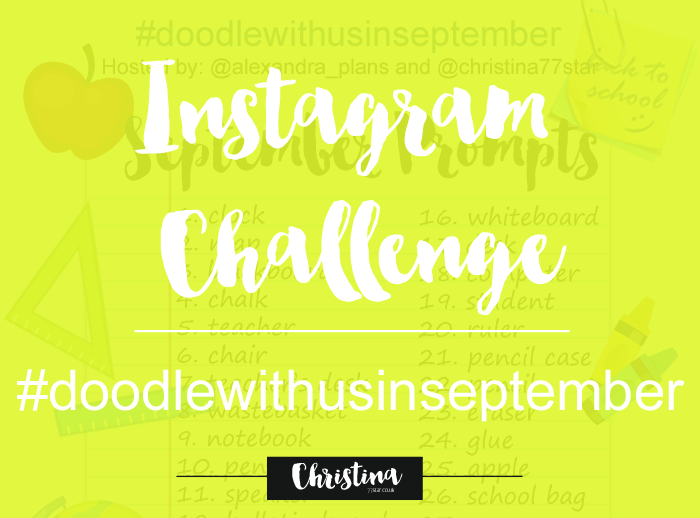
Once again I'm excited to announce our Instagram Challenge for the month of September! It's the #doodlewithusinseptember Instagram Challenge created by me and Alexandra (from @alexandra_plans).
It's going to be 30 days of doodles that will hopefully get you to be creative and have fun! The theme of September's Prompts is 'Back to School', and I seriously can't wait to start drawing!!!
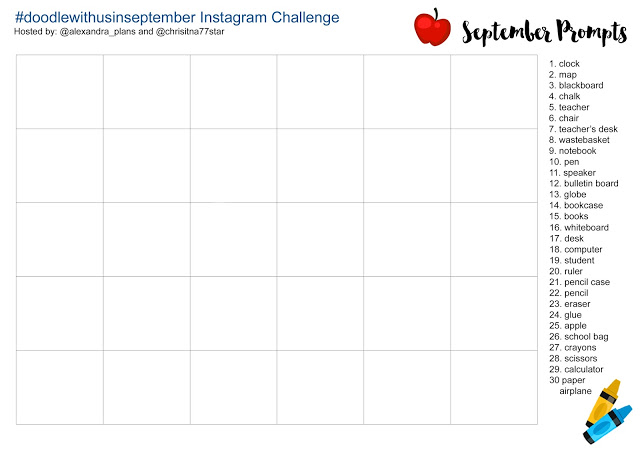
As we did last month, all the doodles are part of one big comprehensive picture. Imagine each day to be one piece of the puzzle. So, at the end of the month you will have one big doodle picture! :)
If you decide to follow this way, you'll have to create a table with 5x6 boxes and you shouldn't add the days on the top. You can also make the boxes and dates in pencil, if you don't want the lines to obscure the end result. It's totally up to you.
Of course, if you prefer to draw the doodles in the traditional way, that's absolutely fine as well. The important thing is to have fun!
You can also download a free printout with the daily prompts here.
- Follow me (Christina) @christina77star and Alexandra @alexandra_plans over on Instagram.
- Download the prompts below.
- Draw something according to the day's prompt, take a photo of it, and share it with us on Instagram.
- Don't forget to add the hashtag #doodlewithusinseptember and spread the word.
- Everyone is welcome!


Blogging Resources

Today's post is going to be all about blogging and all the resources that I personally use for my blog.
BLOG PLATFORMS
BLOGGER - Free hosted blogging platform owned by GoogleI've been using it for years now, I'm well acquanted with it and I know how it works. I love how easy it is to create a blog in just minutes, plus it's free :) Once my blog gets even bigger, I'd like to switch to Squarespace cause I love their themes and all the added things they offer.
DOMAIN PROVIDERS
123-REG - Easy to use domain provider.I love it because you can find domains for any type of business and for any country you want.
WEBSITE TEMPLATE
ETSY - Beautiful website templates at low cost.No matter which platform you're using, Etsy is the place to find beautiful blog themes for resonable prices. You can even ask for custom designed themes from the designer you want.
TOOLS FOR GRAPHIC DESIGN
CANVA - An online graphic design tool, great for creating graphics for social media.PICMONKEY - Anogher useful tool for creating visual content for your blog and for editing your pictures.
ADOBE PHOTOSHOP ELEMENTS - Photo and Image editing software that I use for my blog photos.
SOCIAL MEDIA MANAGEMENT
HOOTSUITE - A social media tool that helps me plan, organise and schedule my day to day social media interactions on Twitter and Facebook.BUFFER - Another social media tool that I use it only to plan and schedule my Instagram posts.
BLOG MONETIZATION
CREATIVE MARKET
ZANOX
SKIMLINKS
COMMISSION JUNCTION
AFFILIATE WINDOW
GENI.US
ONLINE STORAGE
DROPBOX - Online storage solution that automatically syncs with your computer (free up to 2GB). I'm using it to share all my free downloads in the Resources Library with you :)IMAGES
SNAPSEED - This is the application I use to edit my images for instagram.UNSPLASH - Great website for free high-resolution photos.
FONTS / GRAPHICS / TEMPLATES
CREATIVE MARKET - My favourite place to be online! You can find some amazing fonts, and bundles of fonts and graphics for some unbelievably low prices. Plus every Monday you get 6 Free Goods!THE HUNGRY JPEG - Another similar site with lots of fonts, graphics, templates etc. They offer one Weekly Free Good.
PODCASTS
SOCIAL MEDIA MARKETING PODCASTONLINE MARKETING MADE EASY WITH AMY PORTERFIELD
SMART PASSIVE INCOME PODCAST
ACHIEVE YOUR GOALS WITH HAL ELROD


Timeline Ideas for your Bullet Journal
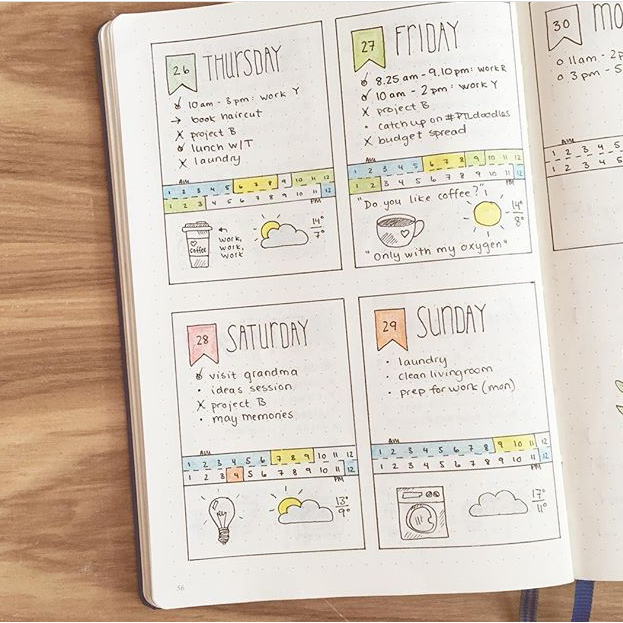
I've mentioned before how important focus and time management is for me during my daily activities, and I've talked about all the techniques I'm using, in this post. Today I'd like to focus more on timelines (also known as time management bars), which is a great way for time management with your bullet journal.

I've mentioned before how important focus and time management is for me during my daily activities, and I've talked about all the techniques I'm using, in this post. Today I'd like to focus more on timelines (also known as time management bars), which is a great way for time management with your bullet journal.
A timeline is a graphical representation of a period of time, on which important events are marked. The way I do it, is to draw two horizontal lines above my day header and in between I write down all the hours, starting with 1am and finishing with 12am.

I can plan my day from the night before and set a specific time frame for each task that I distinguish through colour. I've created a colour coding system that works for me, and so now I know just by looking at it where I've allocated my time during the day.
Of course you can play around with the timeline and make it work for you. You can add less hours and make it smaller.

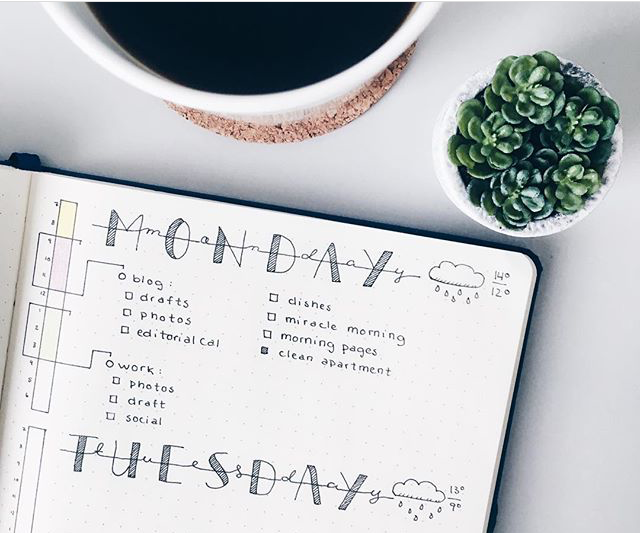
You can incorporate it in your daily header like the following examples:


You can also change it's shape (like I did into a clock), or you can separate the time boxes and make them bigger.

You can have one timeline vertically in your daily spread.
Or you can choose to separate the timeline into three columns to fit the desing of your page, like @bujotrain

You can incorporate it in your weekly spread like Camilla from @creative.pine.apple does.
You can separate the timeline into two lines: the first being an AM and the second a PM like @breeeberry.

You can choose a different design for your timeline, like the one from @honeyrozes

Similar designs like the above from Cristina @shilen.qc

From Camilla @creative.pine.apple
From Roz @rozmakesplans


and the Spiraldex like Camilla from @creative.pine.apple uses in her bullet journal.


Creative Journaling Course
Step by step video lessons that will help you set up and organise your life in your journal.
Do you use a timeline in your bullet journal? Which type of the above do you prefer?
Future Log for your Bullet Journal
For the past few months I've been using a new method for my future planning that - dare I say it - I prefer it from the Calendex method (shocking I know!!!). I saw it in Veronika's Instagram account and I knew straight away that I've finally found the perfect Future Log for me!!
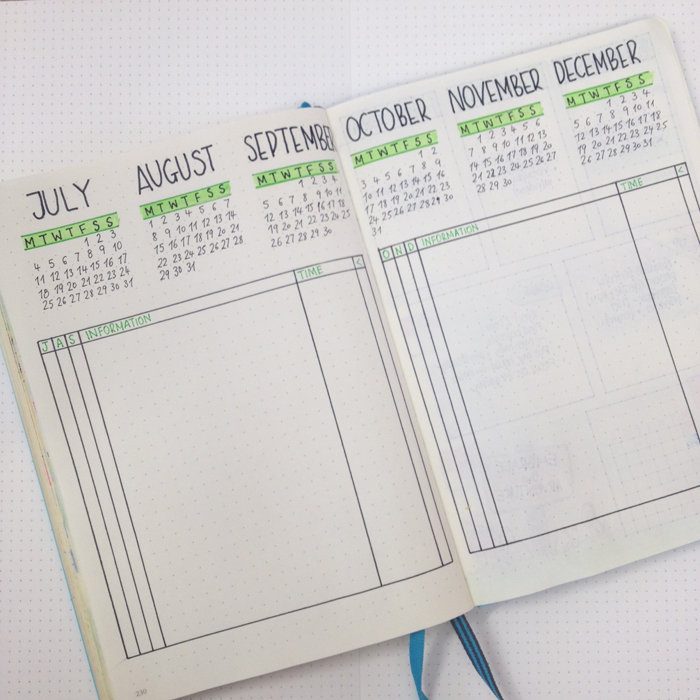
It's a combination of Ryder Carroll's Future Log and Alastair's Method. Basically, you write down the monthly tables for the next 6 months on the top of the page. I started from July, since that's when I started using this technique, but of course you can start any time you want. Underneath the month tables, on each page you then create one long table. The first 3 columns are one for each month and are titled with the first letter of the month. That's where you write the date that refers to that spefic month for each event you want to note down. Then you create a column for the event/appointment with all the information, and another one for the exact time of the event. Lastly, you create a small column in the end, where you can tick off any events/appointments that have already taken place. Of course you can add any other columns that might help you with your future planning.
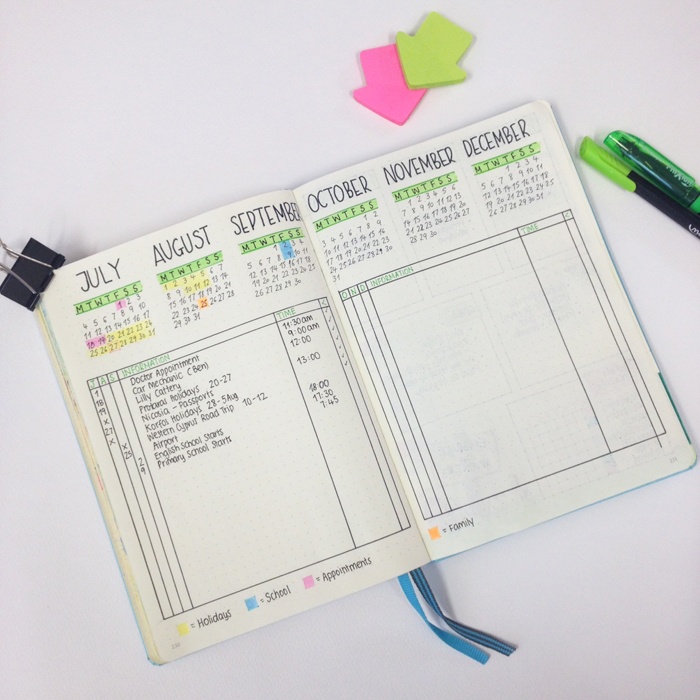
Once you've done that, you can then go ahead and add all your appointments/events to this table. Everytime you have a new event planed for the future, you can go straight to this page and add it with all the information needed. You can also create a colour code for each type of events, like I did, and mark them on the monthly tables on the top of the page. That way you can see straight away what you've got planned for the month. Genius!
What I really like about this method, is that everything is in one page. You don't have to go back and forth to different pages to see what's planned. And also you have 6 months at a time to plan ahead. Perfect!
Make sure you check out Veronika's Etsy Store where you can download this Future Log method. Also don't forget to check her website as well.
I'm so glad that I've found this future planning method, because it has really helped with the way I plan ahead. If you want more information on all the other methods you can use for your bullet journal, then you can check my post on future planning. Which method is your favourite?

Dutch Door Ideas for your Bullet Journal
I found out about the 'Dutch door' system for your bullet journal when I watched @Alexandra_Plans's video on YouTube. After that I just knew I had to try it out!
The 'Dutch door' system is a way of creating a weekly spread in your bullet journal, where part of the page remains stationary and the other part is normal and you can turn the pages as usual. This system can be applied horizontally or vertically. The difference is that with the horizontal you have to tear off part of the pages, while with the vertical way you just have to fold a page in half vertically and move it around as needed.

I decided to try the horizontal way, because I believe it's gonna work better for me (and I was feeling very daring on that day!!!). The first thing you need to do is to plan ahead how you'll use the space on the pages and measure everything in detail, because once you've cut those pages there's no turning back!!!
When you're ready, cut with a pair of scissors horizontally the pages where you've marked them.
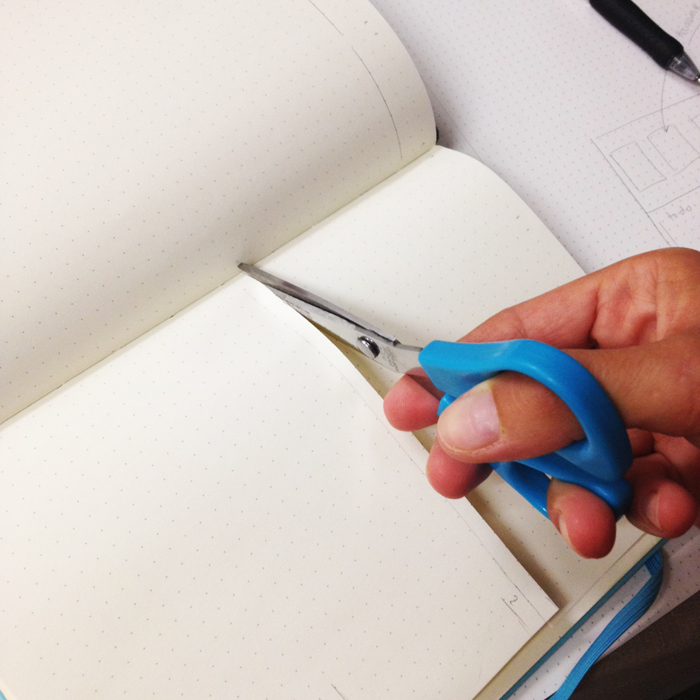
Then hold the cut pages and pull really carefully towards you. This can be a bit tricky and nerve racking but just be patient and carefull and you'll do it ;)
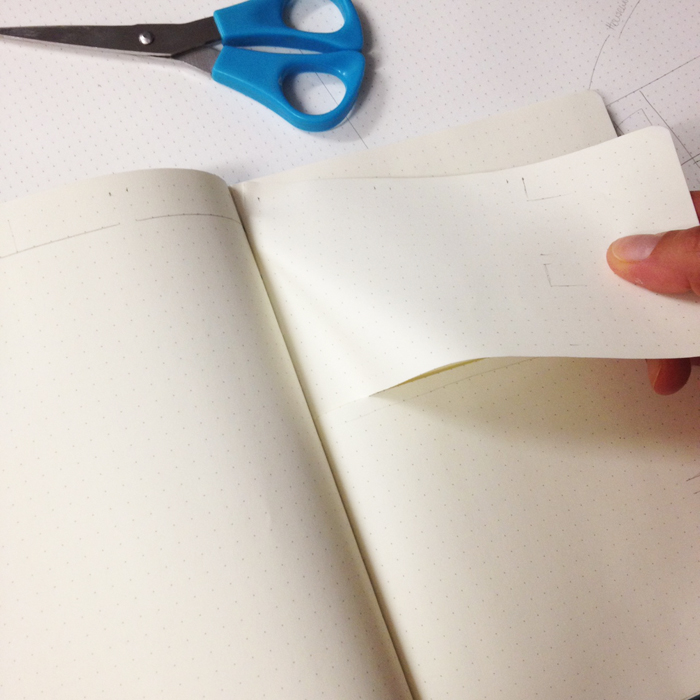
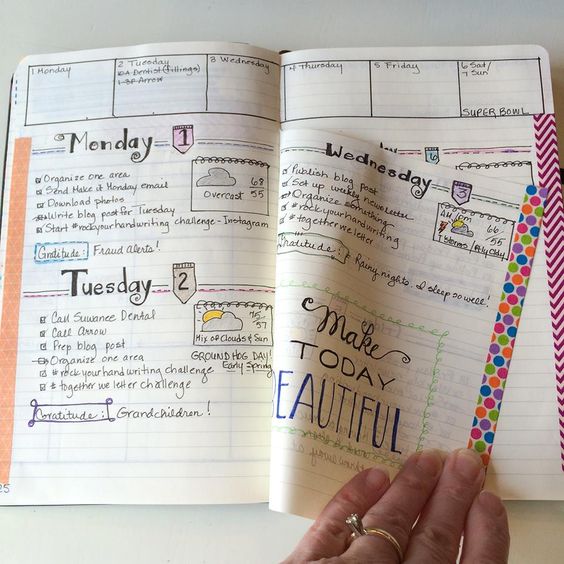
After that just go ahead and fill in the pages as you've plant from the beginning. You may also add some washi tape at the top of the pages you've cut. I decided to leave it as it is and here is the end result:

Dutch door ideas for your bullet journal - www.christina77star.net

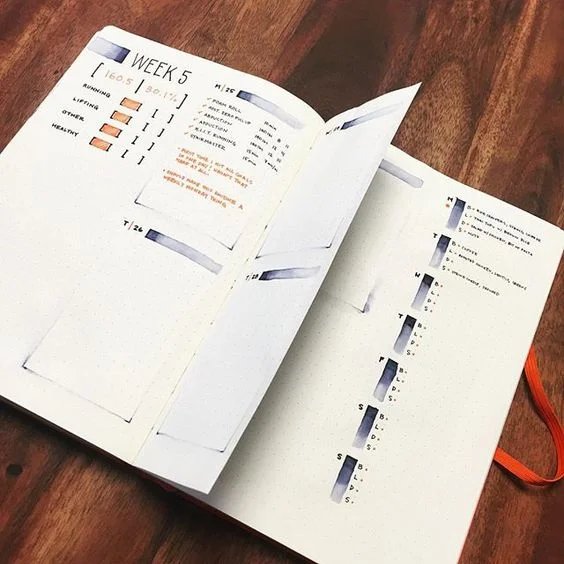
To get even more inspired, here are some examples of the dutch door system by some amazing bullet journalists:


Cristina's design from @My.Life.In.A.Bullet is absolutely stunning!!! You just have to check her Instagram account out! You have to!!!

I'm in love with the polka dots and Marissa's layout!!! She has more 'dutch door' weekly spreads in her Instagram account @choosingbliss.

I love how Victoire from 'Vik's Studyblr' has used the space in the pages. Check her blog out for more inspiration.

If you are a busy mum, then the vertical dutch door system for your bullet journal is what you need. See how Evie and Sarah from www.evieandsarah.com make use of it! Simply genius!!!


Kimberly's layout looks great and I love the colours she's used!!! At her website 'Sublime Reflection' you can find some amazing inspiration for your bullet journal.
I just love Karen's style from @beastmode.bujo. Make sure you check her out.
For some of the above pictures I couldn't find the owner to give credit, so I just added the link I found the picture at. If this is one of your pictures, or you know who created these spreads please let me know in the comments below so that I can give them credit. ;)

>> Here are my favourite Resources that I use every day with my Bullet Journal.
Click to find out what I love to use.
I absolutely love the way it looks and the functionality of it and I'll be definitely using this technique again for sure! Have you tried the dutch door system? If you have make sure you share with us in the comments below ;)

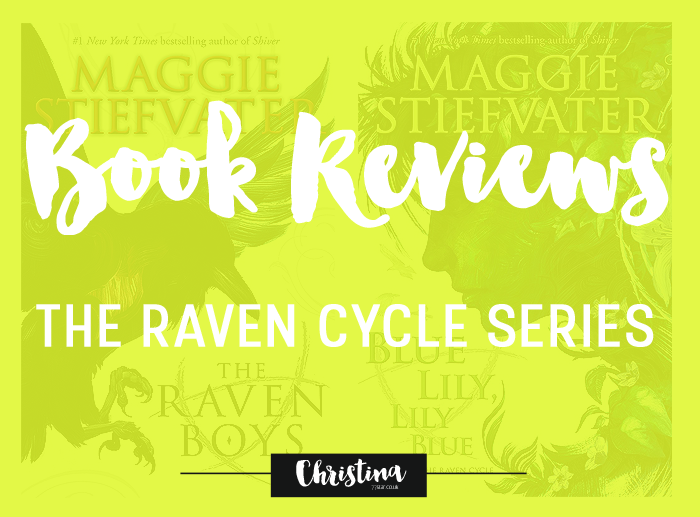
Book Reviews: July 2016
I am starting a new post category in my blog, where once a month I'll review and talk about the books that I've read the previous month. I love reading books and since reading is such a big part of my life, I wanted to share with you my views and opinions of all the books that I read. :)
 |
 |
 |
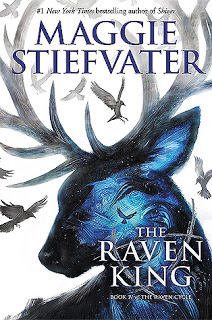 |
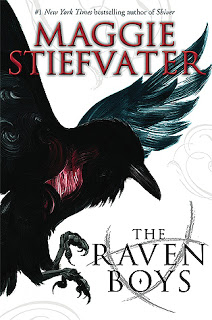
During July, I managed to finish 4 books and marathon The Raven Cycle Series. I wanted to read The Raven Boys for a while, but I was a little intimidated by the hype that surrounds this series. However, since the 4th and last book ("The Raven King") came out in April, I decided to start reading it and see why everyone seems to be obsessed about it. I'll talk more about the first book of the series and I'll be a bit more vague about the other 3 books, so that I don't reveal any spoilers :)
On a cold night every spring, sixteen-year-old Blue and her psychic mother wait in a churchyard for the dead to arrive. Her mother is usually the one who sees the spirits of people who will die within the next twelve months, but this year, Blue herself sees the ghost of a boy named Gansey who's going to die within the coming year.
“There are only two reasons a non-seer would see a spirit on St. Mark’s Eve, Blue. Either you’re his true love or you killed him.”
With those chilling words, Blue is caught up in a mystery she never expected, involving the privileged Raven Boys from Aglionby Academy. She must be carefull though, because Blue's always been told that she's destined to kill her true love with a kiss.
I have never read a book with an even close storyline. I was highly intrigued by this premise and I couldn't wait to start reading!
I'll start my review by saying that this is quite a unique and captivating series filled with lots of twists. Psychics. Ghosts. Spirits. Sleeping kings. Legends. Enchanted forests. And a cursed romance. What else could you ask for?
The Raven Boys is filled with intriguing characters. We have a lot of very distinguished and very unique personalities.
Blue is the main female character of the story, that lives with a family of psychic women. She’s a strong and eccentric character that wants to be different. She sounds weird and pixie-like, but I really liked her character and the part she plays in the story and in the boys' lives.
“She wasn’t interested in telling other people’s futures. She was interested in going out and finding her own.”
Needless to say, Richard Campbell Gansey III was my favorite. He is obsessed in finding the legendary sleeping Welsh King that has played such a big part in his life. I loved his inquisitive mind and commanding leadership. He acts like the leader of the group, but that has nothing to do with his money or his status. His friends follow him in his quest out of love and respect, which is mutual.
“My words are unerring tools of destruction, and I’ve come unequipped with the ability to disarm them.”
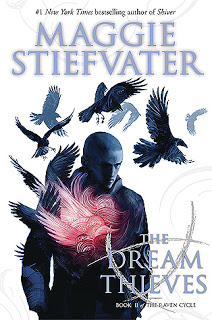
Ronan was by far the most mysterious of the boys, and remains so throughout the whole series. He sounds scary and intimidating, but that just shows even more how broken he really is. Book #2 "The Dream Thieves" shows more about him and his story, and all his scary and out of this world little secrets start to be revealed.
“You're looking for a god. Didn't you suspect that there was also a devil?”
Adam is such a lovable character. You connect with him straight away and can't help but feel for him and everything he's been through. I just wanted to jump in the book and give him a big hug! I also loved to see how he evolved and transformed as a character through the whole series.
Noah is the character that is always a bit in the background. But more about him are revealed as you get through the series, and you get to know his big secret that has affected everyone's lives.
I have to mention here the closeness that all the characters seem to share with one another. I loved the complicated relationship between these boys, from their good-natured jeers to their anxious concern for one another. And I think Blue was the missing piece!
Of course there are even more amazing characters that are introduced throughout the books and play a big part in the story. Each one is intriguing and different and I love how the author helps you to get to know them more and get close to them. The book is told from multiple point of views, which I found to be a quite interesting change to what I'm usually reading, and a necessary one given the many characters we get to know, particularly the raven boys.
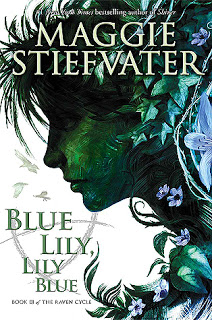
The rest of the books feel like to be centered more to one character at a time, without taking anything away from the story or the other characters. That way you get to know them even more. In the "The Dream Thieves" we get to know more about Ronan, in the "Blue Lily, Lily Blue" we connect more with Blue's character, while in the last book Gansey seems to be more the center of attention.
I caught myself lots of times, while reading this series, wanting to actually be part of the story, to join Blue and the Raven Boys in their adventures! The first book definitely leaves you wanting to know more, and the rest of the books surely don't disappoint!
A strange and otherworldly, original and enthralling nonetheless series that you must read!!!