

New Bullet Journal Flip Through (+ Video)
Today I'll share with you the pages and spreads that I've created in my second bullet journal until now. This time I've chosen a bright orange Leuchtturm1917 in A5 with dotted grid. (You can see my first bullet journal here). I started my second bullet journal in the beginning of September and I've managed to transfer most of my favourite spreads in it by now.

Today I'll share with you the pages and spreads that I've created in my second bullet journal until now. This time I've chosen a bright orange Leuchtturm1917 in A5 with dotted grid. (You can see my first bullet journal here). I started my second bullet journal in the beginning of September and I've managed to transfer most of my favourite spreads in it by now.

Watch the Video here!
Moving to a new bullet journal can be a bit of a pain with all the spreads you have to recreate. However, I quite liked it, because this time I got to choose which spreads to add, put them in the beginning of the journal, so that I can have easier access to them (having all the important spreads in the beginning, rather than having them spread in different places in the journal), and put them in the order that I liked.

I also got to make any changes that I thought were necessary and change the layout or the way I decorated the pages. All in all I'm really happy with the result and I love all the pages that I've recreated.
So, let's get started!

The first page after the index pages was a page that I wanted to decorate with a nice phrase or a quote. There is a phrase that I picked up from Pam Grout's book "E-Cubed: Nine More Energy Experiments That Prove Manifesting Magic and Miracles Is Your Full-Time Gig" that I say every morning, and that is 'Something amazing is going to happen today' I really wanted to include this in my bullet journal, so I created this page and I love it because it's the first thing I see when I open my bullet journal.

In the next page I wanted to include my Word of the Year and my Mission Statement, but I wanted to do something a bit different than before. I got inspired by Nicole and her lovely air-balloon drawings and created the above page, which is definitely one of my favourites.

I always include a page of Useful Numbers for me but also for my kids. They know that in a case of emergency they can go to this page and call the number they need.

I simplified my Key completely. Now I only use a dot for everything. I only use more specific symbols for bithdays and anniversaries. I found that using various different symbols for your activities can be a bit confusing some times, and I also thought that it made my pages a bit messy. The Colour Code has all the colours that I use for my dailies and for my time management bar, and it has stayed the same.

I wanted a Year at a Glance spread. In my previous journal I created this spread in 4 pages, but this time I wanted to condense everything in only 2 pages. I really like how it turned out. This is the page I use to note down holidays, birthdays, anniversaries, various events and school related days. Now I can see how my schedule is looking for the next 12 months.
* There is a printable version of the above 2-page Year at a Glance spread for 2018. You can find it here.

In the next spread I created my Future Log where I note down all the appointments, events and other important dates. I have a full blog post dedicated to this one if you want more information about it. So, having these two spreads together is really functional, because I can see straight away what I have to do in each month.

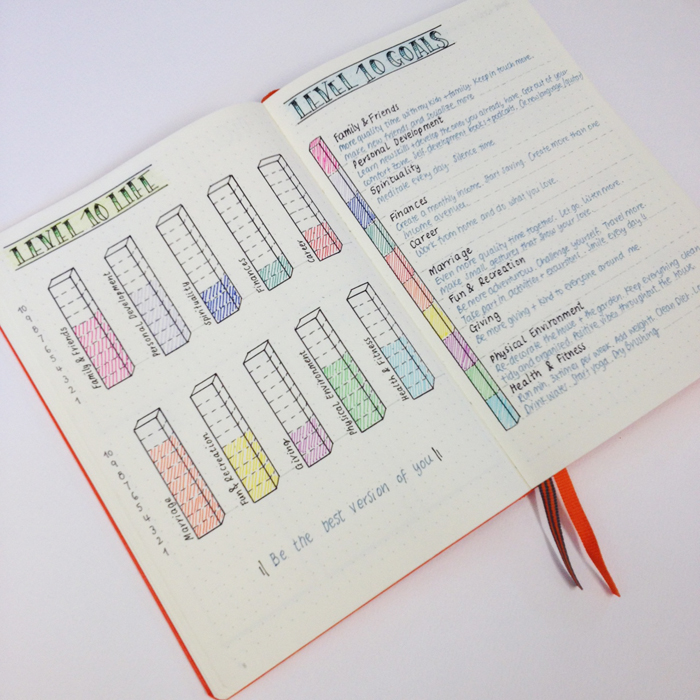
Then I created my Level 10 Life / Level 10 Goals spread, which I've changed up a bit. I talked about it thoroughly in this post if you want to check it out. But it's basically an assessment of your life as it is now in 10 different areas. Then you set up your goals in each one of those areas and you establish the ways and habits that will help you get there. I loved it when I read about it in Hal Elrod's book 'The Miracle Morning' and it has helped me a lot in my goal setting.


The next two spreads are about the books I want to read and the books that I have read during 2016. On the first page I'll write previous publications that I really want to read - my top picks from my wishlist. Then I have new publications per month and lastly I note down all the books I've read in 2016. By the way, a little update about my reading goal that I mentioned in the '17 before 2017' post. I had to changed it because it was completely unreasonable.... There was no way could have read 20 books by the end of the year, especially with my schedule as it is now. So now, my reading goal is 60 books in 2016 which is definitely more achievable..

Moving further, the next spread is about my Planning Routine. This is the only spread that I didn't change a thing. I literally copied it from my first journal.

The next page is my Housework Schedule. This is the basic weekly schedule that I tend to follow. Of course, I can change things around depending on the things I need to do each week.

My Menu Planning is almost the same. I changed the banner at the top a bit, but generally I followed the same layout as my previous one. I need to add more food ideas for each category. It's a very helpful page if you're stuck each week and you don't know what to cook!
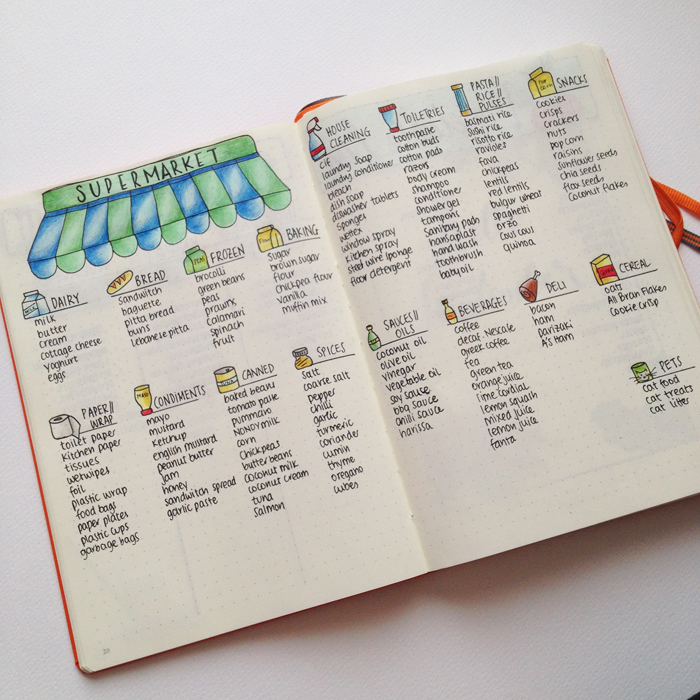
My Supermarket List looks neater and cleaner. Again I changed the banner at the top and rearranged the items a bit, but all in all it's the same spread. Very functional and practical.

Lastly, I also recreated a spread for my Vegetable List. Basically the same - just changed the top part a bit. The rest of the pages I've already shared them with you. You can look back in my September and October set ups to see how I prepared my bullet journal for each month.
So, there you have it. My new bullet journal set up. Which spreads do you recreate when you change journals?


JOIN THE GANG!
Get all the inspiration delivered to your inbox twice per month.
Plus get access to the Resources Library!

Bullet Journal: My November Set Up
I know I've been saying the same thing every month, but seriously it feels like October just flew by! Maybe it's because October was a very exciting month for me (both personally and professionally). But also, as we're getting closer to Christmas (can you believe that it's only 54 days till Xmas??), the days get busier and time just seems to fly.
I know I've been saying the same thing every month, but seriously it feels like October just flew by! Maybe it's because October was a very exciting month for me (both personally and professionally). But also, as we're getting closer to Christmas (can you believe that it's only 54 days till Xmas??), the days get busier and time just seems to fly.
I've (FINALLY!) made my first YouTube video, and I'm really excited about that. I'm still learning about editing and all that new and interesting stuff! I hope you like the video and you'll give it a thumbs up :)
PS: I don't know why, but in the video I sound like a robot. I swear I speak normally in real life!
As always, at the end of the month I prepare my montly set up in my bullet journal. I did some changes this month, that hopefully will help me stay more focused in order to achieve my goals.

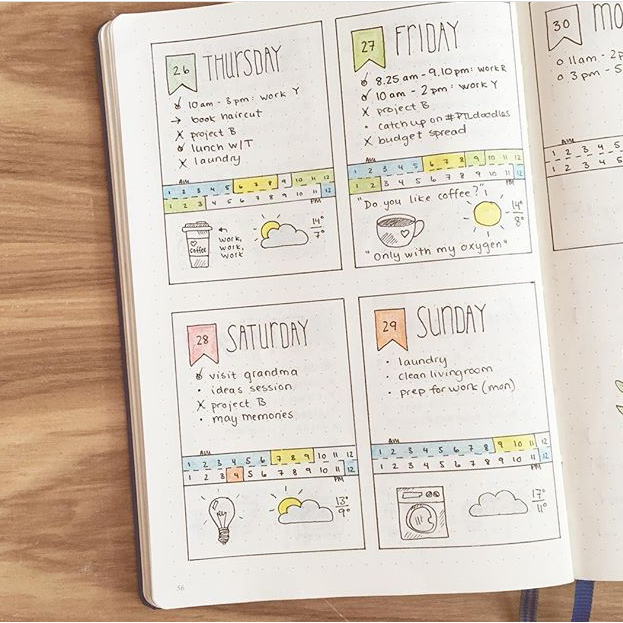
The first change was in the month at a glance spread. I didn't find the previous spread practical, so I changed it to this one. My issue with the one I used in October was that there was not enough space to add more that one things per day. It seems that I enjoy this month's spread more already. I think my brain functions better in squares :)
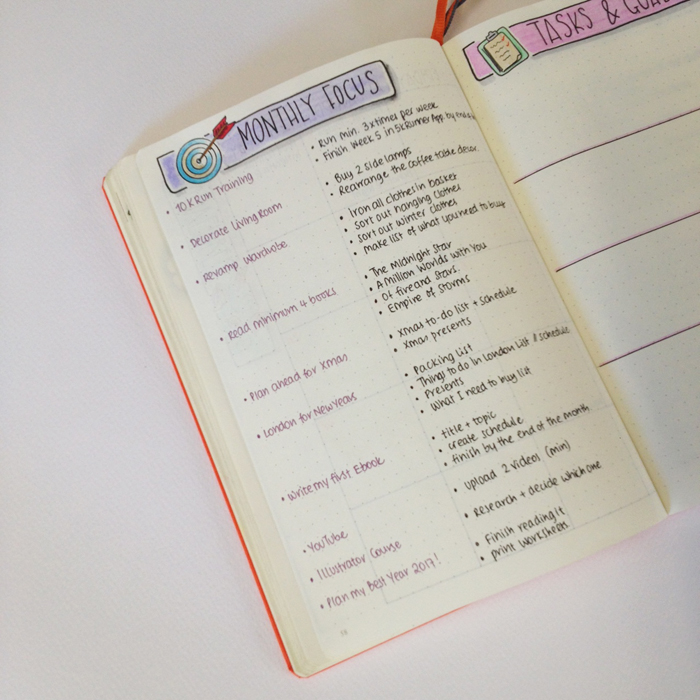
I've changed my monthly focus spread too. This time I'm very specific in the tasks I want to tackle and more organised in the actions I need to take for each one. I've narrowed it down to 10 goals for November, and I've writen next to each one what needs to be done.

The next page I've separated it into 4 rows, one for each week of November. These will act as a funnel, so that I can allocate the steps and tasks for each goal to one of the 4 weeks. That way, when I'm doing my weekly spread, I can visit this page and see exactly what I need to do in the next 7 days.

The only thing that's stayed the same this month is my gratitude log that I continue to add in every monthly spread.
So, this is how my November Set Up looks up until now in my bullet journal. Have you done yours yet? Did you make any changes this month?

PS: Let me know what other videos you'd like me to make next :)

Bullet Journal: My October Set Up
October is already here, even though it doesn't really feel like it. In Cyprus it's still 32 degrees and it definitely feels more like summer! But of course a new month means a new bullet journal set up, so I'm going to share with you the way I've set up my BuJo for October.
October is already here, even though it doesn't really feel like it. In Cyprus it's still 32 degrees and it definitely feels more like summer! But of course a new month means a new bullet journal set up, so I'm going to share with you the way I've set up my BuJo for October.
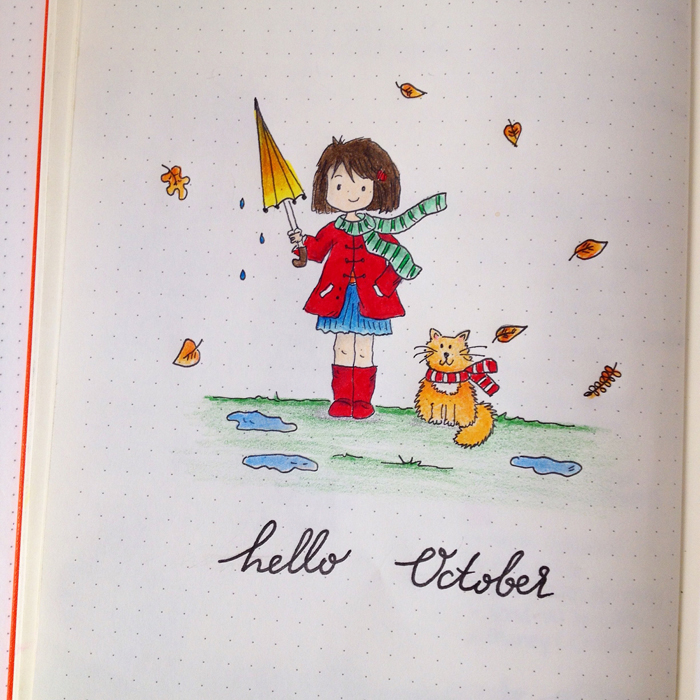
I had a lot of fun making the first page of the month. I wanted to do something different and in the end I came up with these two characters. The cat reminds me of Hercules - my previous cat that I miss so much...
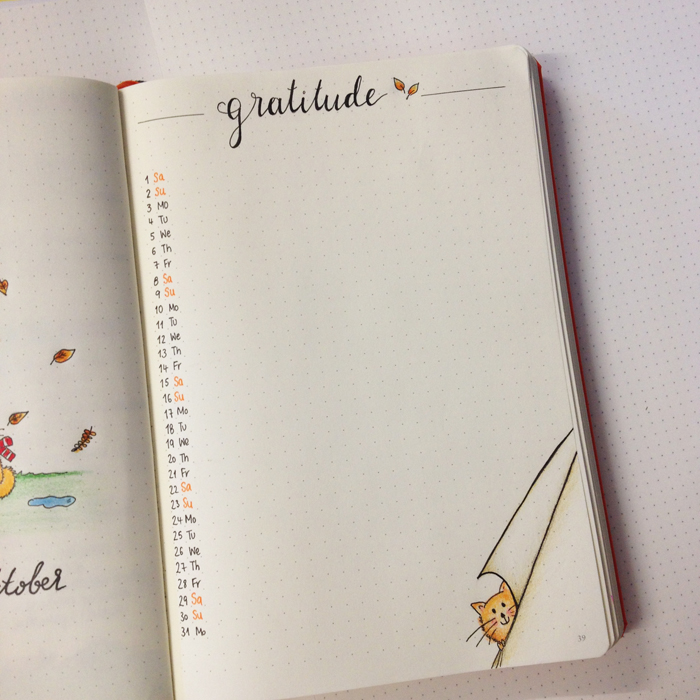
The next page is my Gratitude page that I always include in every month's set up. It keeps me grounded and helps me focus on the most important things during the day.
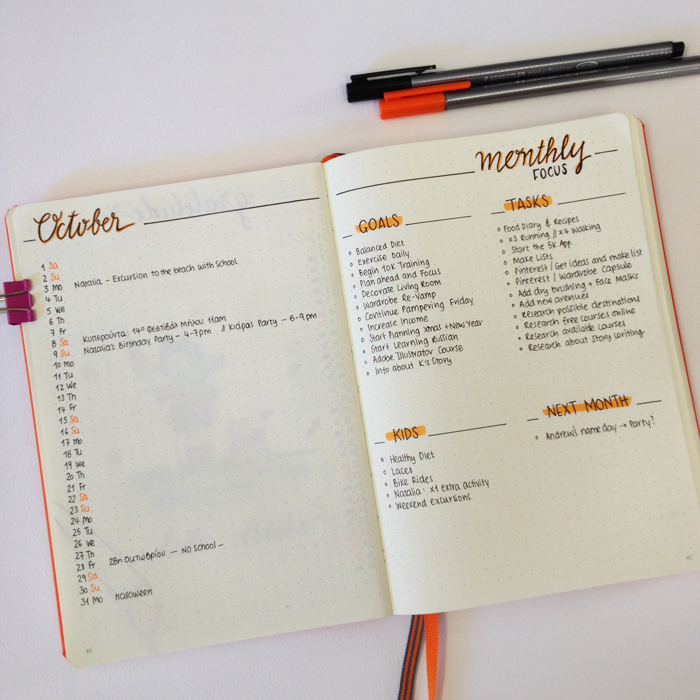
Moving further, the next page is my month at a glance, where I write all my appointments, events, birthdays and generally any important day I need to remember. On the right page is my monthly focus. Here I write any goals, tasks and projects that I need to address and do during this month. I tried to keep things simple and minimal for these two pages.
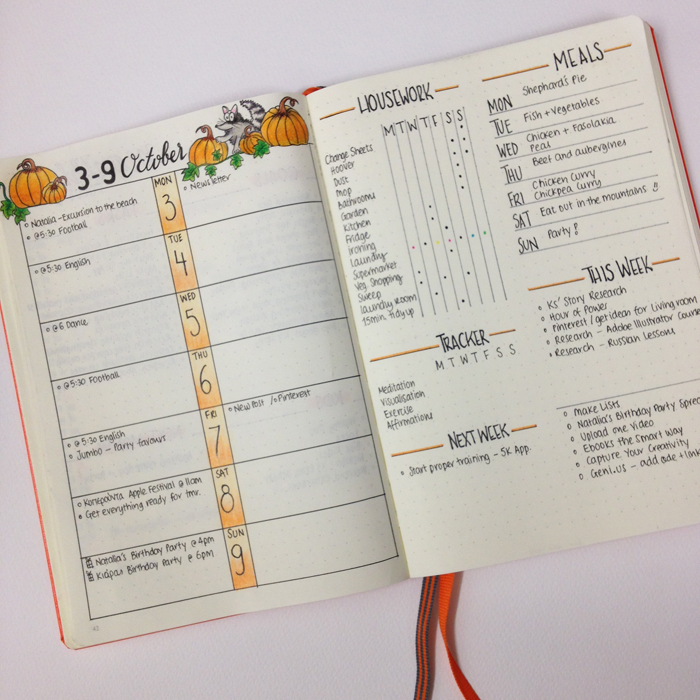
The last page for October is my weekly spread for the first week of the month. I really like this spread - it's very practical and functional and keeps me very focused. You can find a printable of a similar spread in the Resources Library. To get access to it and to many other printables, you just have to join my Newsletter.
So, there you have it. That's how I set up my bullet journal for October. What changes did you make this month and what did you keep the same? Let me know in the comments below.
Have a nice day ;)


40 Weekly Spread Ideas for your Bullet Journal
After the unbelievable popularity of my 2 previous posts with weekly spread ideas (here and here), I thought I'll make another one with even more layouts for you. I admit it, I am collecting weekly spread layouts constantly!!! I keep on changing my weekly spread all the time, trying to find the one that is just perfect. And I thing that I've found it (or that at least I'm very very close!).
And that's the beauty of bullet journaling. You can take parts of spreads, change things around and adjust them to your own needs, play with shapes and sizes and most importantly - have fun! With time, you'll find the ideal spreads that work for you.
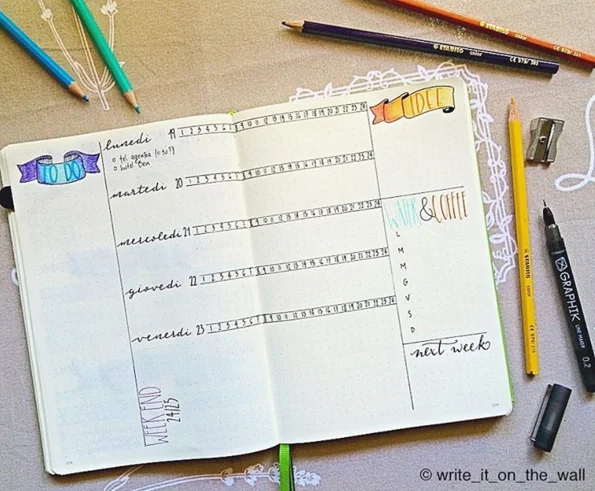
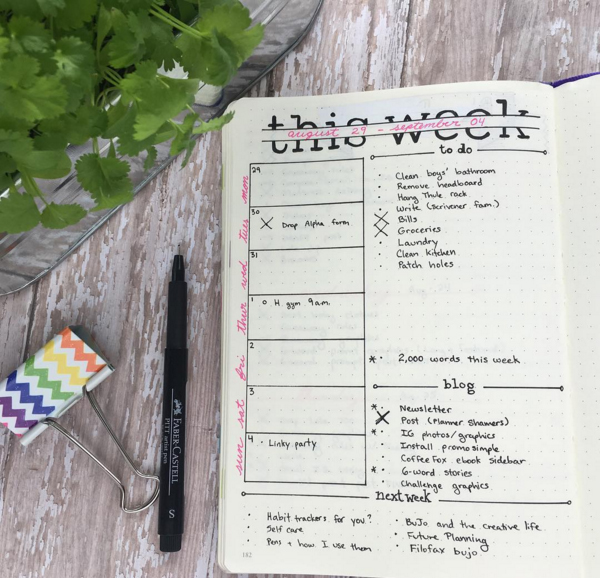
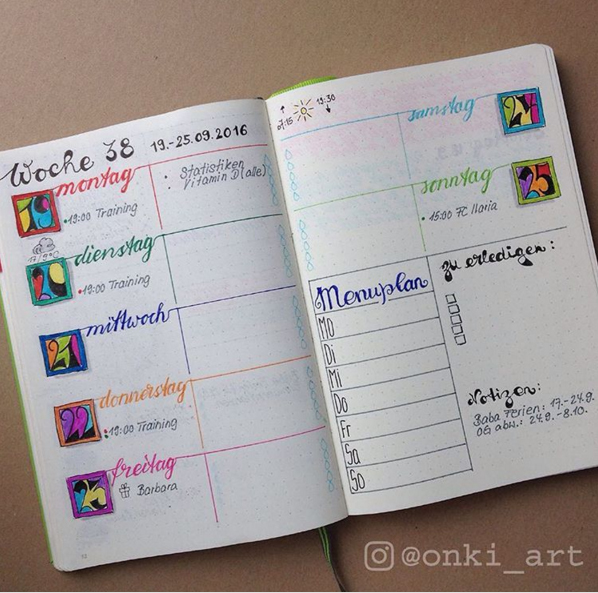
Here are some examples of my own and of other talented fellow bullet journalists, for you to get some ideas. So make yourself a cup of coffee (or tea) and let's get inspired :)

After the unbelievable popularity of my 2 previous posts with weekly spread ideas (here and here), I thought I'll make another one with even more layouts for you. I admit it, I am collecting weekly spread layouts constantly!!! I keep on changing my weekly spread all the time, trying to find the one that is just perfect. And I thing that I've found it (or that at least I'm very very close!).
And that's the beauty of bullet journaling. You can take parts of spreads, change things around and adjust them to your own needs, play with shapes and sizes and most importantly - have fun! With time, you'll find the ideal spreads that work for you.
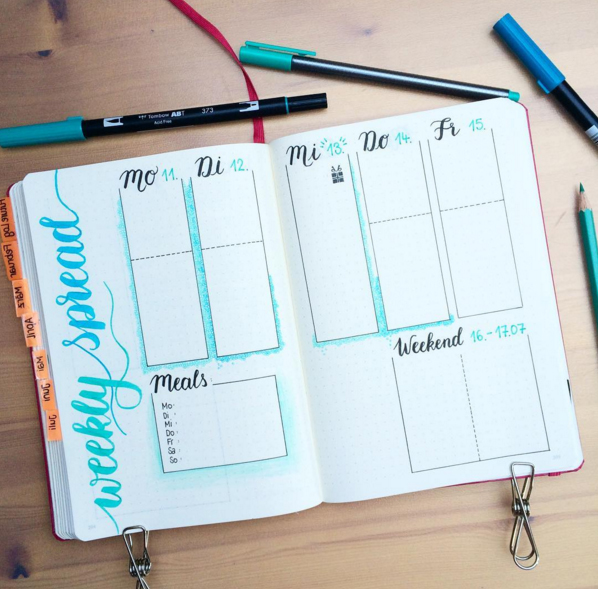
Here are some examples of my own and of other talented fellow bullet journalists, for you to get some ideas. So make yourself a cup of coffee (or tea) and let's get inspired :)

I've created a FREE Printable of the above weekly spread for you :)
JOIN THE GANG!
Subscribe now to my Newsletter to download the FREE Printable.
Plus get access to the Resources Library!


Creative Journaling Course
Step-by-step video lessons that will help you set up and organise your life in your journal.
There is definitely some amazing talent in the bullet journal community that I'm so glad and grateful to be a part of. Please mention in the comments below any bullet journalist that has inspired you :)

How to create a Level 10 Life spread in your bullet journal
During the past week, I've been trying to figure out how to set up my very new and very orange bullet journal. So, I went through my previous one, and noted down all the spreads that I wanted to include in the new one as well. Even though some people might find that it's too much of a hassle to re-do some spreads when changing their journal, me personally I really like this procedure, because you also get the chance this way to do your spreads a bit differently, correct any mistakes and get inspired by all the amazing people in this community :)
Amongst the spreads that I decided to re-do in my new bujo, is the Level 10 Life spread.

During the past week, I've been trying to figure out how to set up my very new and very orange bullet journal. So, I went through my previous one, and noted down all the spreads that I wanted to include in the new one as well. Even though some people might find that it's too much of a hassle to re-do some spreads when changing their journal, me personally I really like this procedure, because you also get the chance this way to do your spreads a bit differently, correct any mistakes and get inspired by all the amazing people in this community :)
Amongst the spreads that I decided to re-do in my new bujo, is the Level 10 Life spread. I first saw this spread in Kara's website where she was talking about it, and after that I read about it in Hal Elrod's book "Miracle Morning". ( I have a post where I talk about the Miracle Morning and the 30-Day Transformation Challenge here if you want more information). This spread consists of two parts:
- Level 10 Life - an assessment your life as it is now in 10 different areas.
- Lefel 10 Goals - getting clear on your ideal conditions for each of those areas and establishing the ways and habits that will help you get there.
My previous spread looked like this:

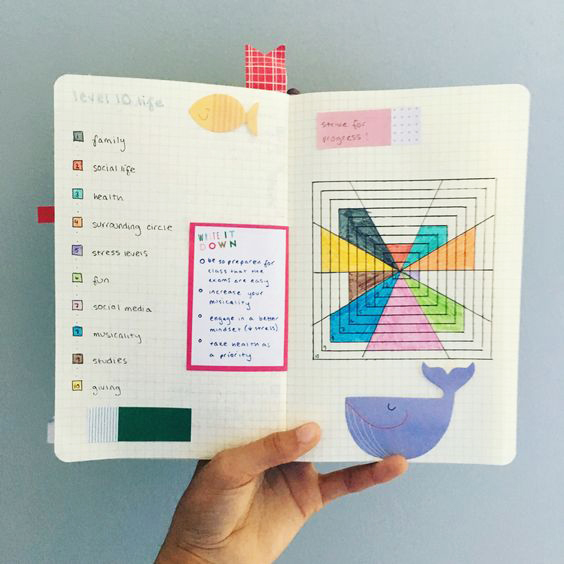
Even though I liked the way it looked, I wanted to try something different this time. While searching online, I saw how Kara re-did hers as well as this image by the lovely Clarissa, and decided to combine the two and create something new.

Instead of using the wheel in order to assess the different areas of my life, this time I created a graph with cubes, which afterwards I coloured in, depending on how well I thought I'm doing in each one, with different colours.

Then I filled the next page with the steps and ways that I'm planning to make each area of my life better. And this is the end result:
I am really pleased with how it looks, and that's one more spread finished in my new Bujo!
While searching online for inspiration, I found various ways you can do the Level 10 Life, like the following:


** I couldn't find to who this image belongs to. If you know, please let me know in the comments below, so that I can give credit **

Creative Journaling Course
Step-by-step video lessons that will help you set up and organise your life in your journal.
Have you tried the Level 10 Life?
Bullet Journal: My September Set Up
After an amazing summer, September is here and I couldn't be happier! I've got a brand new Bullet Journal to play with (I've chosen the orange one this time) and a new monthly set up. :)
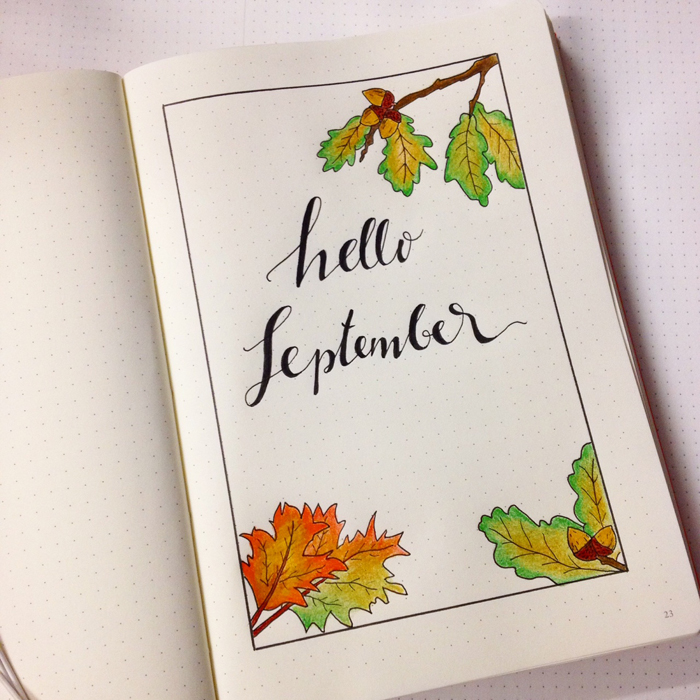
This month I started my layout with a page to welcome the new month. I chose an autumn theme with leaves and acorns (even though it's burning hot here in Cyprus!).

After an amazing summer, September is here and I couldn't be happier! I've got a brand new Bullet Journal to play with (I've chosen the orange one this time) and a new monthly set up. :)
This month I started my layout with a page to welcome the new month. I chose an autumn theme with leaves and acorns (even though it's burning hot here in Cyprus!).
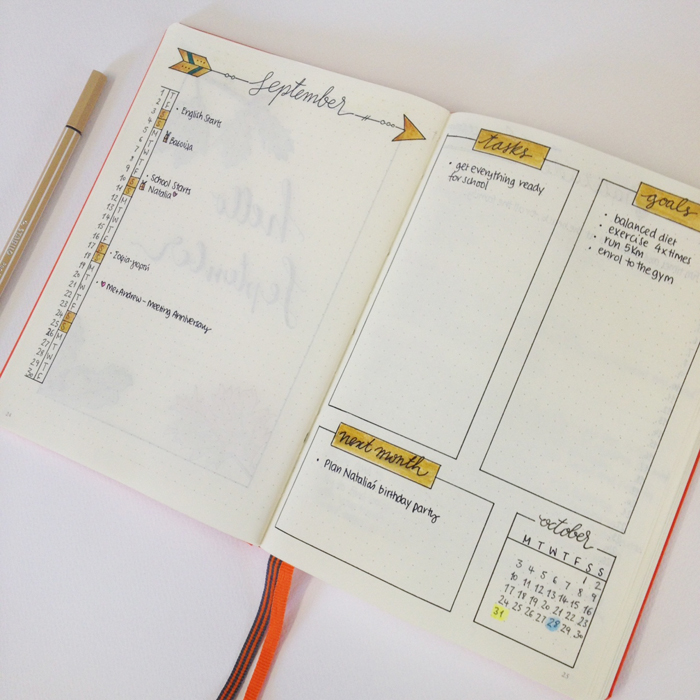
For my monthly spread, I decided to go back to one of my favourites that I used in the past. On the left page is a monthly log, where I note down any birthdays, holidays, events or appointments planned for this month, and on the right page I write all the tasks I need to do and all the goals I want to achieve this month (I'm still thinking through all the things I want to add in this section, so it looks a bit bare right now). At the bottom of the page I made a section for next month's plans, as well as an October mini calendar.
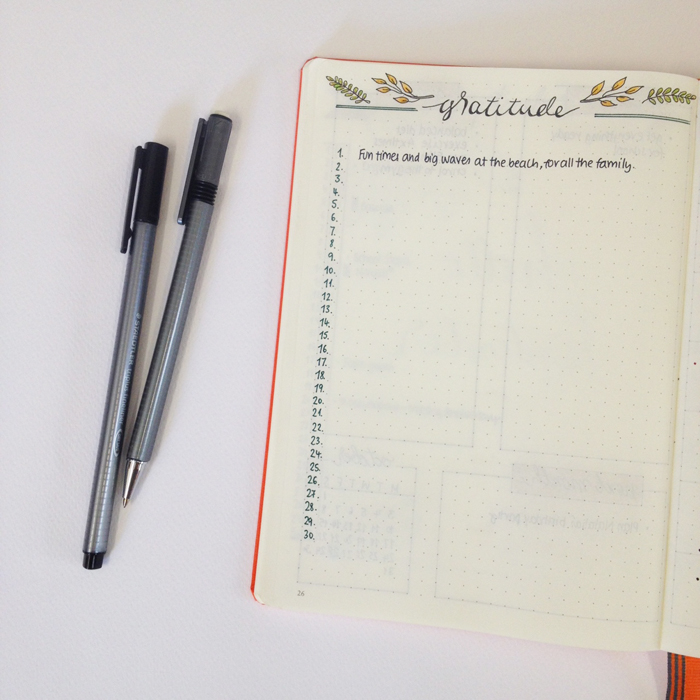
Moving to the next page, I started again my gratitude spread. I loved it when I was doing that before, but during the summer I just didn't have the time for it. But now that I'm back, I thought to add it in my September spread.
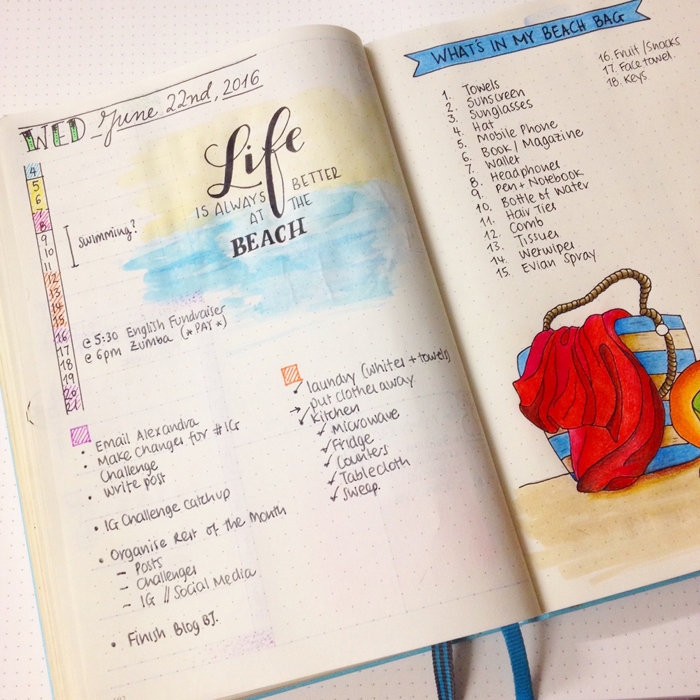
The last part of my layout for September is my weekly spread. It starts on the 5th, since I already had a weekly spread set up in my previous bullet journal for the first 4 days of the month.
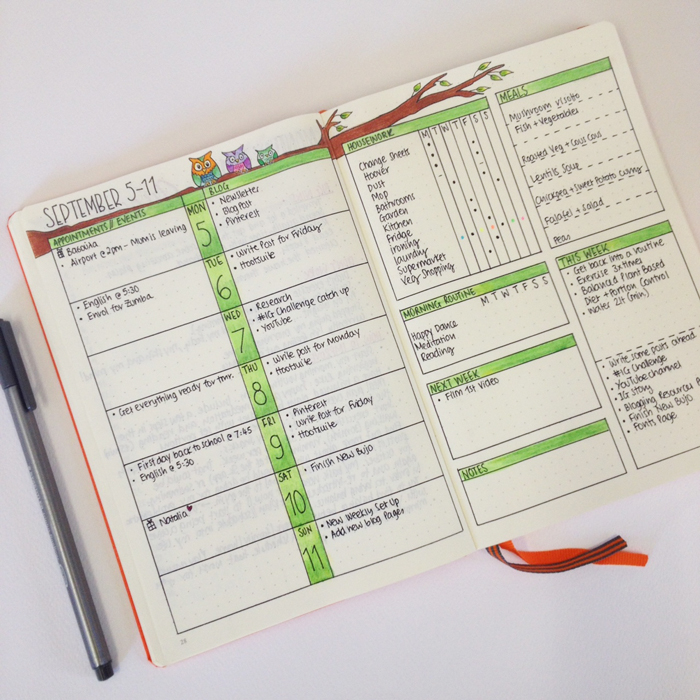
On the left page I am using a layout I had before, with two columns: one for events/appointmens and one for my blogging tasks. On the right page, I'm trying something a bit different for this week and I really hope that it works for me, cause I love the way it looks. I created a section for my housework in the form of a tracker. I was inspired by the lovely Helen @helencolebrook (don't forget to visit her website as well!).
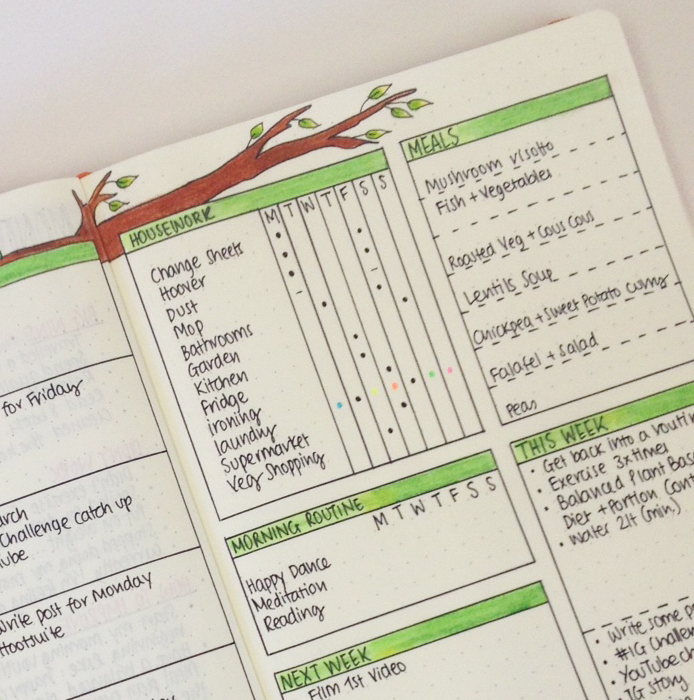
I wrote all the housework tasks for this week and created columns for each day of the week, so that it's easier visually to see what needs to be done each day. In those columns, I added some dots when these tasks should take place during the week. - is for only if it's needed and the colourful dots show me what type of laundry I need to do that day. :) Once I finish each one of the tasks, I'll simply put an X on it.
I've also included sections for my Morning Routine, that I really want to come back into, Notes, my weekly Meals as well as a section for what to do Next Week. I've also added a section for the things I want to achieve This Week - personally as well as for the blog. I love this part, because it helps me focus and plan ahead my week.
Lastly, there's always a two page spread for the Instagram #doodlewithus challenge, but right now I haven't drawn anything on it ;) If you want more information about the challenge, have a look at this post.
I love the way everything looks and I can't wait to start filling things in! Have you tried anything new in your bullet journal for this month?

Timeline Ideas for your Bullet Journal
I've mentioned before how important focus and time management is for me during my daily activities, and I've talked about all the techniques I'm using, in this post. Today I'd like to focus more on timelines (also known as time management bars), which is a great way for time management with your bullet journal.

I've mentioned before how important focus and time management is for me during my daily activities, and I've talked about all the techniques I'm using, in this post. Today I'd like to focus more on timelines (also known as time management bars), which is a great way for time management with your bullet journal.
A timeline is a graphical representation of a period of time, on which important events are marked. The way I do it, is to draw two horizontal lines above my day header and in between I write down all the hours, starting with 1am and finishing with 12am.

I can plan my day from the night before and set a specific time frame for each task that I distinguish through colour. I've created a colour coding system that works for me, and so now I know just by looking at it where I've allocated my time during the day.
Of course you can play around with the timeline and make it work for you. You can add less hours and make it smaller.

You can incorporate it in your daily header like the following examples:


You can also change it's shape (like I did into a clock), or you can separate the time boxes and make them bigger.

You can have one timeline vertically in your daily spread.
Or you can choose to separate the timeline into three columns to fit the desing of your page, like @bujotrain

You can incorporate it in your weekly spread like Camilla from @creative.pine.apple does.
You can separate the timeline into two lines: the first being an AM and the second a PM like @breeeberry.

You can choose a different design for your timeline, like the one from @honeyrozes

Similar designs like the above from Cristina @shilen.qc

From Camilla @creative.pine.apple
From Roz @rozmakesplans


and the Spiraldex like Camilla from @creative.pine.apple uses in her bullet journal.


Creative Journaling Course
Step by step video lessons that will help you set up and organise your life in your journal.
Do you use a timeline in your bullet journal? Which type of the above do you prefer?


Dutch Door Ideas for your Bullet Journal
I found out about the 'Dutch door' system for your bullet journal when I watched @Alexandra_Plans's video on YouTube. After that I just knew I had to try it out!
The 'Dutch door' system is a way of creating a weekly spread in your bullet journal, where part of the page remains stationary and the other part is normal and you can turn the pages as usual. This system can be applied horizontally or vertically. The difference is that with the horizontal you have to tear off part of the pages, while with the vertical way you just have to fold a page in half vertically and move it around as needed.

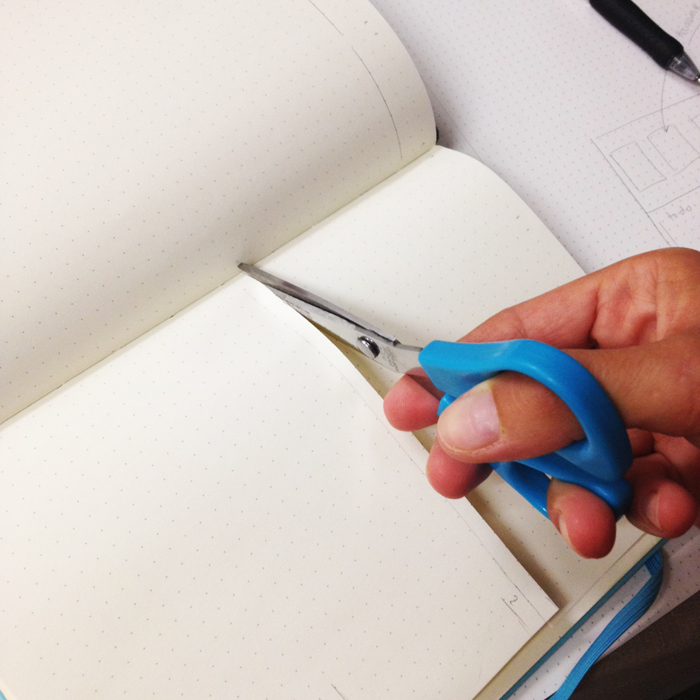
I decided to try the horizontal way, because I believe it's gonna work better for me (and I was feeling very daring on that day!!!). The first thing you need to do is to plan ahead how you'll use the space on the pages and measure everything in detail, because once you've cut those pages there's no turning back!!!
When you're ready, cut with a pair of scissors horizontally the pages where you've marked them.
Then hold the cut pages and pull really carefully towards you. This can be a bit tricky and nerve racking but just be patient and carefull and you'll do it ;)
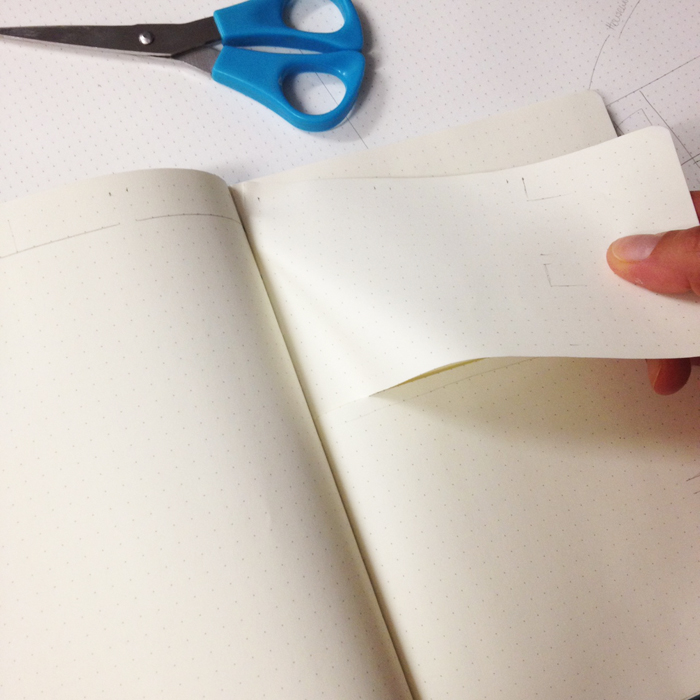
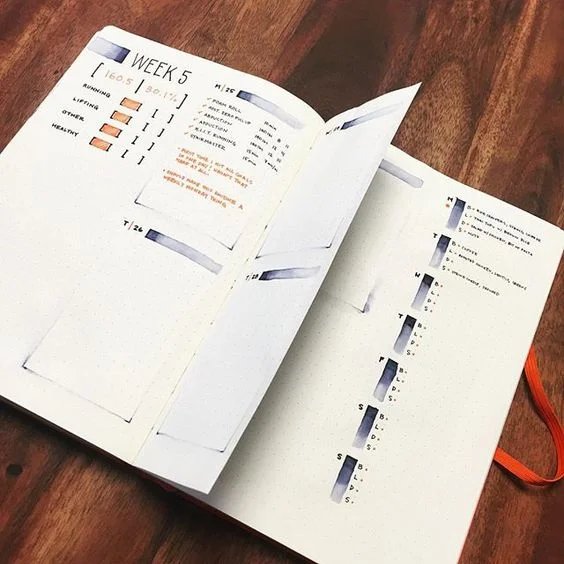
After that just go ahead and fill in the pages as you've plant from the beginning. You may also add some washi tape at the top of the pages you've cut. I decided to leave it as it is and here is the end result:

Dutch door ideas for your bullet journal - www.christina77star.net

To get even more inspired, here are some examples of the dutch door system by some amazing bullet journalists:


Cristina's design from @My.Life.In.A.Bullet is absolutely stunning!!! You just have to check her Instagram account out! You have to!!!

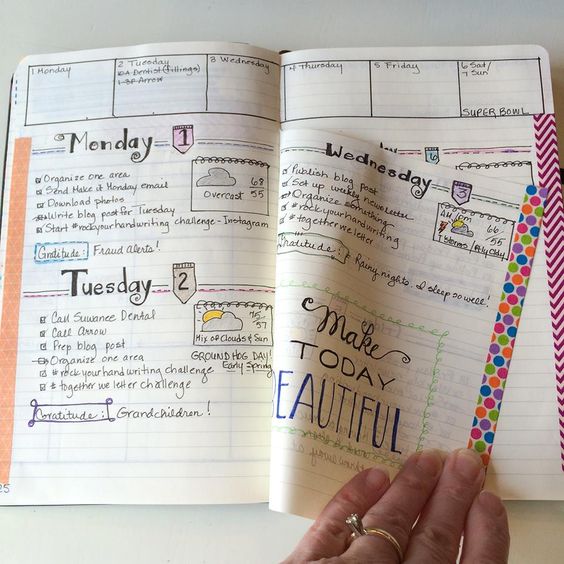
I'm in love with the polka dots and Marissa's layout!!! She has more 'dutch door' weekly spreads in her Instagram account @choosingbliss.

I love how Victoire from 'Vik's Studyblr' has used the space in the pages. Check her blog out for more inspiration.

If you are a busy mum, then the vertical dutch door system for your bullet journal is what you need. See how Evie and Sarah from www.evieandsarah.com make use of it! Simply genius!!!


Kimberly's layout looks great and I love the colours she's used!!! At her website 'Sublime Reflection' you can find some amazing inspiration for your bullet journal.
I just love Karen's style from @beastmode.bujo. Make sure you check her out.
For some of the above pictures I couldn't find the owner to give credit, so I just added the link I found the picture at. If this is one of your pictures, or you know who created these spreads please let me know in the comments below so that I can give them credit. ;)

>> Here are my favourite Resources that I use every day with my Bullet Journal.
Click to find out what I love to use.
I absolutely love the way it looks and the functionality of it and I'll be definitely using this technique again for sure! Have you tried the dutch door system? If you have make sure you share with us in the comments below ;)
