

Bullet Journal: My July Setup
One more month is almost finished. I'm so excited that July is just around the corner, because we're going on vacation!!! Yay!!!! I really REALLY need some time off! I had some good and some bad news during the last month, with lots of ups and downs and I have to say that I'm in dire need of a break, to recharge my batteries and find balance both psychologically and physically.
As you'll see, I haven't changed much during this month. I try to keep things simple and easy. So, let's jump right in!
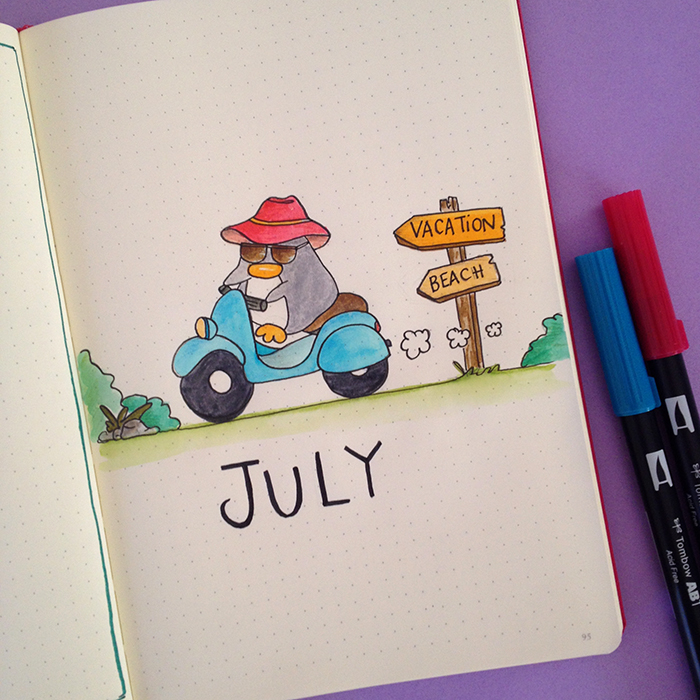
As always, the little penguin makes his appearance in the first page of July. You can clearly see that he feels the same way like me and needs some vacations too!

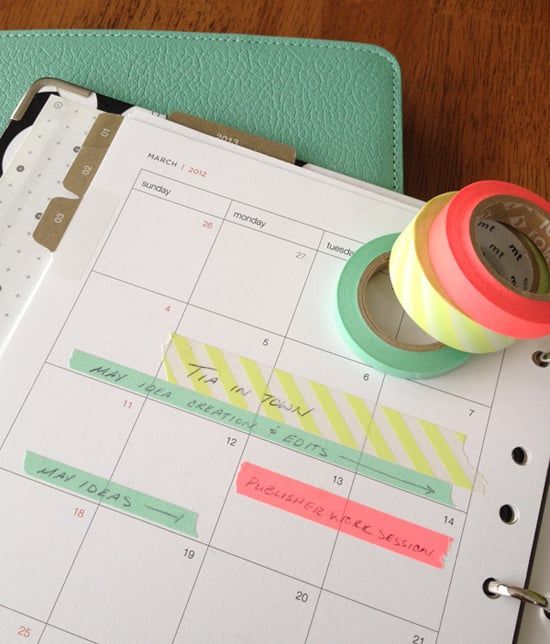
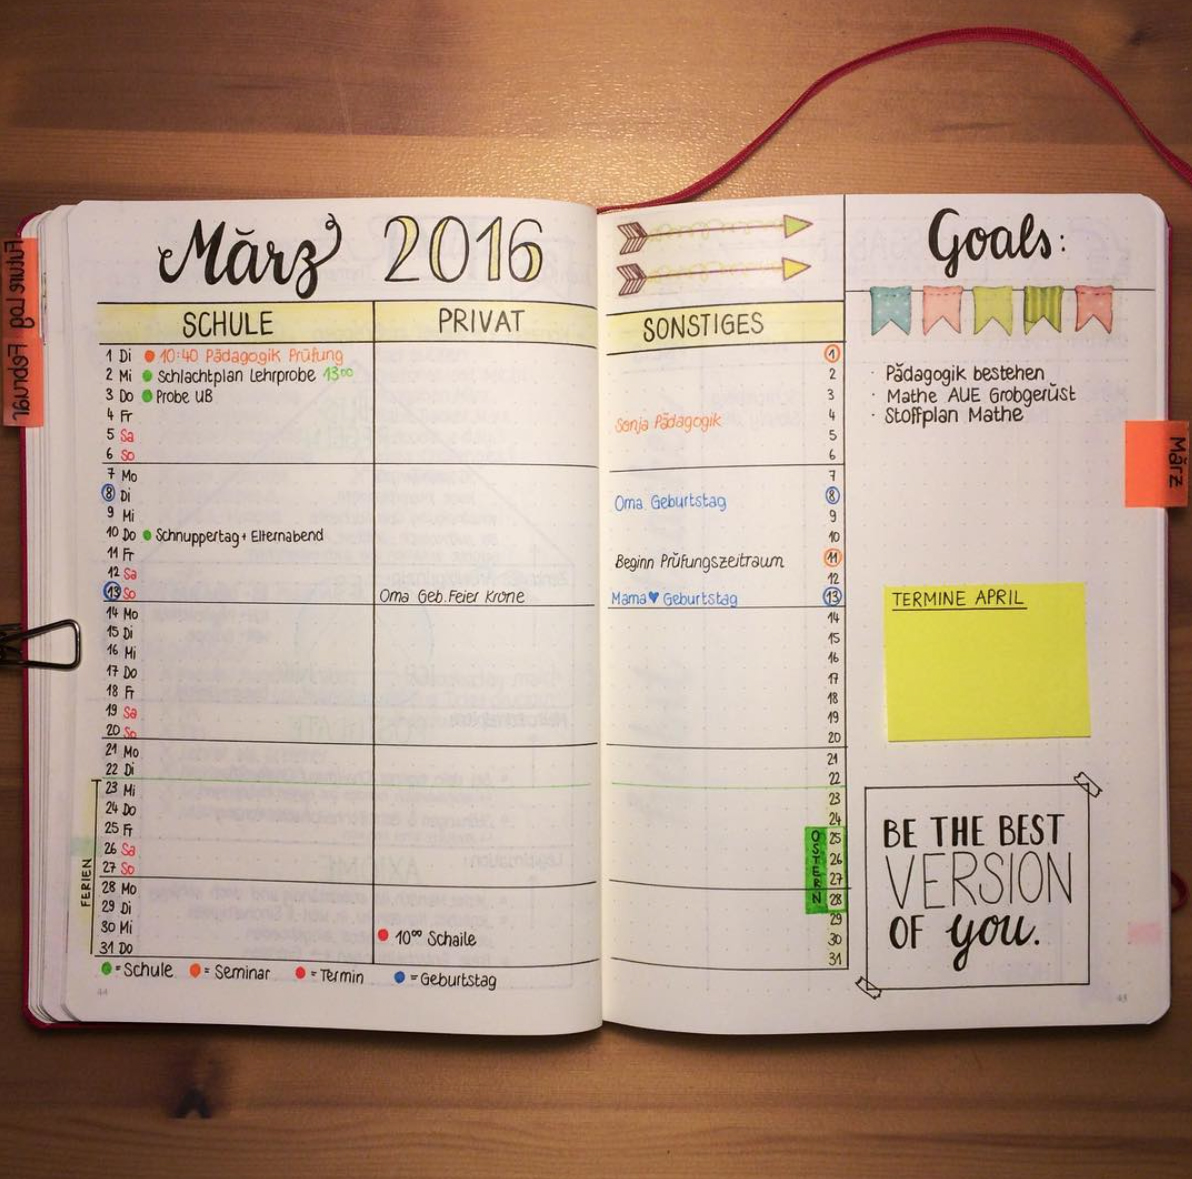
I completely changed my month at a glance. Instead of a two-page calendar I opted for a one page one, where I separate my personal and work tasks/events with two columns. That way I can easily see what's happening and what I need to do, without mixing up things and confusing myself.

The right-hand page is separated in the categories: tasks, goals and next month, with boxes.

I've also included a mini calendar for August, because I want to prepare for some already scheduled events and pre-plan other things in advance. I think that this monthly spread turned out pretty good, and it looks quite simple and functional.

Last month, I decided to include a 'brain dump' page in every monthly set up. It really helped me focus and actually finish most of the tasks that I wrote on that page during June. So, since it worked so well, I brought it bac for this month too. ;)

I chose a simple layout for my gratitude page this month. Again I tried to keep it simple and functional.

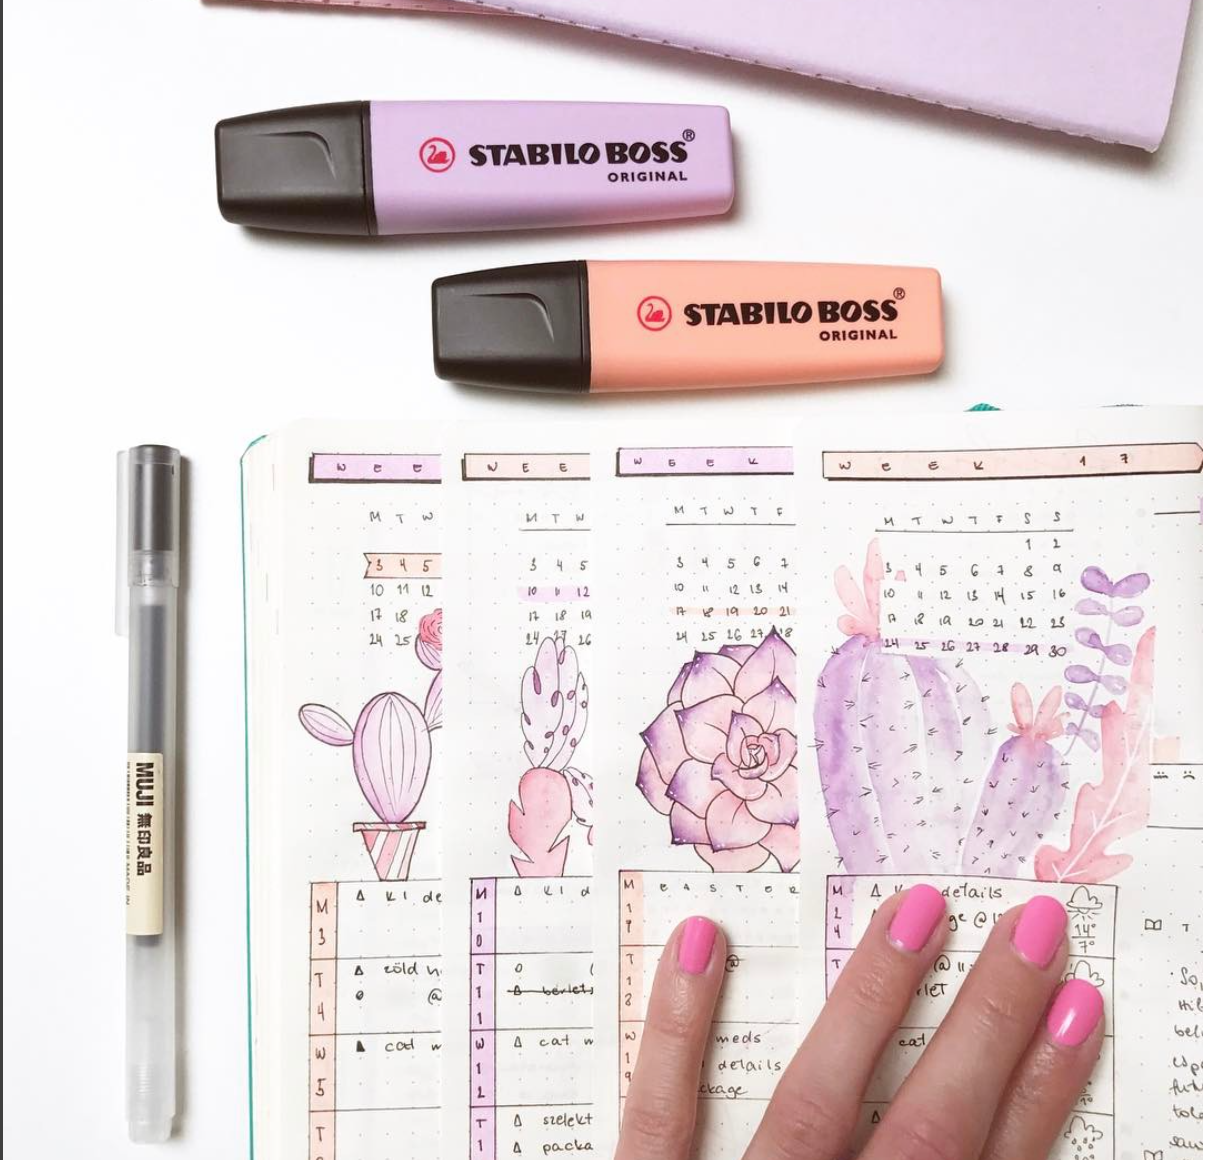
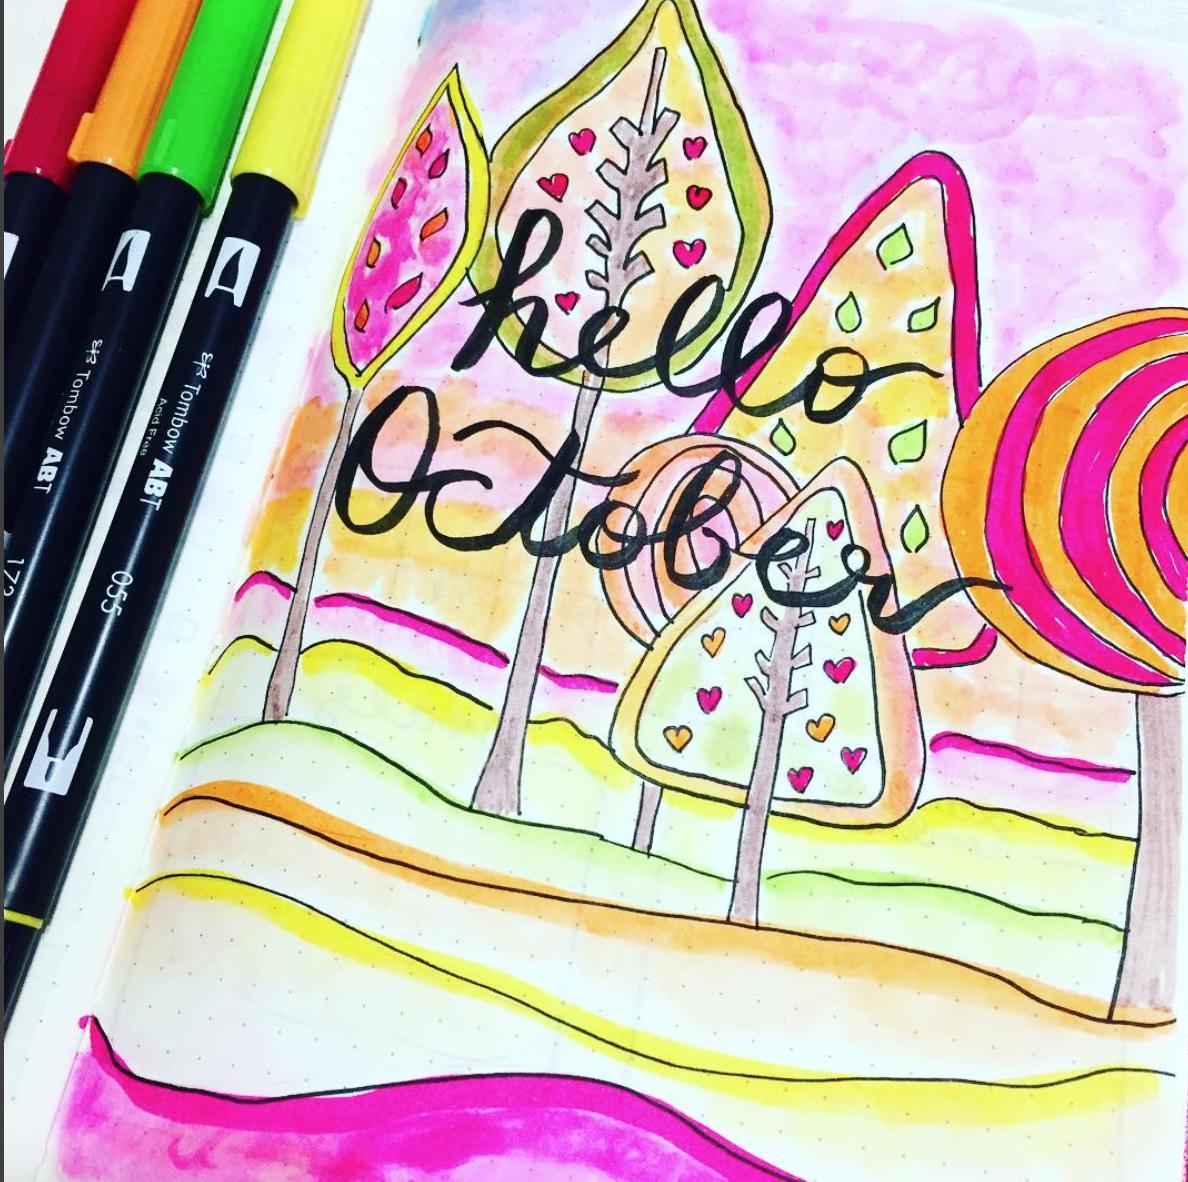
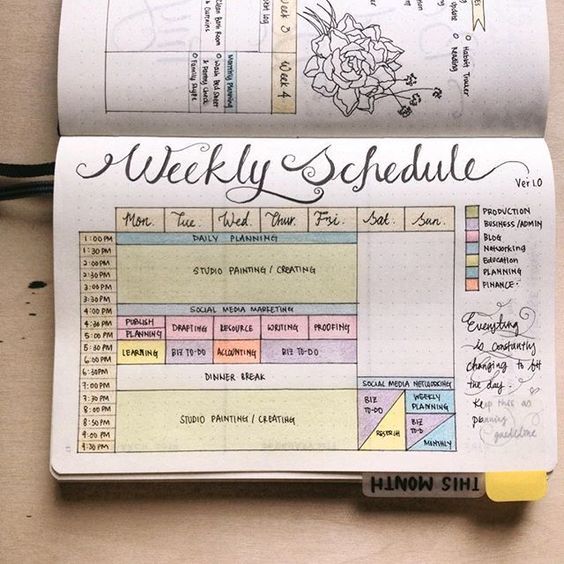
And lastly, I created my first weekly for July so that I'm prepared. I LOVE how the colours turned out and I can't wait to fill it in :)
So there you have it. That's how I set up July in my bullet journal. I can't wait to see how everyone else has set up their month in their bujo. Leave a comment below and tell me which spreads have you included in your July setup?


Daily Plan Bar for your Bullet Journal
For me, time management is one of the most important things in my daily planning. I tend to get distracted left, right and centre with the result of not finishing my tasks and projects. Keeping these distractions to a minimum and finding things that can help me to focus on the tasks at hand are imperative for me. In today’s postI’m going to talk about something that I've been adding to my daily spreads lately and which helps me to manage my time even better.
For me, time management is one of the most important things in my daily planning. I tend to get distracted left, right and centre with the result of not finishing my tasks and projects. Keeping these distractions to a minimum and finding things that can help me to focus on the tasks at hand are imperative for me. In today’s postI’m going to talk about something that I've been adding to my daily spreads lately and which helps me to manage my time even better.
The new thing that i’ve been implementing in my daily planning is called ‘daily plan bar’. It was created by Mike Rohde who was in turn inspired by Bill Westerman.
What is a daily plan bar?
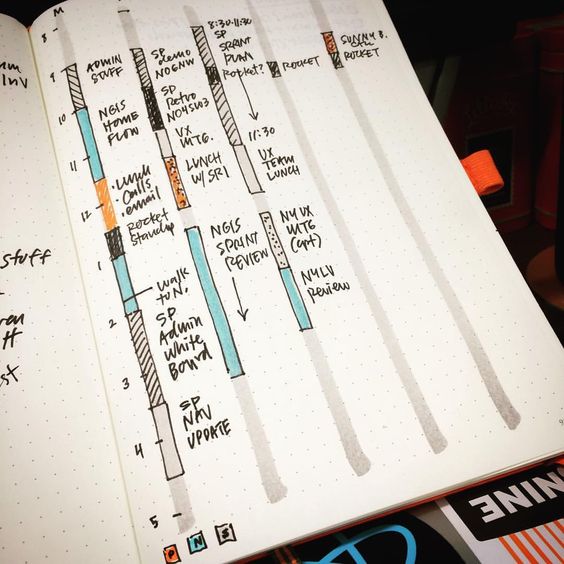
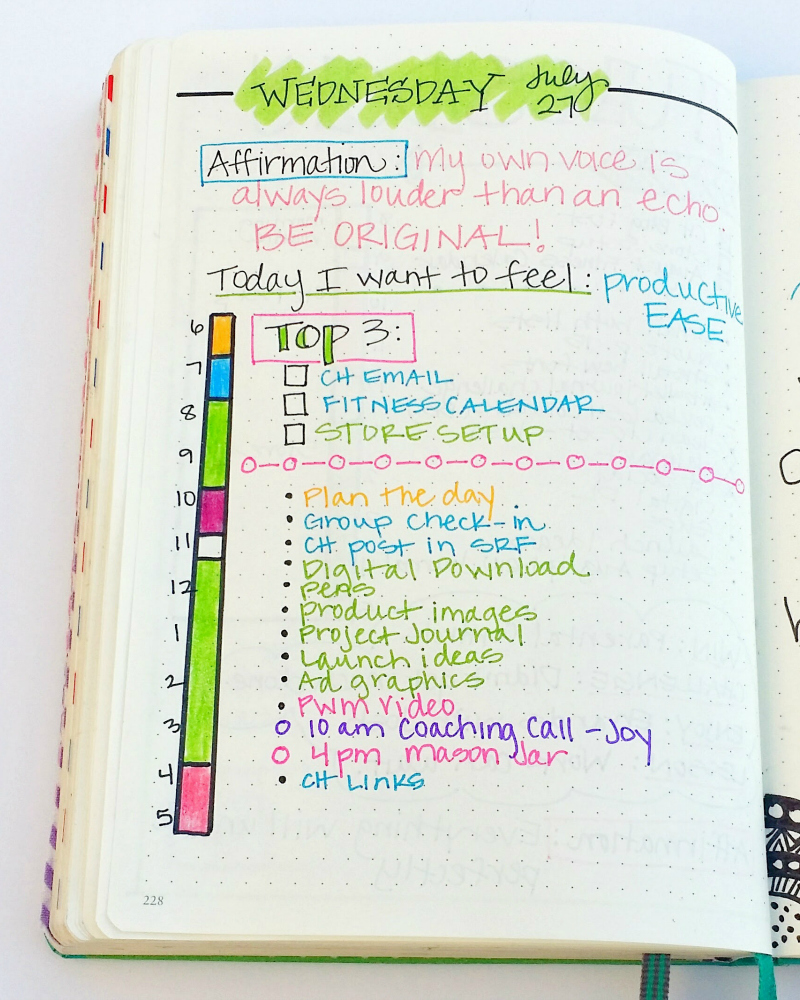
It mainly is a vertical bar where you note the times during the day and then you go and either colour or sketch parts of it that you allocate for different events or tasks. This way you are blocking out time during the day to do a certain things.
It looks and sounds like a timeline but it is a vertical version of it and it’s also more detailed.
How to create it
On the page where you create your daily spread create your daily header as usual and on the left hand side create a vertical bar by drawing two vertical lines or by filling in the space with I highlighter like I did.

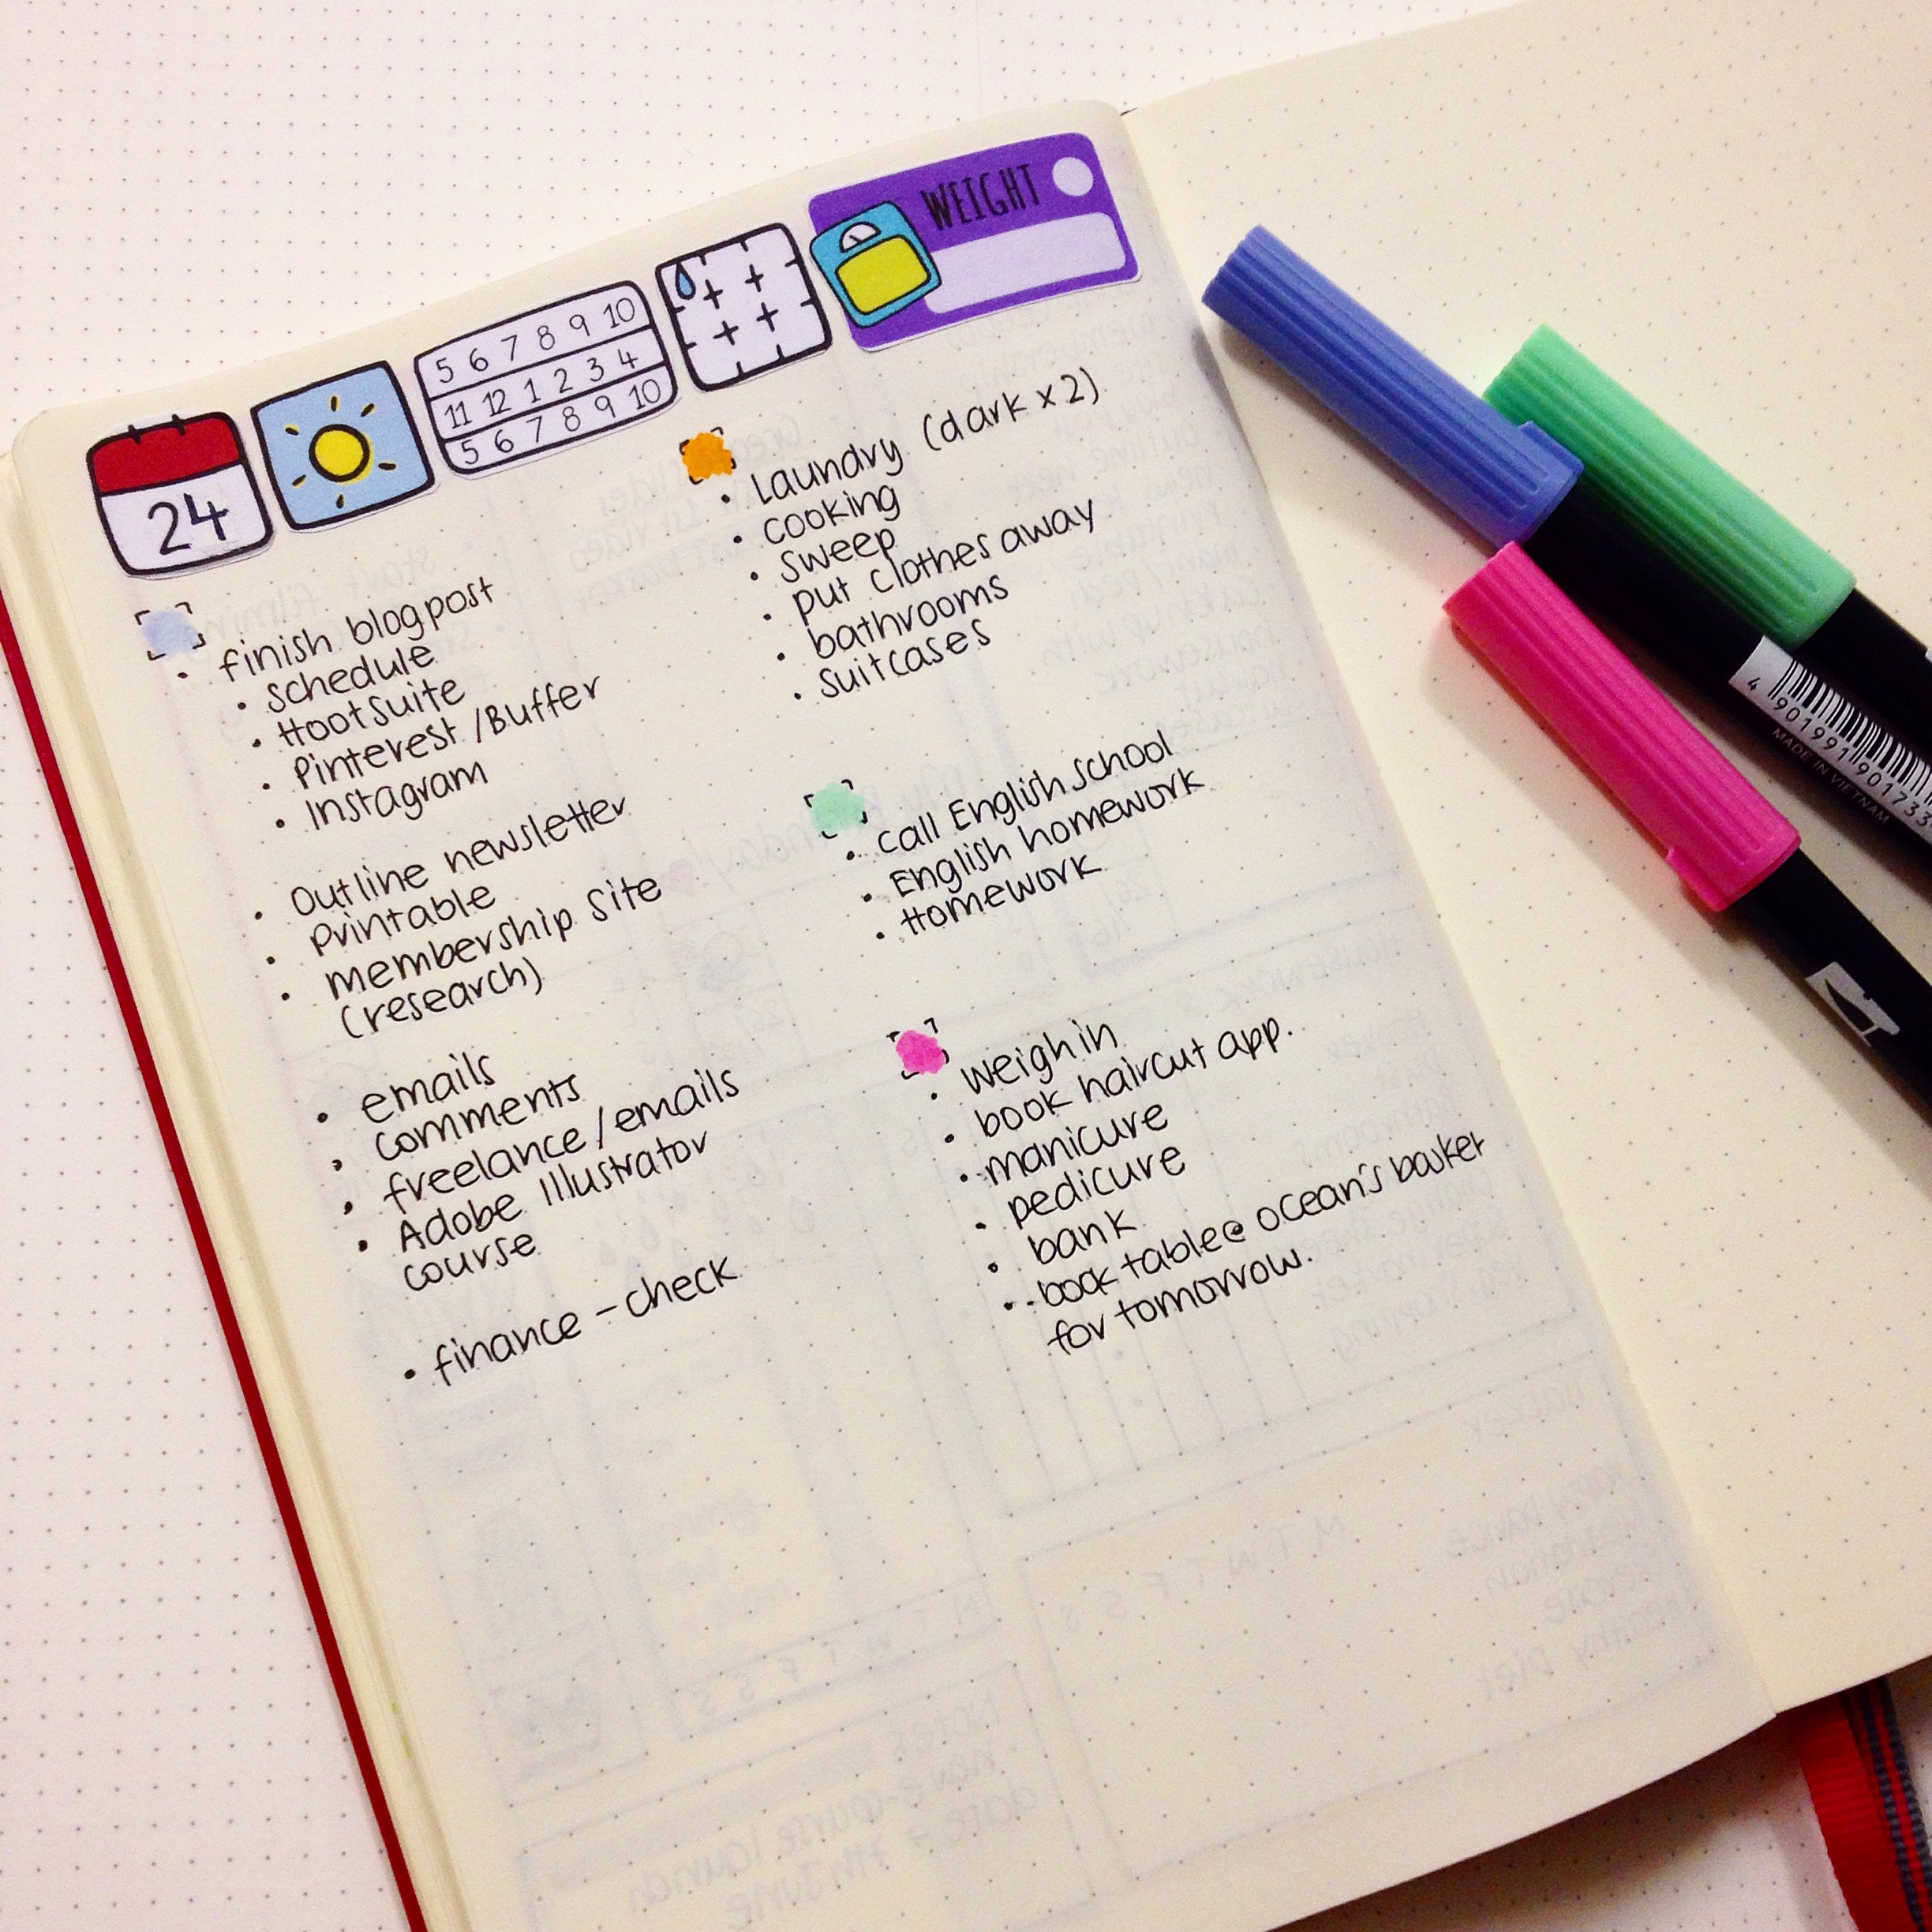
It’s up to you from what time you’ll start your daily plan bar. For example, Mike Rohde starts his from 8 o’clock (picture below), whereas I prefer to start my day way earlier and so my bar starts from 6am.
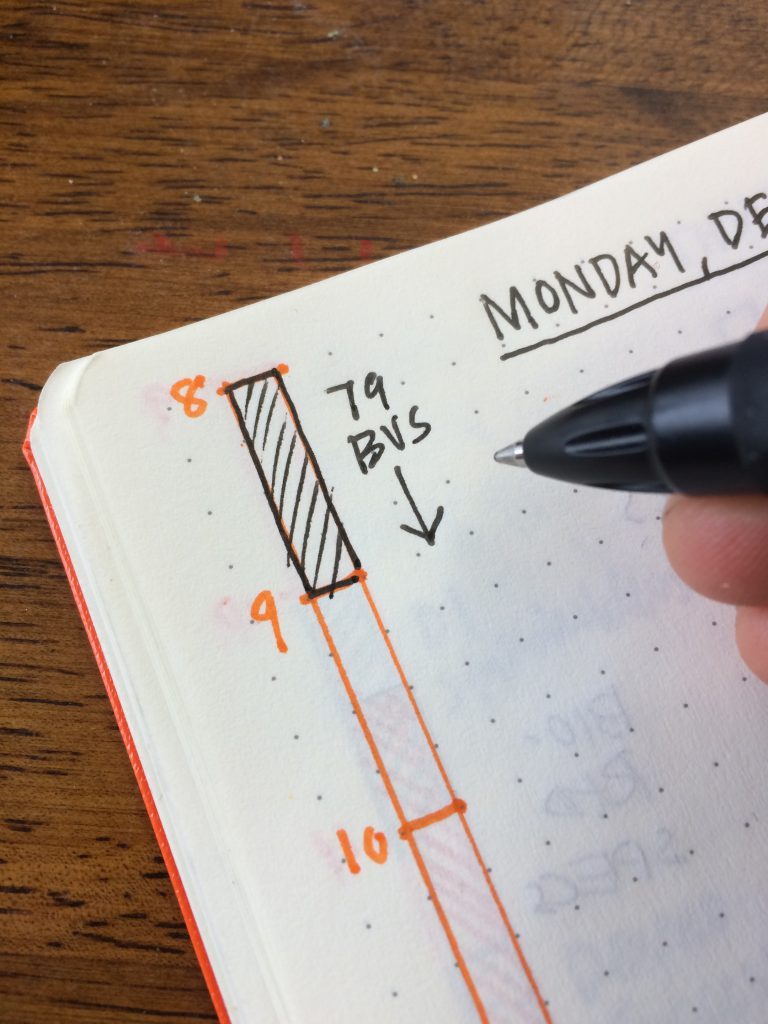
It’s also up to you how much space you’ll leave in-between the hours.


As you can see in the pictures above, on one day I chose to represent each hour with a square on the page, whereas on the other picture you can see that each hour has three squares. Also, Mike Rohde has 4 squares for each hour. The space you leave between each hour depends on if you have lots of things to do and note within that hour. Having more space means that you can mark mark time blocks of 15 or 30 mins, and that you can be more detailed with the time you allocate for each task. And even though you can still mark the 30min time block with the 1 square space between the hours, (by colouring half a square as you can see in the picture above), it doesn’t give you enough space to write in-between.

Stickers used from my Etsy store
Once you’ve set up your daily plan bar, then you can start time blocking and mapping your day ahead. You can choose to use colour coding to time block and separate the different tasks and events, or you can use shapes and doodles to do that.

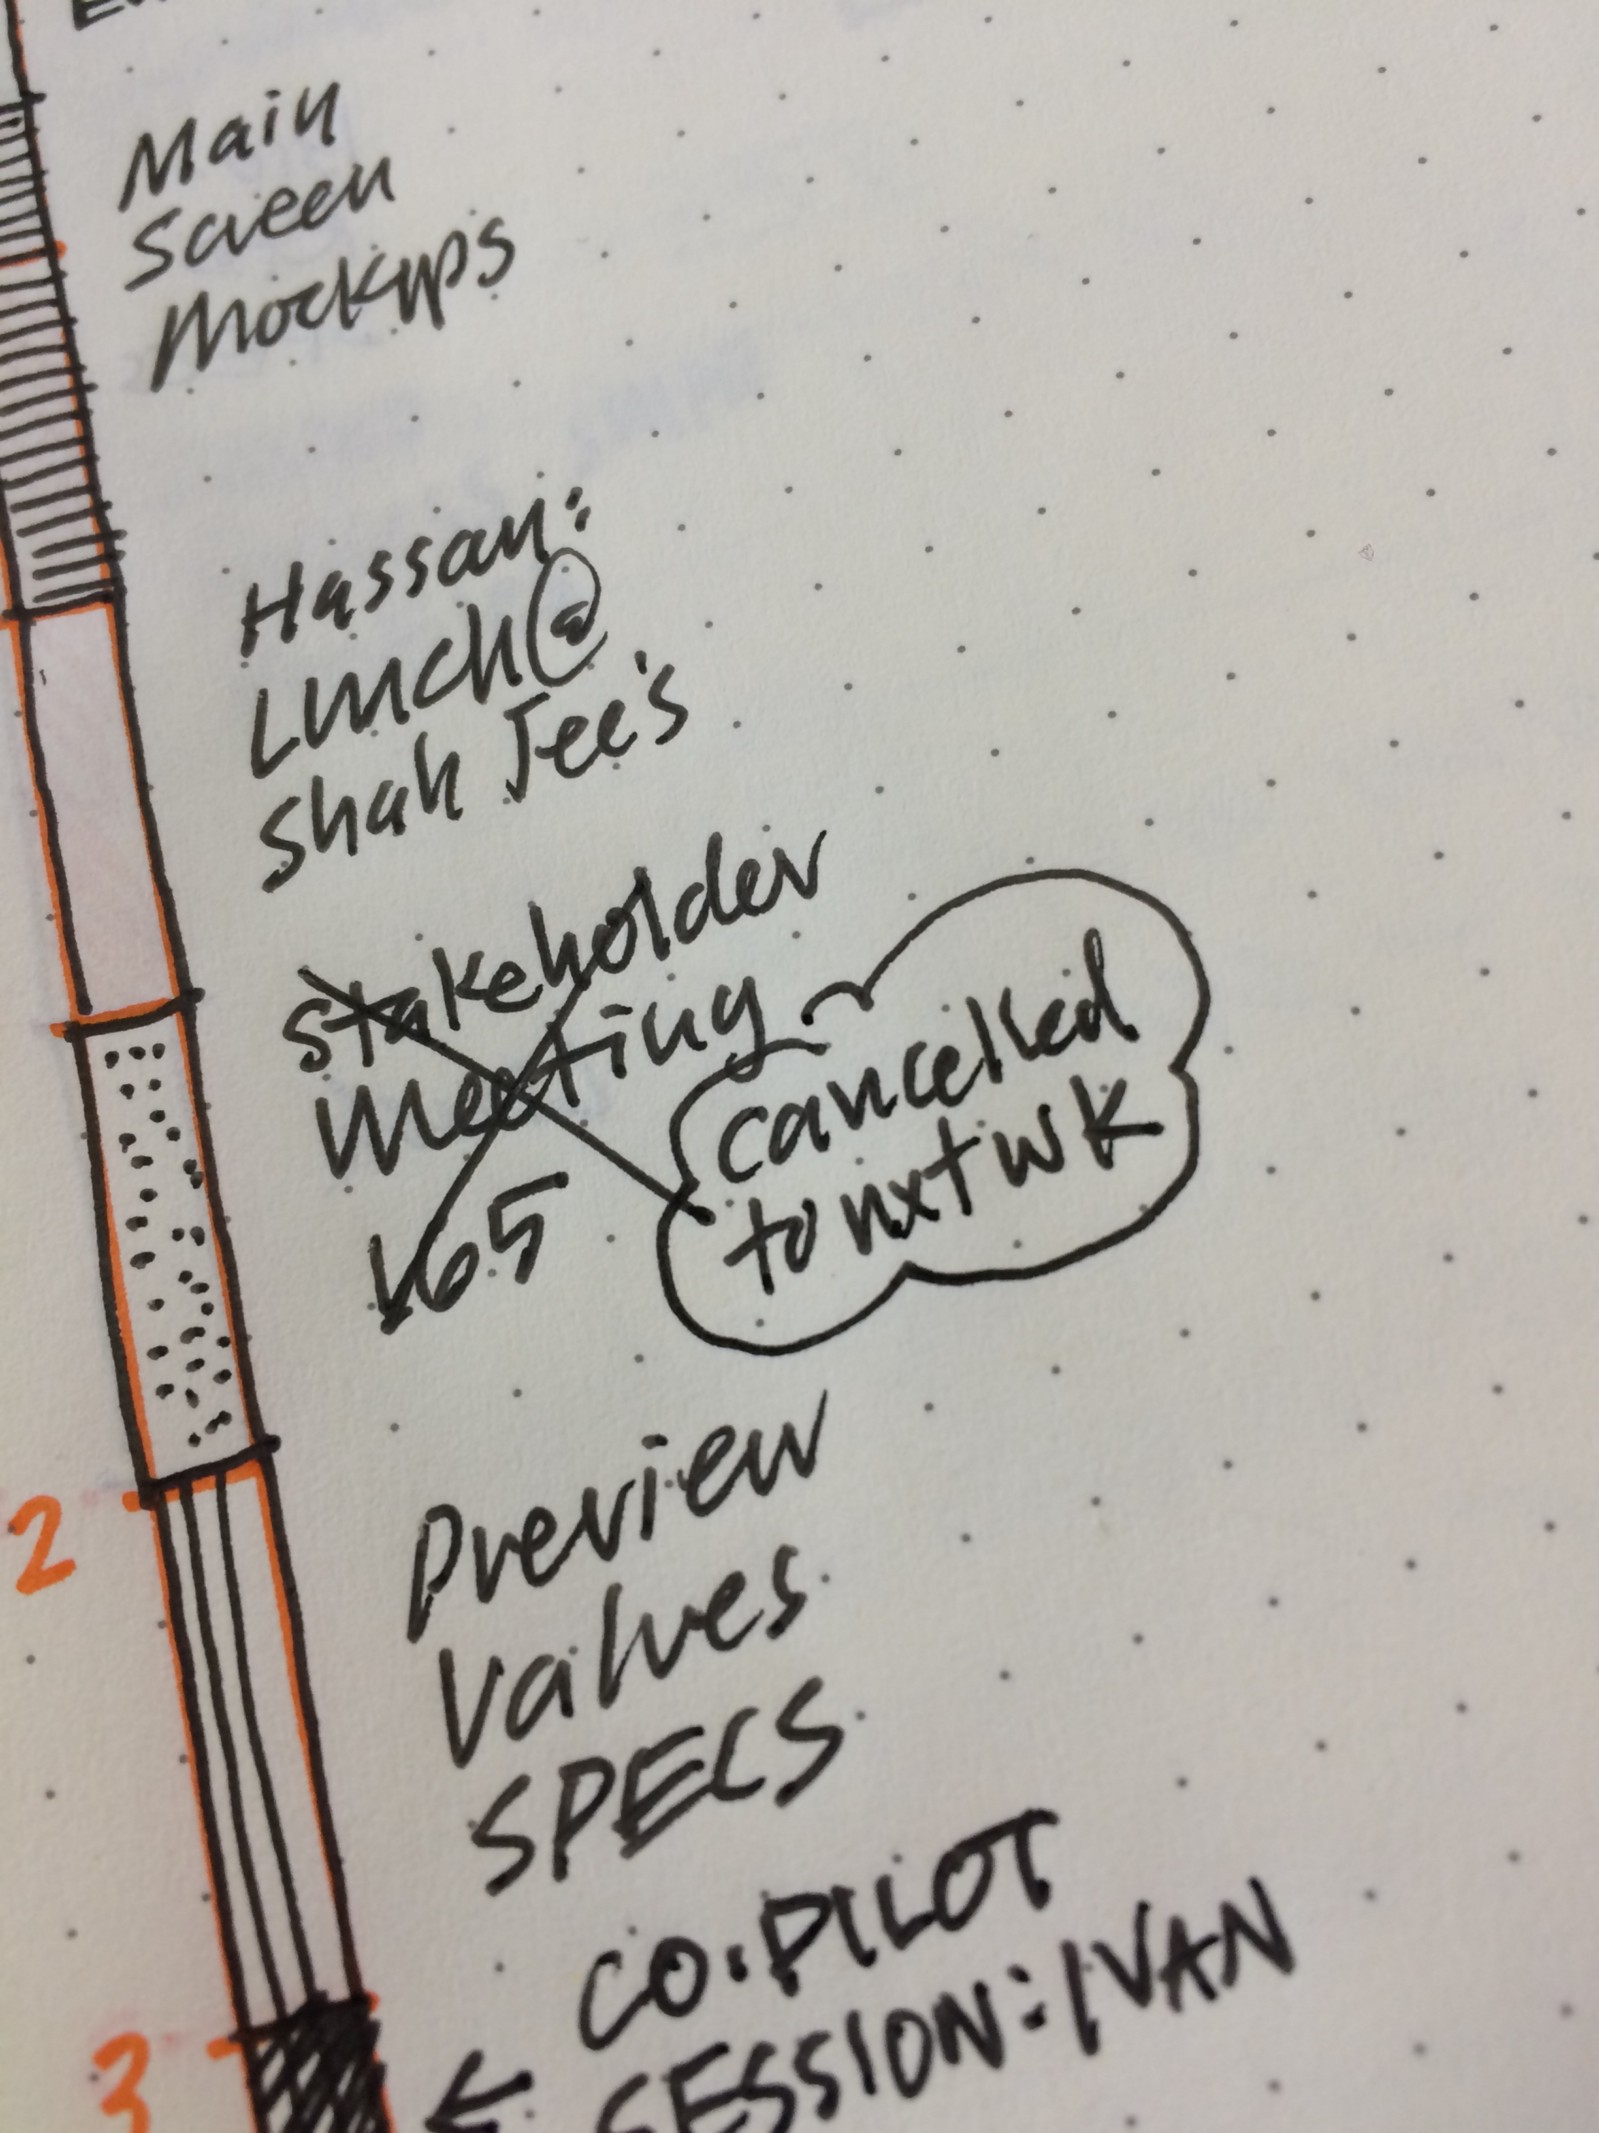
You can make changes and re-shuffle things as your day unfolds. If something is cancelled, you can simply cross it off and add a note next to it for more information or with the new time and date of the event.

The rest of the page, is left for you to add your to-do list or you can doodle and journal.
How it can help you in your time management
The daily plan bar can really help you focus on your day and the way you use your time. It’s really easy when you sit down in the evening to plan the following day to create that bar and see how your day unfolds and how busy it is. It is also very helpful so that you don’t over plan and fill your schedule with things and events that you simply don’t have time to do.
How you can use it for weekly planning

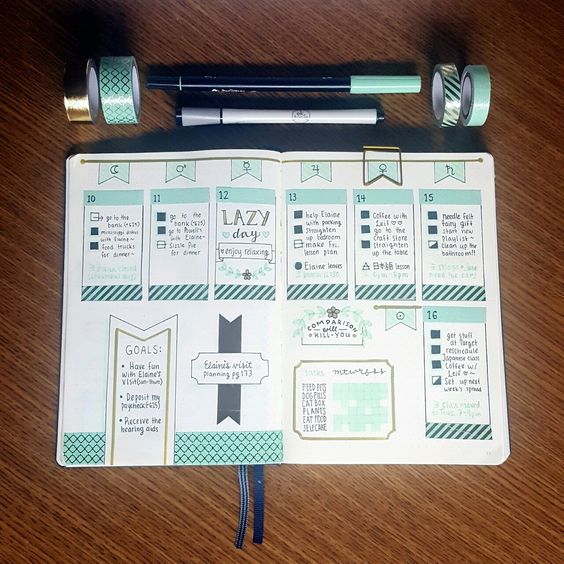
You can use the daily plan bar for your weekly planning by adding a bar for each day of the week on one page. That way you can see at a glance how the rest of your week looks like and how busy it is. That can help you to schedule even more things (if you have time during that day) or to re-arrange things for a later time.
What do you think of the daily plan bar? Have you used it before?
Christina x

Weekly vs Daily Spreads in your Bullet Journal
A lot of people have emailed me lately, asking me whether they should have both weekly and daily spreads in their bujo, and how can they make them work without re-writing tasks and events? So today, I’ve decided to talk about this topic more analytically and explain how I use those type of spreads in my bullet journal.

A lot of people have emailed me lately, asking me whether they should have both weekly and daily spreads in their bujo, and how can they make them work without re-writing tasks and events? So today, I’ve decided to talk about this topic more analytically and explain how I use those type of spreads in my bullet journal.
I’ll start by saying that the magic of bullet journaling is that you can adjust it the way you want. You basically start with an empty notebook, a blank canvas, that you can then turn into your ideal planner/journal. That means that you can add any spreads that are important and functional to you and your life. At the same time you don’t have to use any spread if it doesn’t work for you. So, you can have only dailies, or only weeklies, or you can use both. It’s totally up to you.

What is a weekly spread?
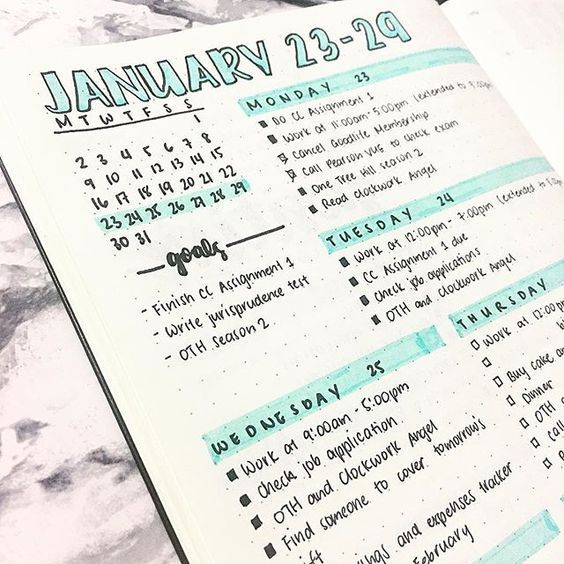
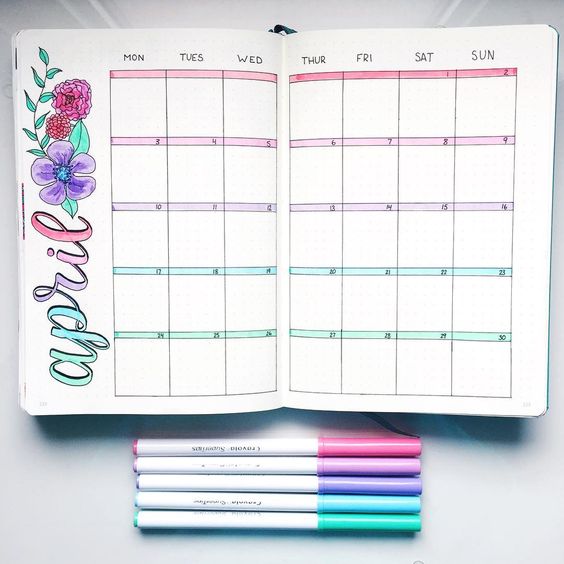
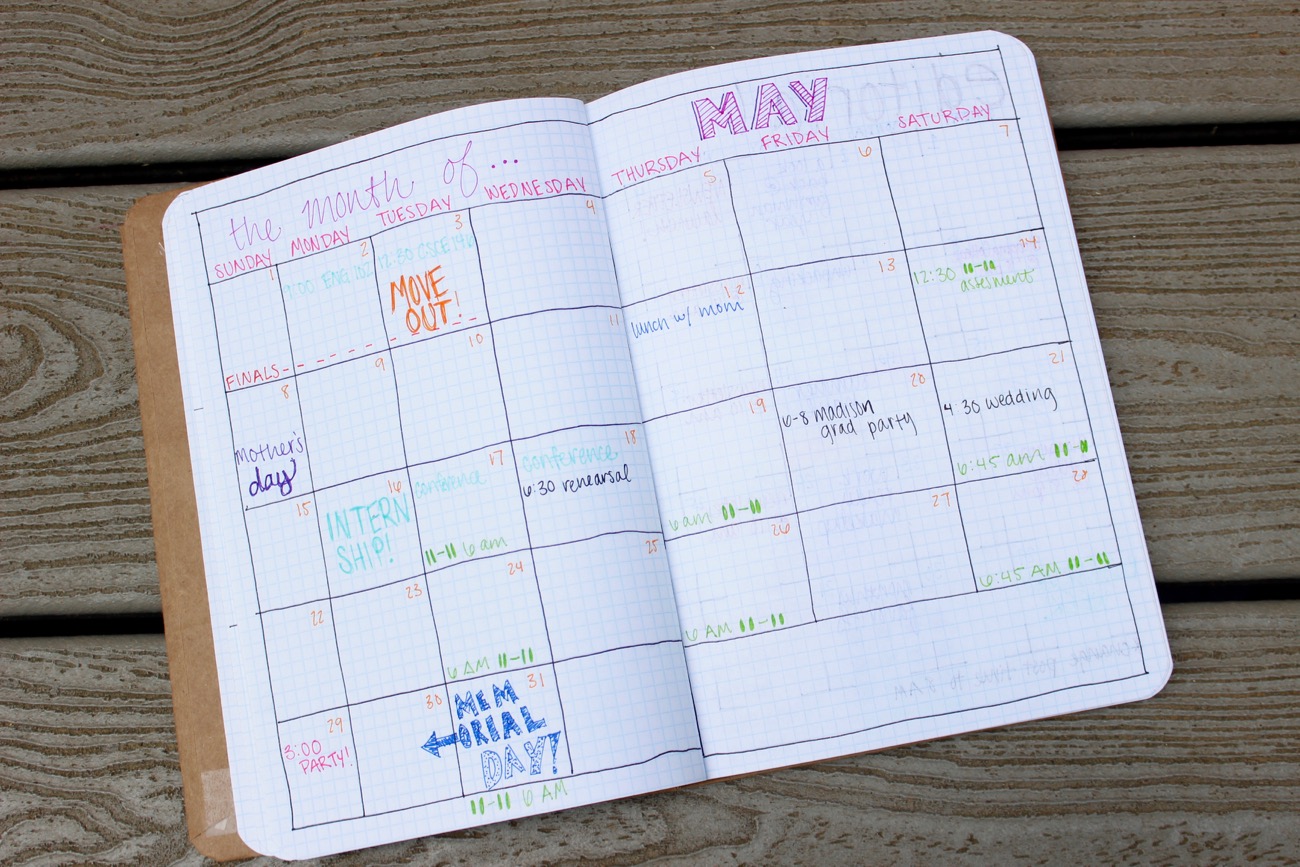
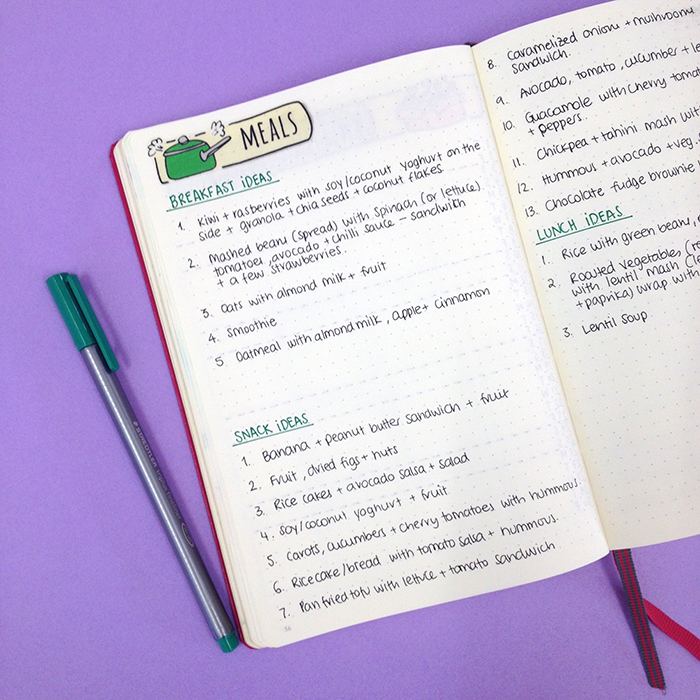
A weekly spread is basically an overview of your upcoming week that allows you to plan, schedule and visualise what you have going on for the week ahead. It usually consists of sections for the days of the week, but you can also add your weekly trackers, meal planning, weather forecast etc. You can adjust it and add all the things that are important to you.
Pros
- You set it up once a week and then you don’t have to spend any time creating layouts until next week.
- You can easily see what’s planned for the week at one glance.
- You have an overview of the upcoming week in just one page making it easy to distribute tasks.
- A planning stage for all the things you need to do that week.
- A way to break down your goals into smaller steps and distribute them in the week.
- You can easily see your progress and what you have done during the past 7 days.
- You can also see which tasks have been migrated.
Cons
- You have limited space to write for each day.
- Smaller to-do lists.
- Not much space to be creative.
- You can see only one week at a time.

What is a daily spread?
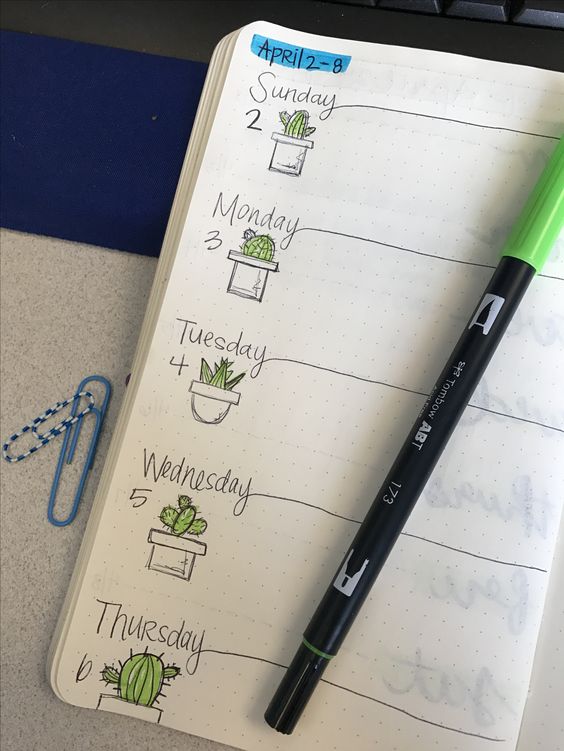
A daily spread (or daily log) is a place where you plan and record your tasks, events and notes as they occur throughout the course of the day. You usually have to create it the night before or first thing in the morning. You have plenty of space to add anything you want, from doodles to your daily journal.
Pros
- More space for more detailed to-do lists
- Lot’s of space to be more creative.
- Can have more of a journal style.
- You can focus on what is planned for each day without distractions.
Cons
- It’s usually done the night before, so you can’t pre-plan it earlier than that.
- You have to create the page every day.
- Usually you have to re-write some things over and over.
How do I use both spreads every week?
Personally I like to use both types of spreads every week. I find that this system helps me be more productive and focused on what needs to be done each day.
The weekly spread, even though is not part of the original bullet journal system that Ryder Caroll created, for me is one of the most useful ones. It is the only spread that I will add to my journal every single week. It's a way for me to ‘brain dump’ all the tasks and events I don’t want to forget to do in my weekly view, and start planning and shaping my week ahead. I can easily see which days are the busy ones, on which days I can add more tasks and so on.
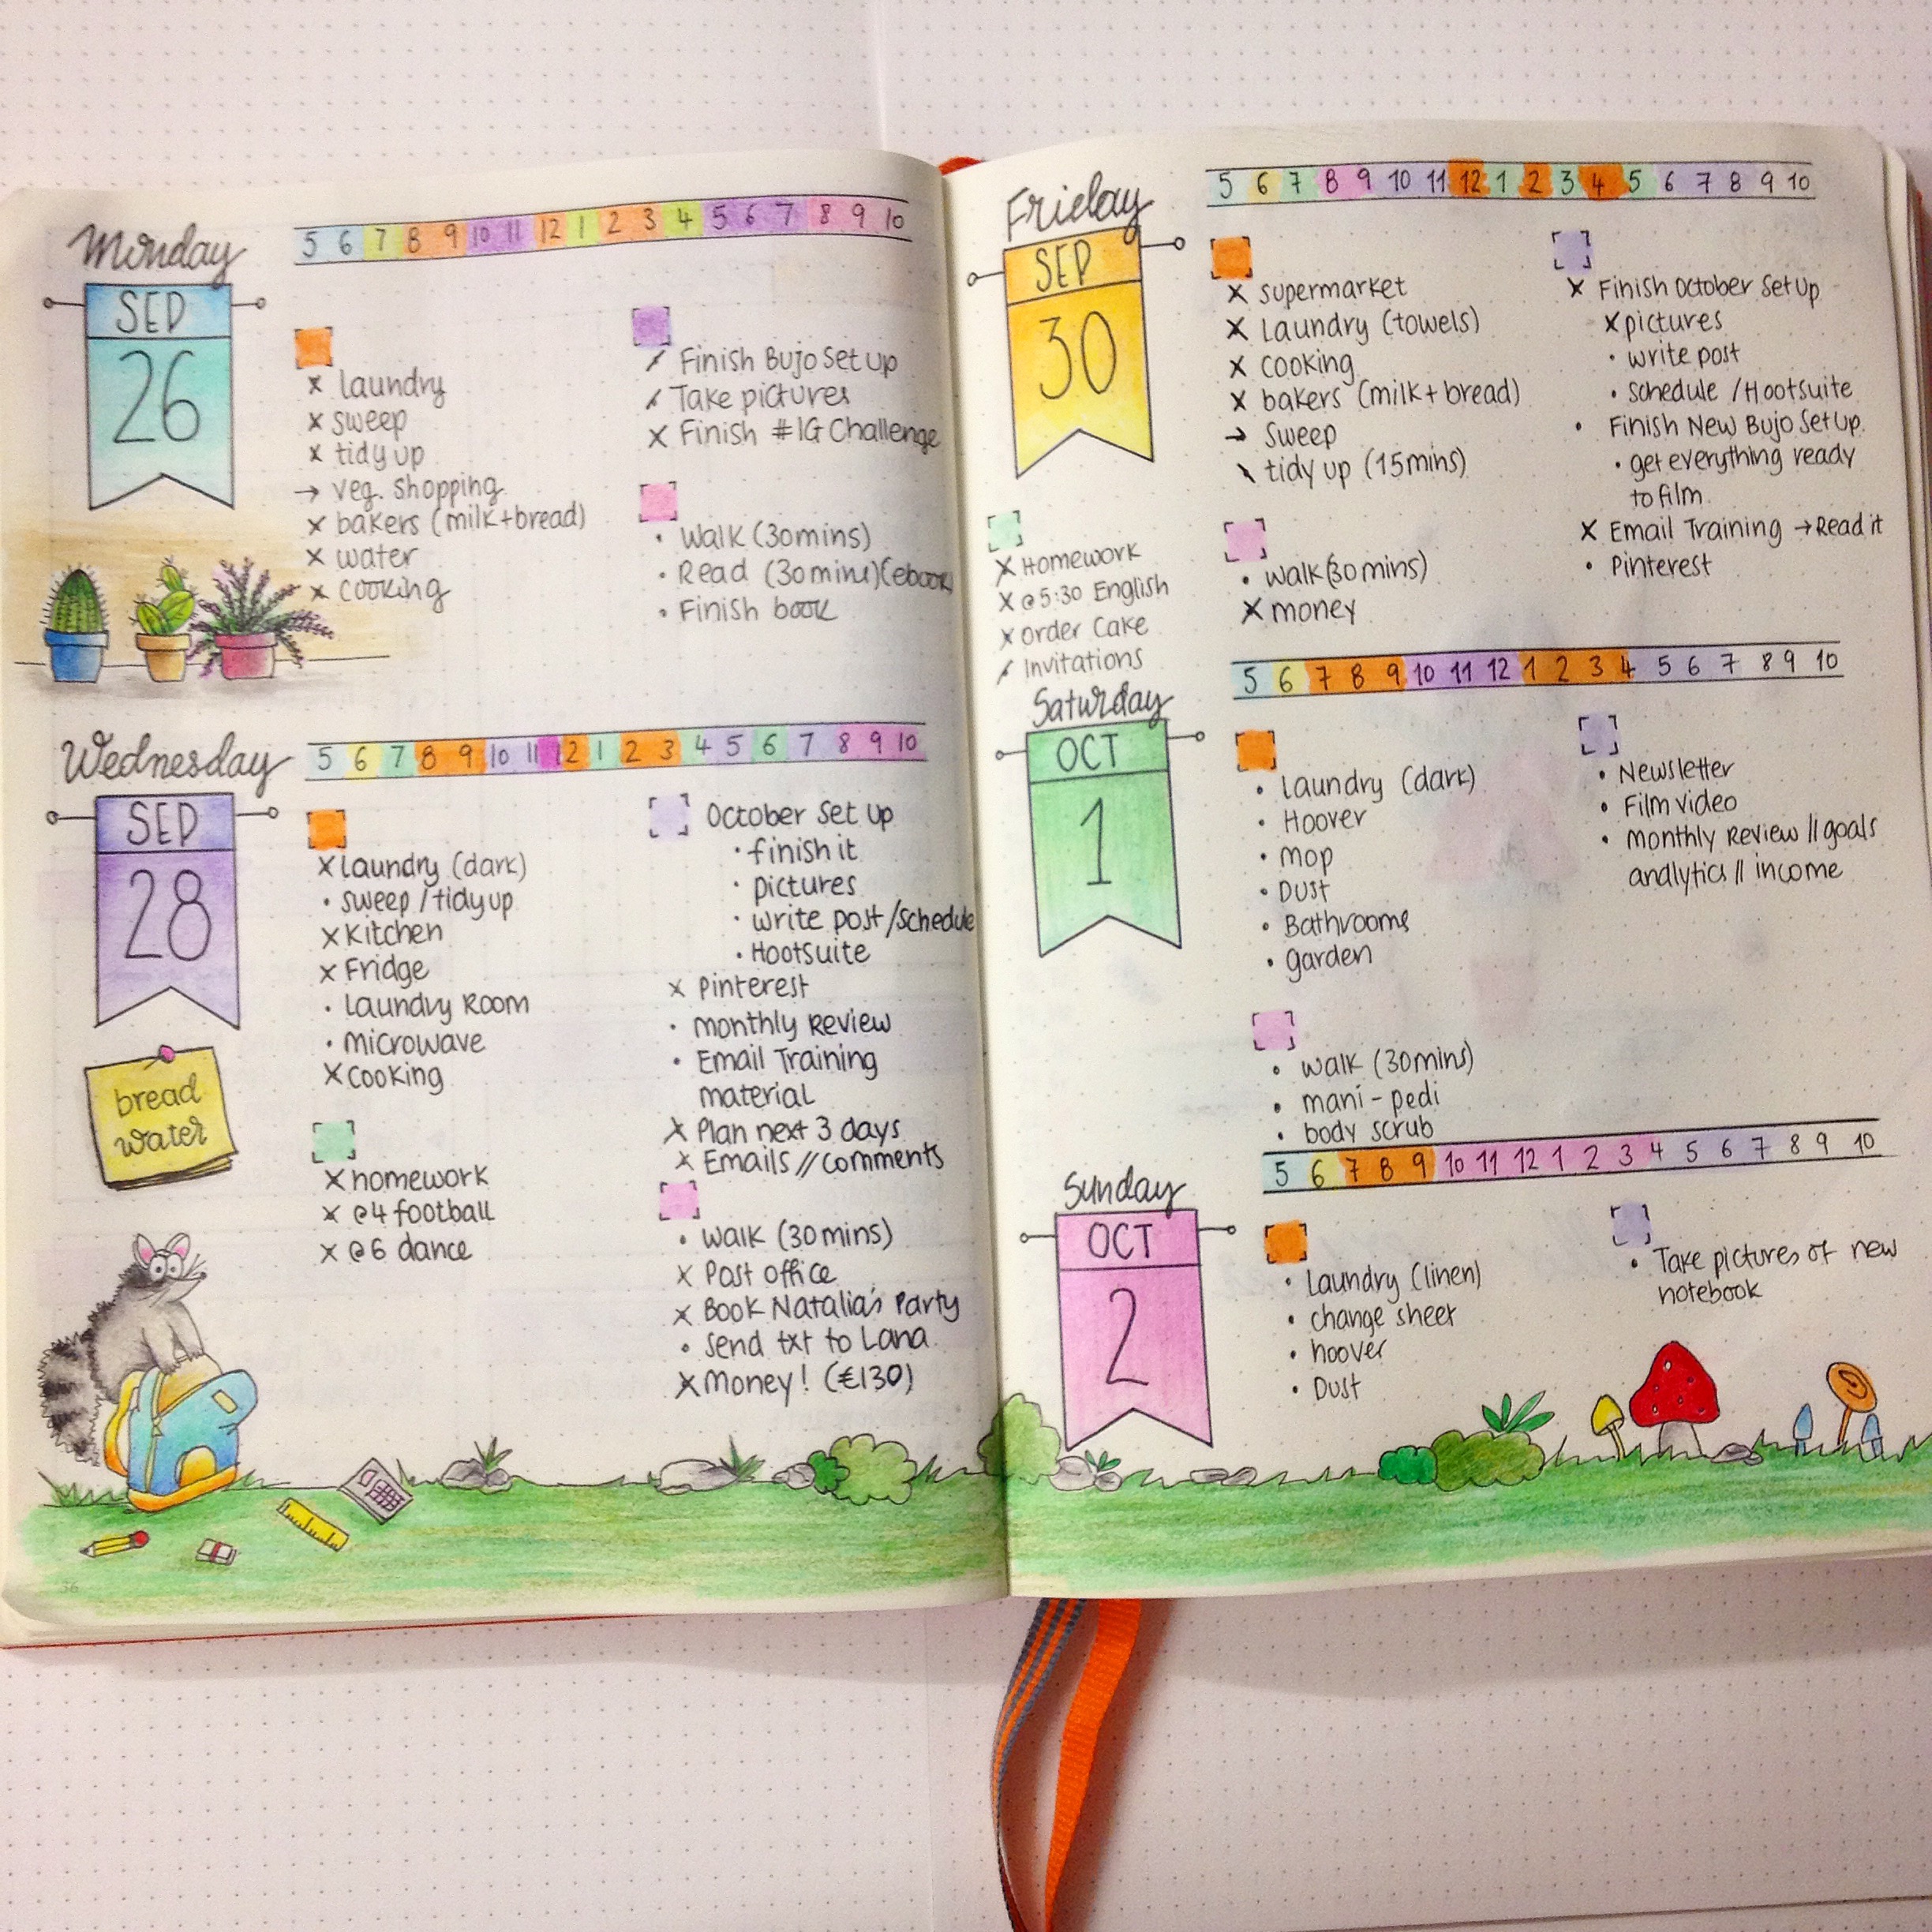
On the other hand, I use the daily spreads for a more detailed view of the individual days. Here I like to separate the tasks/events in categories by colour coding them. I can break each task into smaller ones and tick them off as I go along. I also like to doodle and take notes.
For me and the way I plan my weeks, I prefer to use both types of spreads, especially if I have a very busy week ahead. But there are some (very) rare weeks that I’m not that busy, and on those weeks I prefer to use only my weekly spreads.

My Bullet Journal planning routine:
My planning routine using both types of spreads starts usually on a Sunday afternoon where I sit down with a cup of coffee (or tea, depending on the mood), and after I've created the weekly layout on the two pages, I start planning my week ahead.
- I check on my Future log, Monthly Log and the Birthdays and Holidays spread to see if there is anything planned for the week.Then I note them down on the appropriate days.
- I usually have a column named ‘This Week’ which works as a ‘brain dump’ of all the things I need to do that particular week. So, after I fill this in, I start allocating each item of this list on specific days.
- I look at all the projects I’ve set for myself and all the things I need to do for each one this week. I then check on which of the next 7 days I have spare time and I distribute these tasks accordingly.
For my daily spreads, I usually do them the night before. I like to get everything “off my head" before I go to bed, and have an idea of how my day is going to be tomorrow.
- I look at my weekly spread and see what I’ve set myself to do that day.
- I separate the tasks in categories with my colour code method. This helps me to visually see which of the tasks are going to happen on certain times during the day.
- I then look at the day before and see if I have left any tasks that I haven't finished. If I do, then I migrate them to tomorrow's daily spread. The migrated tasks are marked then with an arrow and the cancelled tasks with an “-“ .
I understand that by using the above method means that sometimes I have to write down tasks several times, and that might seems redundant to some people, but it does work for me and it doesn’t bother me.
Since I’ve started using my bullet journal I’ve noticed how much more productive I’ve become and how much this system has helped me to stay on top of things day in and day out.
How do you plan your days and weeks in your bullet journal? Do you use only weekly or daily spreads, or do you prefer to use them both? Let me know in the comments below.
Christina x
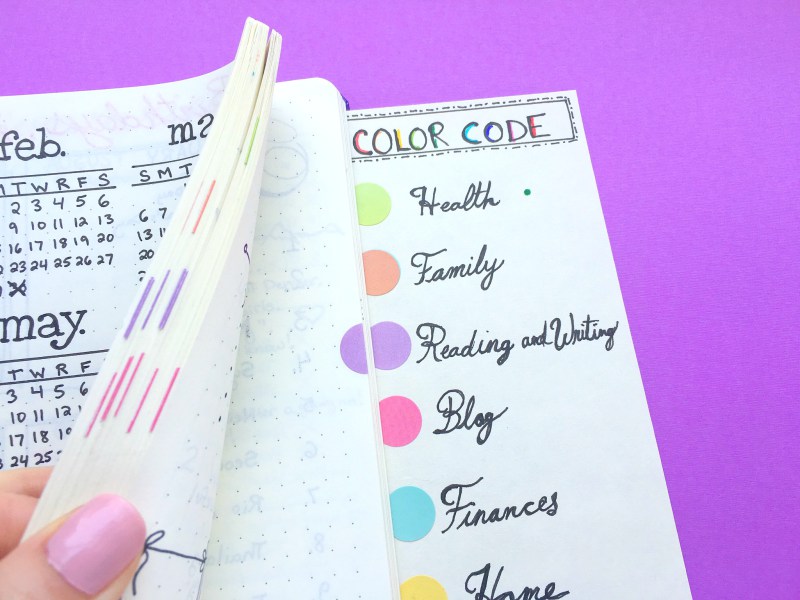
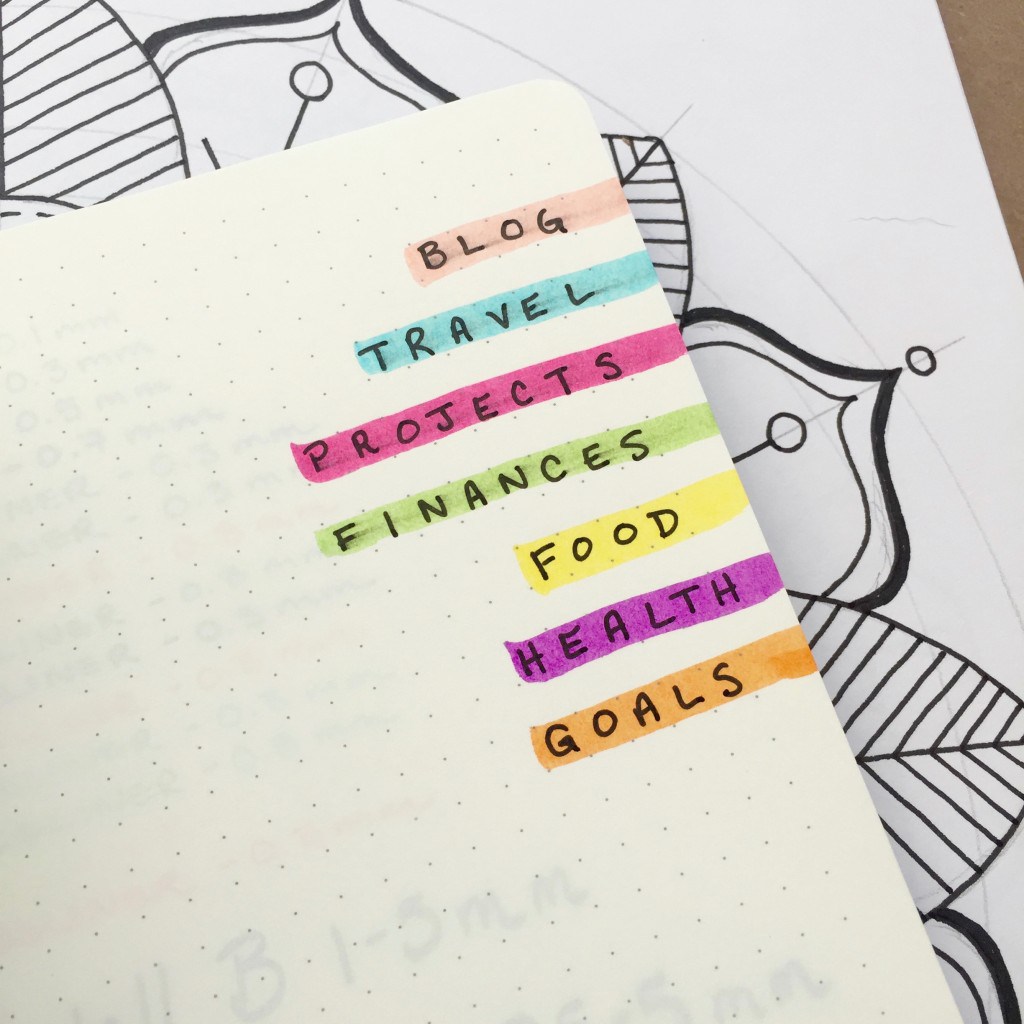
How to add Colour in your Bullet Journal
Colour has always made me happy. I remember from a very young age that I loved to colour all the time. This carried on in my school years and University. I had to add colour on everything - my books, my bags, my notes, my room - you name it! Especially when I was studying, I had to colour code my notes and add lots of bright colours on all my notebooks. Even to this day, for some weird reason I can function better when my notes / to-do list is full of bright happy colours :)

Colour has always made me happy. I remember from a very young age that I loved to colour all the time. This carried on in my school years and University. I had to add colour on everything - my books, my bags, my notes, my room - you name it! Especially when I was studying, I had to colour code my notes and add lots of bright colours on all my notebooks. Even to this day, for some weird reason I can function better when my notes / to-do list is full of bright happy colours :)
For me, colour is a way to express myself and to be creative. I also truly believe that colour can affect your mood.
“Modern research has shown that when our eyes connect with a colour, our brains release different chemicals that impact us on a physical and emotional level.”
I’ve also carried this trend in my bullet journal. If you’ve been following me for a while you must know that I love my colourful spreads and I don’t think I have any page in my bujo where there’s no colour!
“Creativity is intelligence having fun”
However, I’ve heard a lot of times, in the social media especially, that a lot of people are scared to add colour, because they don’t consider themselves artistic or good enough. But you don’t have to be an artist to add colour in your journal. Especially nowadays, there are loads of easy and quick ways to make your bullet journal colourful. And today I'll show you how.
Which mediums / tools to use?
Washi Tape
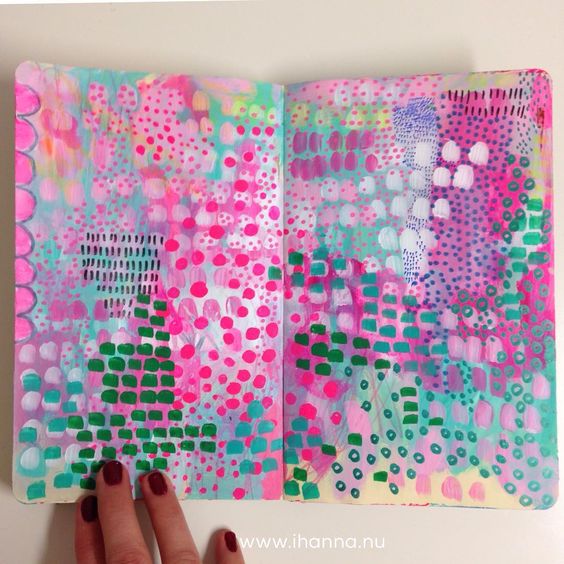
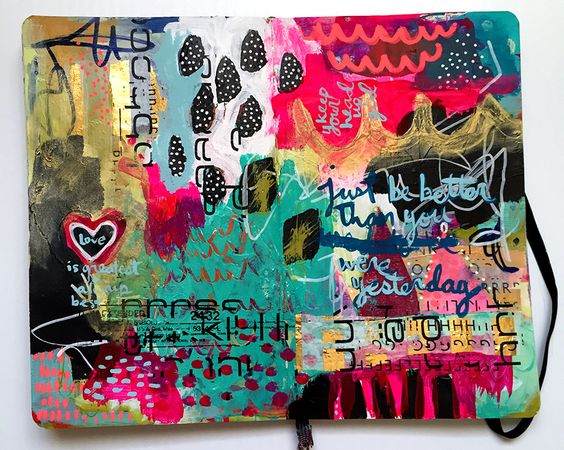
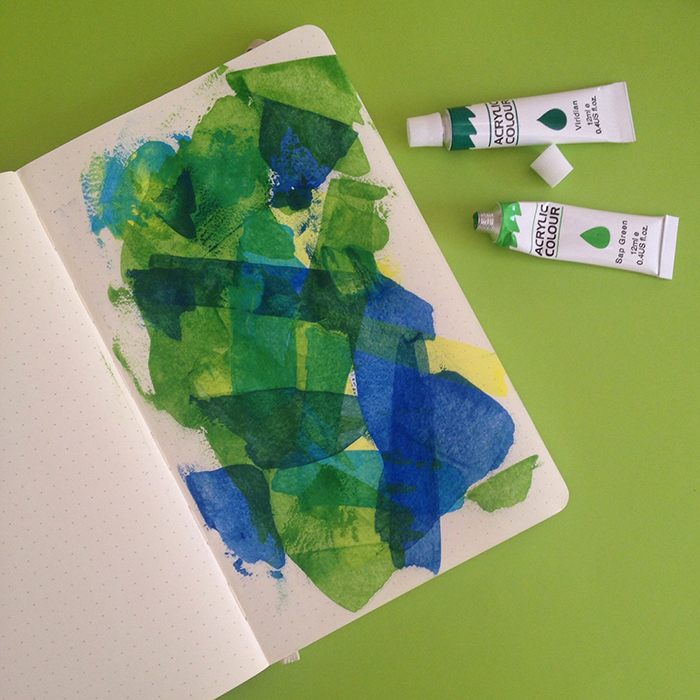
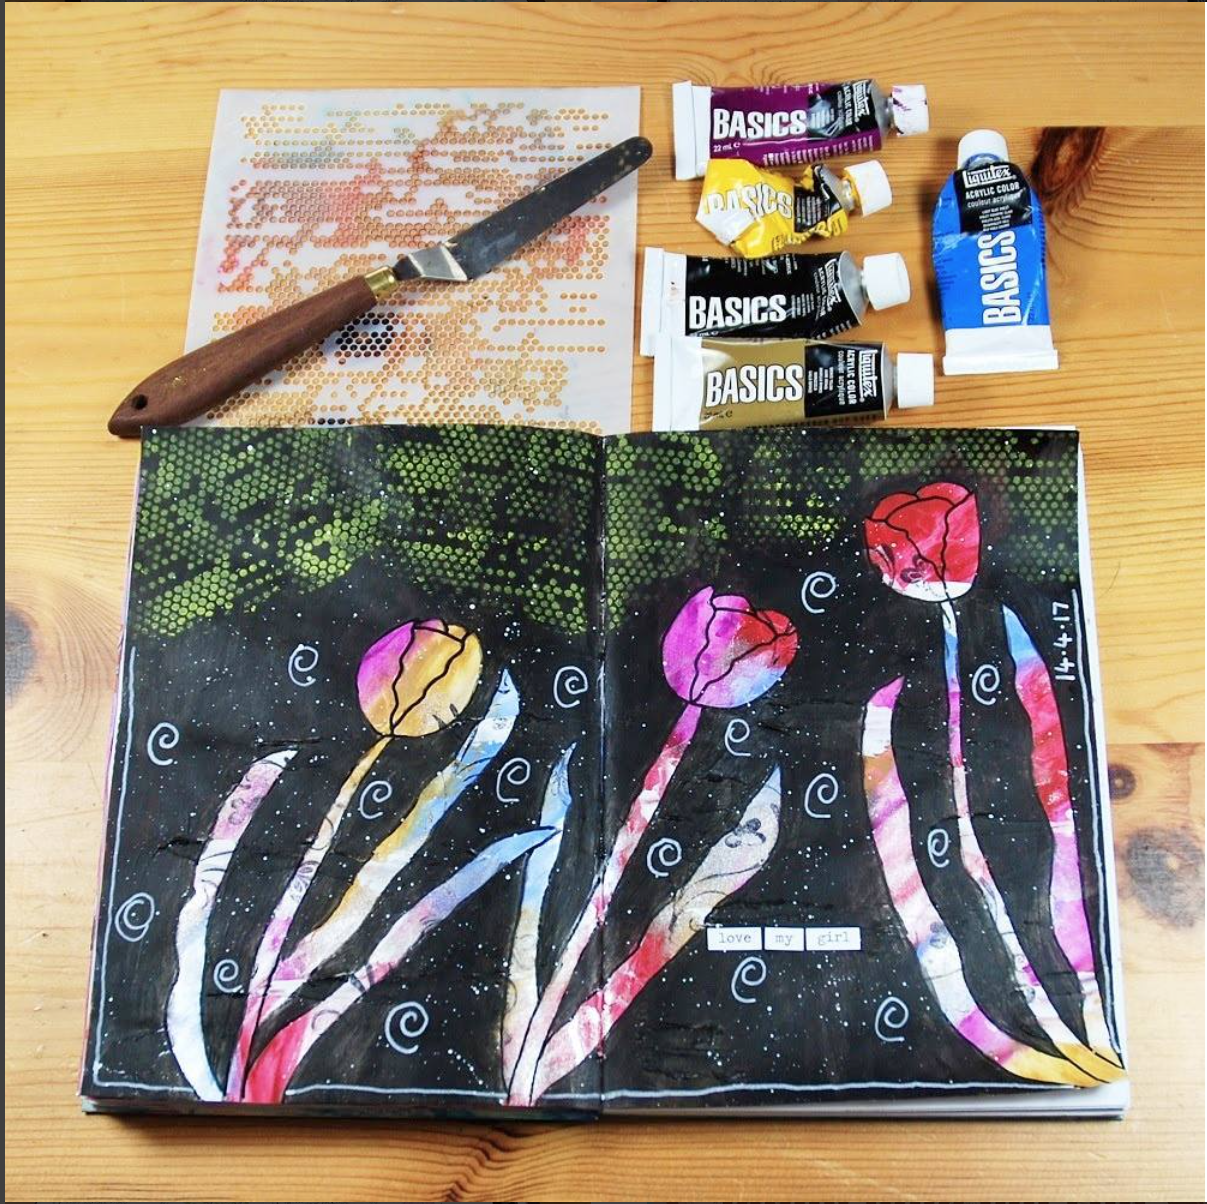
Acrylic Paint
Stickers

Highlighters
Markers
Coloured Pencils
Colourful pens
Where to add colour?
Simply everywhere! In your: dailies, weeklies, monthlies, future log, habit tracker, time line, index, quote pages, any type of spreads!
Various ways to do it
You can just go ahead and use your colours in the normal way or you can try one of the following:
Lines

Shapes
Boarders

happilyeveafter_
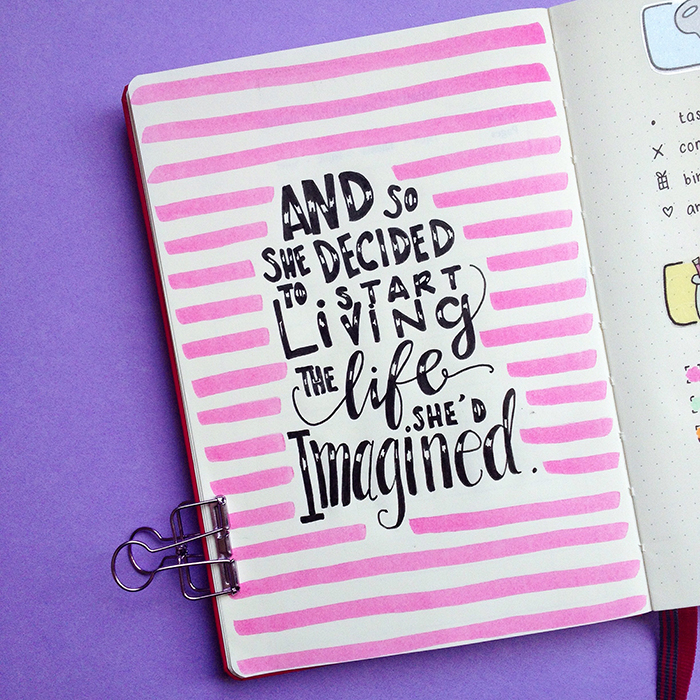
Banners
Page Markers
The possibilities are endless!!! So, there's no excuses, pick up any of the above tools and start adding colour! Let's be creative!
Make sure to share with me any of your creations. I love to get inspired!
Have a very colourful day ;)


My Morning Routine
The morning time is very important for me. I truly believe that the first few hours can really affect the way the rest of your day will unfold. So, for the last few years I have tried to incorporate some sort of routine, which would help me wake up and start my day in the best possible way. I want my body and my mind to be ready for all the things I’ve planned for that day.

The morning time is very important for me. I truly believe that the first few hours can really affect the way the rest of your day will unfold. So, for the last few years I have tried to incorporate some sort of routine, which would help me wake up and start my day in the best possible way. I want my body and my mind to be ready for all the things I’ve planned for that day.
'Using the first five minutes of your day to feel good is like programming a destination into your GPS, like fixing your eye on the spot where you want your golf ball to land.' (Pam Grout, 'E-Cubed')
I remember that mornings used to be very stressful for me - rushing to get ready, thinking of all the things I wanted to do, usually running late and so on. You get the picture. I knew then that something had to change and I remember that I found out about setting up a routine by reading Louise Hay’s and Pam Grout’s books. They helped me to add my happy dance and meditation time to my mornings, and that made a huge difference!
'By consciously starting your day focused on gratitude and joy, you'll find that your whole life will begin to sparkle.' (Pam Grout - ‘E-Cubed')
Since then my morning routine has evolved even more. After reading Hal Elrod's The Miracle Morning book, I took the 30-day Life Transformation Challenge and really focused on that part of the day. And I have to say that, even though this really works, sometimes it was getting too much for me and I didn’t want that to have a negative effect to my mornings. But I still wanted to continue having a morning routine.
Recently, I came across Sadia’s YouTube channel Pick Up Limes for something completely different (vegan recipes), and I happened to watch one of her videos on healthy morning habits. I loved the idea! It is essentially something very similar to the miracle morning. However, I loved how relaxed this routine sounded and I started applying it to my mornings straight away.

I have taken parts of the habits she mentions in her video and created a new morning routine for myself. The steps / habits that I’ve added are the following:
1 | Take it easy
Start the day without rushing. Wake up early. Let in natural light.
'When you rise in the morning, give thanks for the light, for your life, for your strength. Give thanks for your food and for the joy of living.' (Tecumseh, Native American Leader)
Even with my other morning routines, I was just rushing out of bed straight away. This step helps me to pay more attention to how I wake up, have a feel of my surroundings and give myself 2-5 minutes to get out of bed.
2 | Breathe & 5-4-3-2-1
Meditate.
Or take a deep breath and say aloud to yourself:
- 5 things you can see
- 4 things you can feel
- 3 things you can hear
- 2 things you can smell
- 1 thing you can taste
Meditation has been a big part of my morning routine for a few years now. However, I had never heard about that breathing exercise she mentions, and I find it very-very helpful.
3 | Screens off
No TV in the morning. Replace it with soothing music.
Check the phone for messages only after breakfast.
I am very rarely watching TV. But I admit that I used to check my phone in the morning a lot. I was checking my messages and emails right before starting my morning routine! And I have come to realise that by doing that, it was affecting my thoughts and made me feel preoccupied, whilst going trough with my morning habits. Now I only allow myself to check my phone after my breakfast and I can actually feel and see the difference.
4 | Hydrate
Drink a big glass of water before breakfast. Add fresh fruit to add flavour.
Continue to hydrate throughout the morning with more water or tea.
This is a habit I’ve been trying to incorporate for some time now. I didn’t like it in the beginning. But I’m actually craving some fruit water in the mornings now!
5 | Have a wholesome breakfast
Have a wholesome, high-finer breakfast. Take you vitamins.
Share the meal with someone, if possible.
Be mindful as you eat: actually see, feel, hear, smell and taste your food in front of you.
Again, I used to check on my phone while I was having my breakfast. By paying attention to what you eat can actually help you appreciate all the good foods you’re adding to your body. It also makes the food taste better!!! The sharing part as well is very important. I try to do that in the weekends when we are all together at home :)
6 | Check-in with yourself
Fill in the following during or just after breakfast:
- I am thinking ________________
- I am feeling emotionally ________________
- I am feeling physically ________________
- My 2 intentions for the day are:
1) ________________
2) ________________
- 2 things I’m grateful for are:
1) ________________
2) ________________
- One thing that would add to my happiness today would be _______________
I love this part. It’s like the journaling part of Hal Elrod’s routine, but now you have more specific questions to answer and they really help! It’s good to see how I’m feeling both emotionally and physically in the morning, and also how to figure out ways to make my day even better!
7 | Visualise
Draw up your action plan the night before. Spend a couple of minutes in the morning visualising yourself doing these things.
I’ve tried visualisation before. But I think I was doing it in a different way. I used to focus on the things that I wanted to do and achieve, my goals and dreams. And even though this is fine as well, I love Sadia’s way of visualising my day ahead. This exercise has helped me to see that some of the days I have added too many things in my to-do list! And I had to reconsider my tasks for the day.
8 | Fresh air & body love
Exercise if possible. Otherwise, try to get some fresh air, go for a walk, bicycle, or do some light stretching at home.
I want to do that more. I want to try and get out of the house more and feel the fresh air. My house is 10 minutes away from the sea and it’s crazy that a week can go by and I might not have gone to the beach… This is one of the things I need to change. And of course, to show some body love with exercise as well.
To see all the steps / habits she mentions, Sadia has a blog post about it, as well as a free printable checklist.
I've been following this routine for more than a week now and I love it! It makes me feel relaxed but also grounded and focused for the rest of the day. You should definitely give it a try. Also don't forget to give Sadia some love, and make sure to check out her recipes cause they are really yummy!
What is your morning routine? Let me know of your morning habits in the comments below.
Have an amazing day!


Bullet Journal - My June Set Up
Hello everyone to another monthly set up. I think that it must be the first time EVER that I won't say that the month just flew by. In fact, I felt that May was a very loooooong month....! It has been a very busy and emotionally charged month. With lots of new beginnings: new bullet journal, new work possibilities and a brand new website! It was also my birthday month, and that always makes May a very special month for me, with lots of lovely memories. However, this month I lost a very close family member and my heart was broken in pieces. It's things like this that come to wake you up and remind you of what's really important in life and to be grateful for every single day.
So, tomorrow June makes it's appearance and I'm all ready and set up in my bullet journal in order to make this one the best month ever! Let's get started.

Hello everyone to another monthly set up. I think that it must be the first time EVER that I won't say that the month just flew by. In fact, I felt that May was a very loooooong month....! It has been a very busy and emotionally charged month. With lots of new beginnings: new bullet journal, new work possibilities and a brand new website! It was also my birthday month, and that always makes May a very special month for me, with lots of lovely memories. However, this month I lost a very close family member and my heart was broken in pieces. It's things like this that come to wake you up, remind you of what's really important in life and to be grateful for every single day.
So, tomorrow June makes it's appearance and I'm all ready and set up in my bullet journal in order to make this one, the best month ever! Let's get started.

The little penguin makes his appearance once again at the cover of the month, because clearly he was very missed in May. I'm happy with the colours and of course the cuteness of the penguin :)

The next page is my Monthly Focus. I decided to divide the page in 4 sections: Personal, Goals, Blog, and E-Course. This way I am more organised and focused on each category. (Sticker used from my Etsy Shop)

Moving on, the next page is my Month at a Glance. I changed it to a bigger layout this time and I really like how it looks. There is some space for notes at the bottom right corner as well. (Sticker used from my Etsy Shop)

I've decided to have a Brain Dump page for each month from now on. It was getting a bit complicated going back and forth to previous pages. This way I can easily check it out more often when I'm checking my Monthly Focus or my Month at a Glance pages. Hopefully this will also make me more productive :) (Sticker used from my Etsy Shop)

The Gratitude Log is back! I have to say that I really missed it last month. It's nice to spend some time at the end of the day and reflect on what you're grateful for. It's good for the soul. :) (Sticker used from my Etsy Shop)
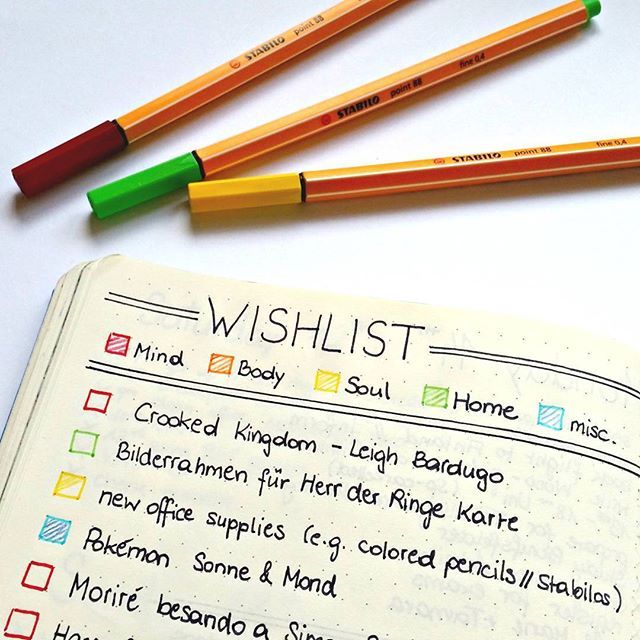
Being vegan can sometimes make you feel that you don't have many food options. (Which is totally not true!) Especially if you are on a diet, you might feel like you're eating the same things over and over. And that's not a good thing! So, I've decided to look around on the internet and get more inspiration about what I can eat. Then I created a Meals spread with various meal ideas, categorising them in Breakfast, Snacks, Lunch and Dinner. That way, when I'm hungry or when I meal plan I can quickly look at this spread and get inspired. (Sticker used from my Etsy Shop)
(* Note: I have created a Menu Planning spread in the beginning of my new bullet journal, but that is mainly for the rest of my family that are not vegan like me. )

The last spread in my June set up is my Weekly spread. I really like how it turned out. Also, since I started my new bullet journal I've decided to avoid using a ruler as much as possible. And even though in the beginning the OCD part of myself was having some problems with it, I find it very liberating now! 😂 And I've come to like my 'wobbly' lines!!! 〰 😉
Hope this has inspired you to create some spreads in your bullet journal, and get it all ready for June. Which are the spreads that you add every single month? Let me know in the comments bellow.


Instagram Challenge #doodlewithusinjune
Once again I'm excited to announce our Instagram Challenge for the month of June! It's the #doodlewithusinjune Instagram Challenge created by me and Alexandra (from @alexandra_plans).
It's going to be 30 days of doodles that will hopefully get you to be creative and have fun! The theme of June's prompts is 'Vacations'. I'm seriously in need of some vacations myself, so this theme is perfect!
As we did before, all the doodles are part of one big comprehensive picture. Imagine each day to be one piece of the puzzle. So, at the end of the month you will have one big doodle picture! :)
If you decide to follow this way, you'll have to create a table with 5x6 boxes and you shouldn't add the days on the top. You can also make the boxes and dates in pencil, if you don't want the lines to obscure the end result. It's totally up to you.
Of course, if you prefer to draw the doodles in the traditional way, that's absolutely fine as well. The important thing is to have fun!
You can also download a free printout with the daily prompts here.

If you want to join us then:
- Follow me (Christina) @christina77star and Alexandra @alexandra_plans over on Instagram.
- Download the prompts below.
- Draw something according to the day's prompt, take a photo of it, and share it with us on Instagram.
- Don't forget to add the hashtag #doodlewithusinjune and spread the word.
- Everyone is welcome!

We're excited to see what you'll share!
Thank you for joining in!


How to create your own Weekly Spreads in your Bullet Journal
Weekly spreads are one of the main components of my bullet journal. This type of spread is not part of the original bullet journal system that Ryder Caroll created. However, for me it’s one of the most useful ones.
There are people that think that weekly spreads are not important in their planning. If you think that such a spread is not suitable for you, then you can totally skip it. However, if you decide to give the weekly spreads a try, that’s great! There’s a million and one ways to create a weekly spread, and today I’ll show you the steps I take to create mine.

What is a weekly spread
A weekly spread or overview is a way to plan your upcoming week and visualise all the things you need to do during that week. Since the bullet journal system works with the creation of your dailies the day before, I wanted to find a way to know before hand what I had planned and needed to do during the week. So, the weekly spread works perfect for me.

Characteristics
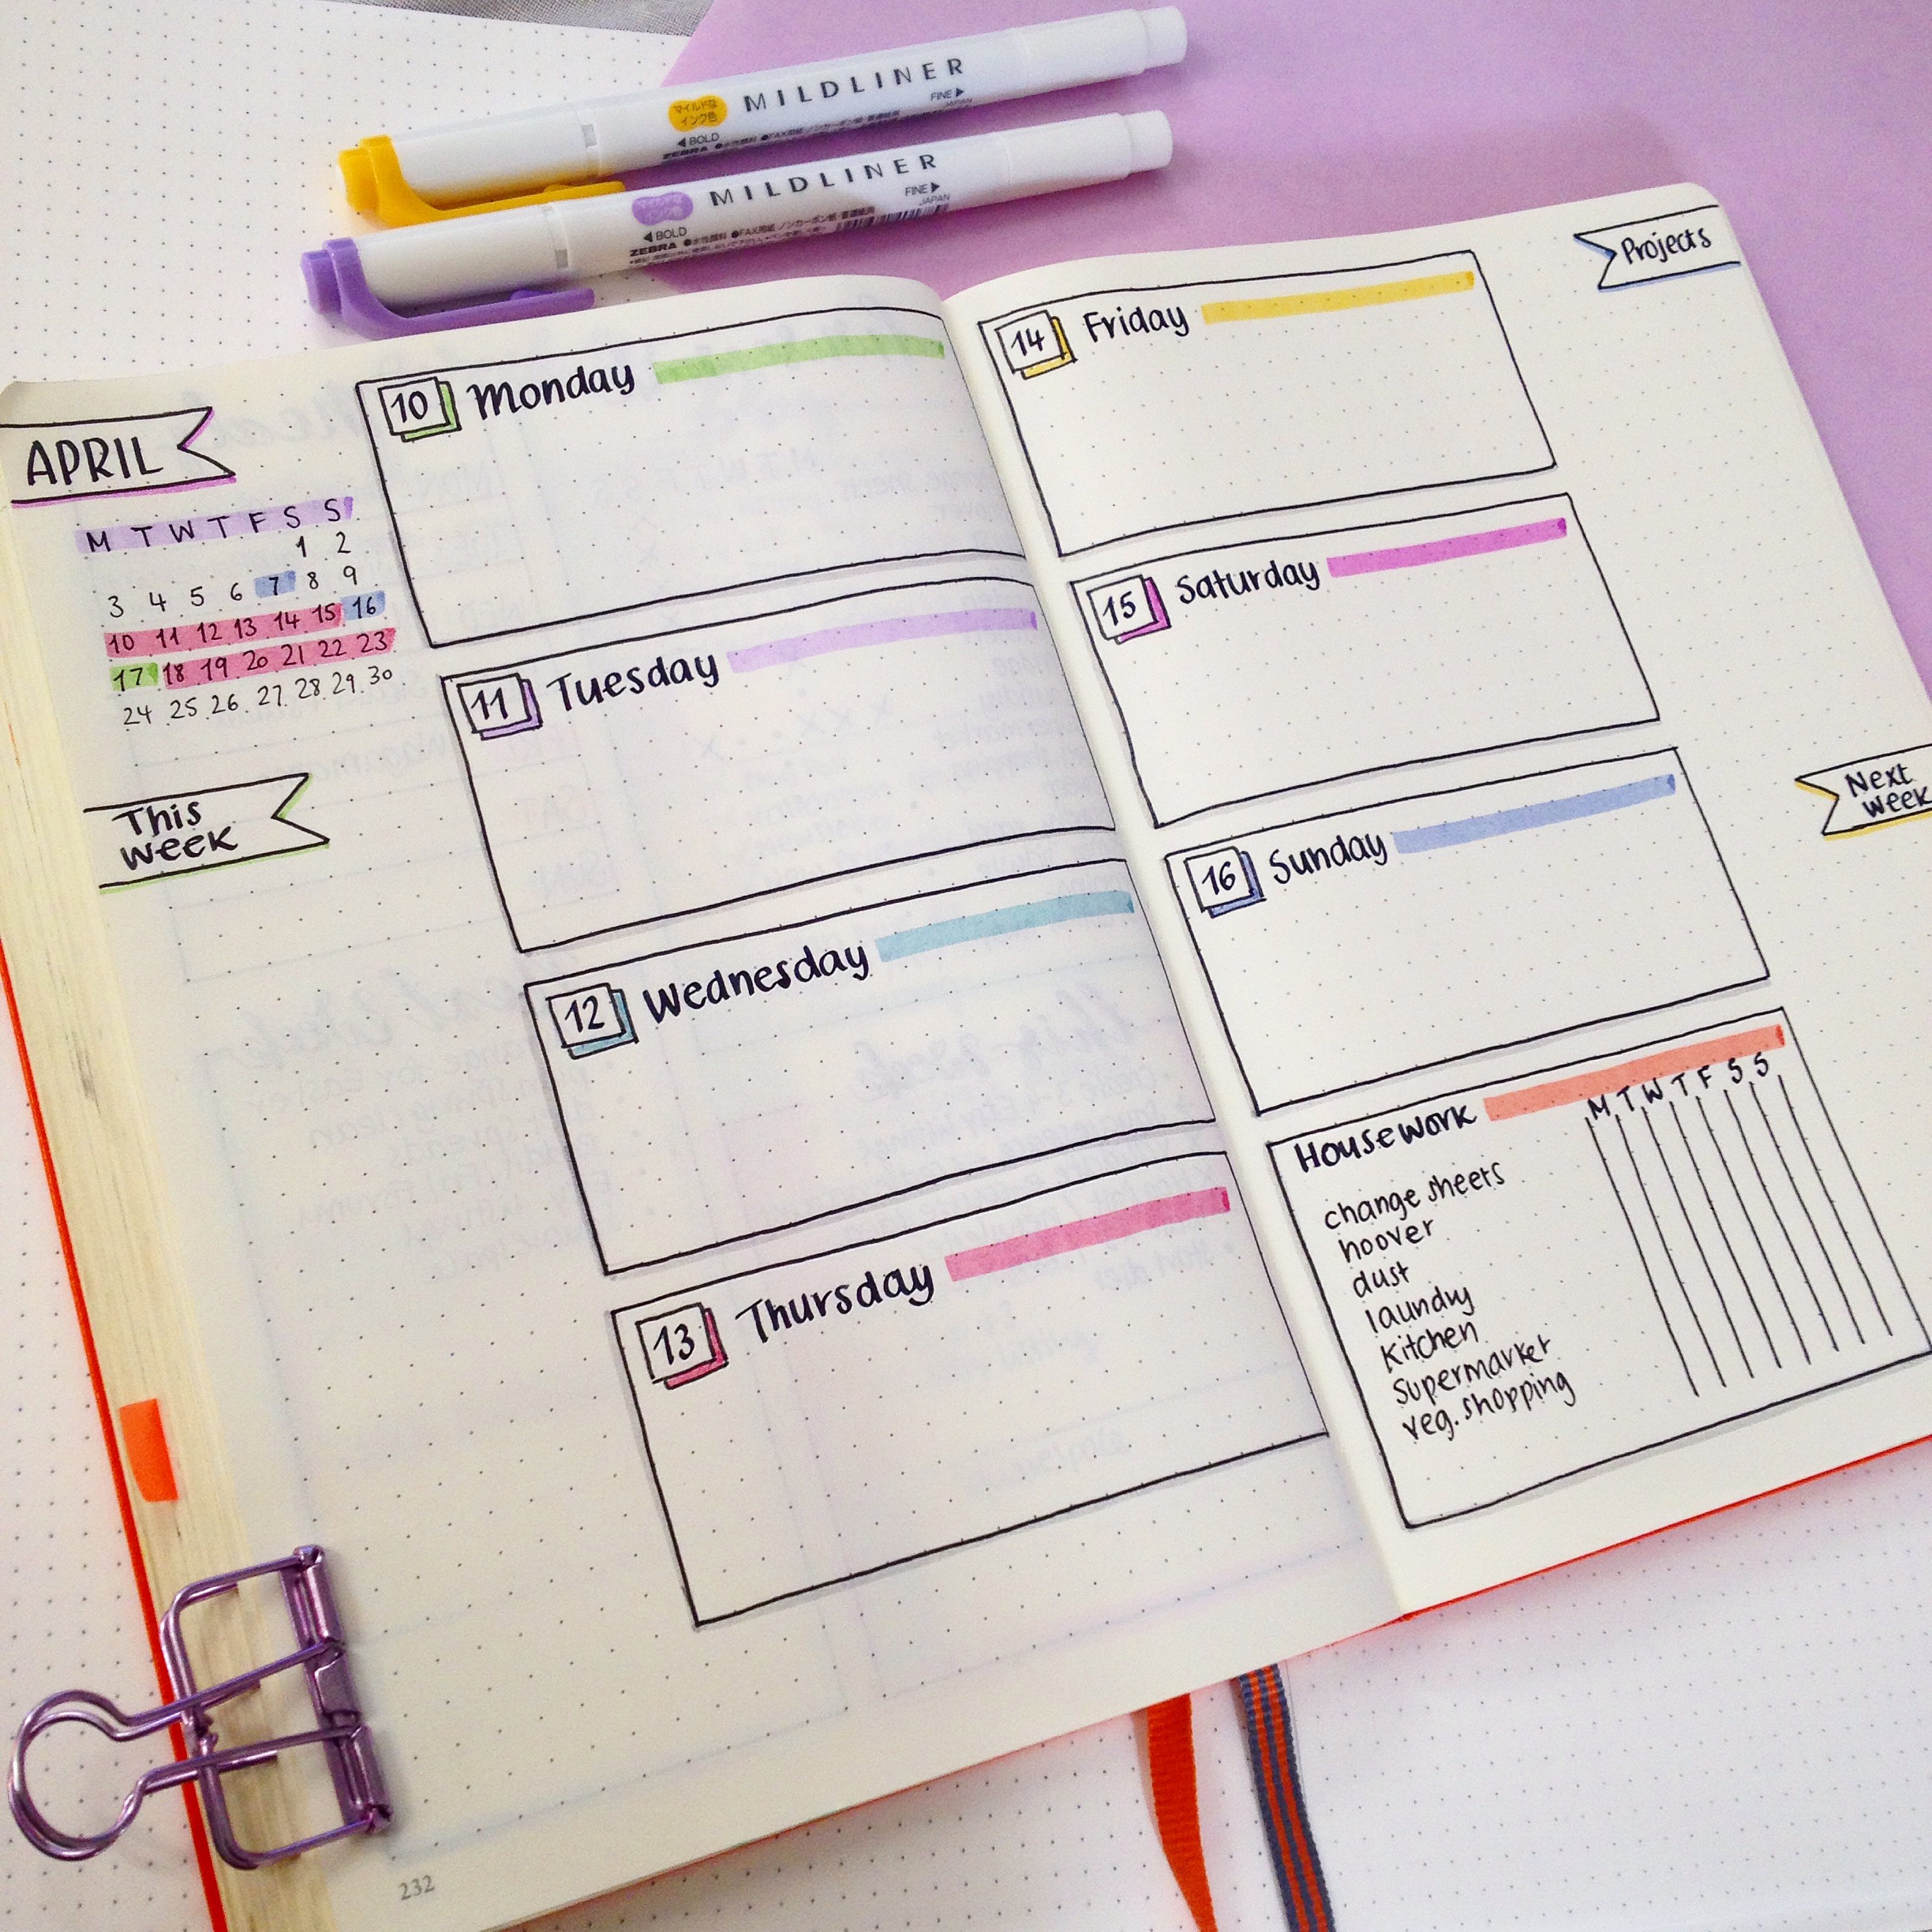
Usually the weekly spread consists of the days of the week, plus any other category you want to include in your planning. You can add your trackers, meal planning, shopping list, projects, next week list, housework, events, tasks, goals, the weather, exercise log etc. The list is endless!
You can adjust your weekly spread to your needs and add only the things/categories you want. Also, you can try a layout one week and if it doesn't work for you, you can change it around or choose something completely different the next week.
Why you need it
For me the weekly spread is very important for my planning and organisation. It gives me peace of mind and a head start for what I’ve planned for the week ahead. Every Sunday I’m looking forward for the time I set aside with a cup of coffee to plan the next 7 days. In a way, I empty my thoughts and all the things I keep in my head, that I want to remember to do in the upcoming week.
I can see at a glance which days of the week are the busiest ones, and add or remove tasks accordingly. Also, knowing how each day looks, I can plan further events/appointments/tasks on the days that I have more time.
Weekly spreads make planning and task organisation very easy to do, and that helps me to stay more focused and productive. Also, if you are very busy and you don’t have time to create dailies each day, you can choose to have only a weekly spread instead. I do that all the time.
How to create yours
One of the best things of bullet journaling for me is the fact that you can change any layout to suit your needs. You can create your own totally from scratch, or you can get inspired from all the amazing fellow bullet journalists online.
So, how can you create your own weekly spread? Here are some tips that work for me:
1 | create an inspiration folder
I keep a folder in my photos on my phone with all the screen shots of weekly spreads I like on Instagram or anywhere else I find them. So, every Sunday, I’ll go over them and see what I like from each one, and what I’d like to include in my weekly. You don't have to recreate a weekly exactly as you see it, unless of course it works perfectly for you. For me, I like to take elements from various ones and create a new one for myself. For example, I might like the colours that someone has used, or the font they used, or the way they arranged the boxes etc.
You can also create a board on Pinterest to keep the spreads that you like the most. Check out my Bullet Journal Inspiration board as well, for lots of amazing layouts.
2 | Measurements
To make my life easier, I have noted down all the measurements for my bullet journal. So, I don't have to count boxes and dots again and again. For the Leuchtturm1917 A5 notebook that I’m using, there are 26 squares horizontally and 38 vertically per page. There are also 27 dots horizontally and 39 vertically per page.


The dimensions of the boxes I use for the days of the week are 8x17 squares when they are vertical, and 18x8 when they are horizontal.
3 | Plan the Layout
Plan ahead how you'll use the space on the pages and measure everything in detail.
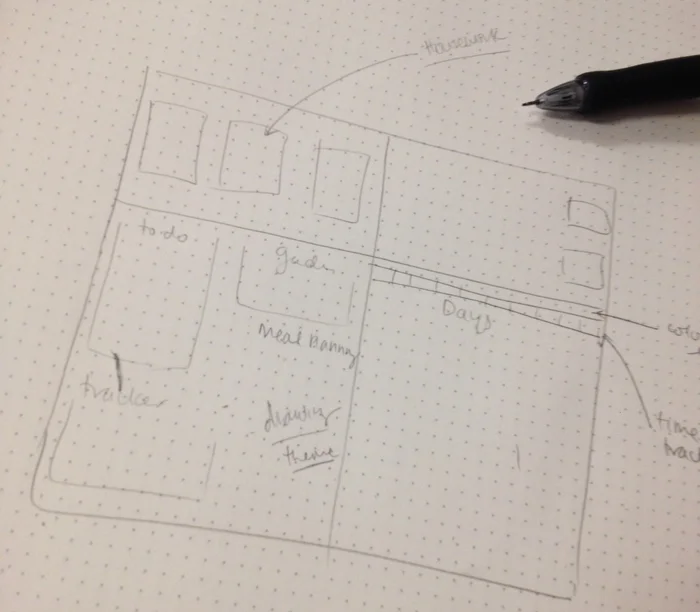
I like to use a dotted page to plan the layout and see how I can rearrange the categories on the page. It's easier to play around marking the sections with a pencil and planning the spread on the paper before transferring it in your bullet journal. You can find a dotted paper printable at my Etsy Shop in letter size and A5 size.
4 | Get Inspired
Use everything around you to get inspired and be creative.

Like for the weekly spread above, I got inspired by Big Brother UK at the time and decided to use the superhero theme on my spread too. Just be creative and have fun!
5 | Puzzle pieces
If you find it difficult to re-arrange the sections on the page, there's another way to do it. Simply cut the boxes of each section to measure, and start placing them around the page like a puzzle. It might take more time in the beginning, but once you've done it a few times, then you won't need these pieces any more and you'll be able to imagine the layout in your head.
6 | related posts
For more inspiration and to get more ideas of various weekly spreads, check out the following blog posts:
- Weekly Spread Ideas for Bullet Journals
- 25 Weekly Spread Ideas for your Bullet Journal
- 40 Weekly Spread Ideas for your Bullet Journal
- Dutch Door Ideas for your Bullet Journal
For even more inspiration make sure you join my Newsletter in order to get access to the Resources Library, where I share lots of weekly spread layouts among other things!
JOIN THE GANG!
Get all the inspiration delivered to your inbox twice per month.
Plus get access to the Resources Library!
Do you use a weekly spread in your bullet journal, or do you prefer to follow the original system and do only dailies? If you do, make sure you share with me your weekly layouts, cause I love to get inspired and try new things :)
Christina x