
Why I Switched from MailChimp to ConvertKit
In the beginning of the year I made the big decision to move my email list of more than 5000 subscribers to ConvertKit from MailChimp, that I’ve been using for the past year.
I got a few questions about why I moved, so today I’ll share with you my story.

In the beginning of the year I made the big decision to move my email list of more than 5000 subscribers to ConvertKit from MailChimp, that I’ve been using for the past year.
I got a few questions about why I moved, so today I’ll share with you my story.
From the Beginning
I’ve been blogging for a few years now, since 2008! When I started, I was a beauty blogger, and back then I didn’t think it was important to start building an email list.
BIG MISTAKE! HUGE!
Later on, I realised that creating an email list is crucial for your business, and that I was missing out on lots of marketing opportunities. Plus, I was not taking advantage of this tool to create a relationship with my audience. So, when I created my blog about bullet journaling, I made sure to start an email list from the very beginning.
I decided to use Mailchimp as my email service provider. One of the main reasons was that they were offering the service for free for the first 2000 subscribers. Between you and me, I never thought I would have any more than 100 subscribers on my list, so I chose to go with them.
To my surprise, lots of people started to sign up for my newsletter and my list started growing! After a few months, I had reached the 2000 limit and therefore I started paying for the service.
During the year, my email list was growing at a steady pace and I found myself at the beginning of 2017 with 5000 subscribers! Some of my goals for the new year included taking my email list to the next level, and while I was planing for it, I noticed that Mailchimp could not support what I wanted to do. My plan was to start offering free downloads with my blog posts, but that was not possible through MailChimp. Also I wanted to create a FREE email course, and that was not easy either. So, after some research online and after reading numerous posts about the pros and cons of each service, I decided to move to ConverKit at the end of January, and I haven’t looked back!
It was by far one of the best decisions I’ve made for my business.
The Move
One of the things I was worried about, was the actual migration from one email provider to the other. I hadn’t done something like that before, and I wanted to make sure that everything happened smoothly. I’ve worked hard for my email list and I care for my subscribers. So, for me it would be a disaster if I lost any (or all) of those precious emails.
I read lots of articles about the move, what to expect and what to do, made my list and took the morning off in order to focus on the migration, and to make sure that everything was working ok.
I have to admit that he whole procedure was pretty straight forward, and the move took only just a few minutes!
The steps you need to follow in order to move your email list from MailChimp to ConvertKit:
- Go to your Mailchimp account and choose which lists you want to move to ConvertKit.
- Export each list individually, by clicking at the ‘Export’ button.
- In ConvertKit go to your Subscribers section and create a tag. This is the tag for the list that you’re exporting, so you can give it the same name or choose something else. For example, I gave one of my lists the tag ‘Newsletter (Mailchimp)’, so that I know that these subscribers have been following me since before the move.
- After you save the tag click ‘Import Subscribers’ in the sidebar. Choose the CSV you exported from MailChimp. Then choose the tag you’ve created to import your subscribers into, and click Import Subscribers. Once the import is finished you’ll receive an email.
- Follow the same steps and repeat the process for each list you have and you want to move from MailChimp.
If any of your subscribers were in multiple lists in your MailChimp, ConvertKit will apply all the necessary tags to them without creating duplicates. Perfect!
Here is a more in-depth guide on how to move your subscribers and lists from MailChimp to ConvertKit.
What makes ConvertKit different?
1 | You don't pay extra.
Convertkit is a subscriber-based email platform. While MailChimp organises the subscribers into numerous lists (and you end up paying extra for subscribers that have subscribed to multiple lists), with ConvertKit you get one list, and you don’t get double entries.

2 | Keeping track of your subscribers.
Even though it has one main database of subscribers, it uses forms, sequences, tags and segments to help you keep track on how each subscriber joined your list. This helps me to understand my subscribers and be more strategic with my emails.
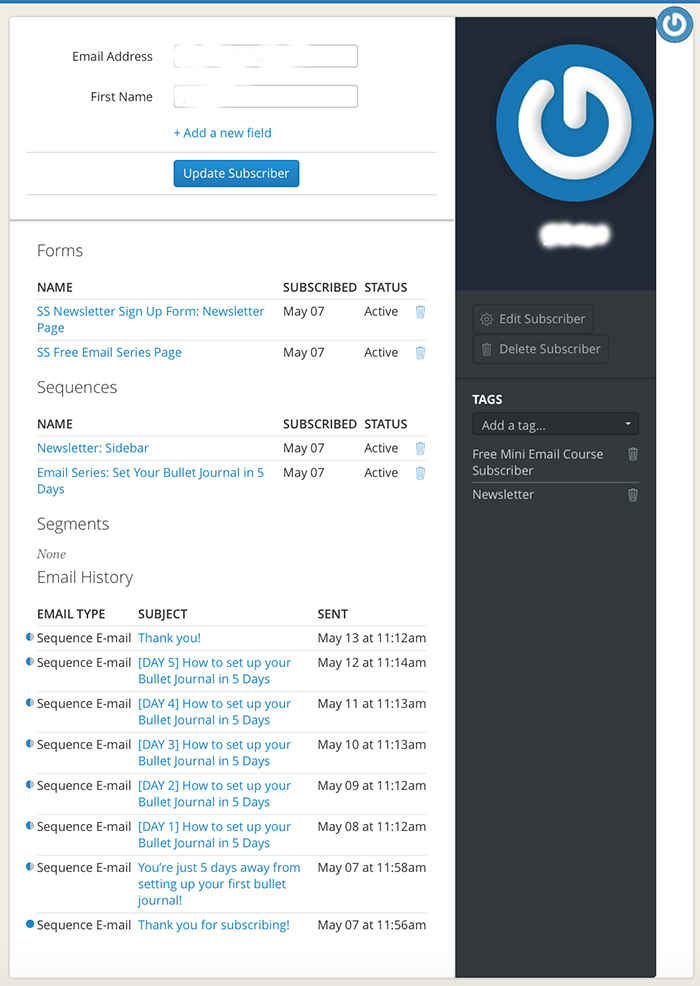
3 | Analytical subscriber profiles.
Every subscriber has a profile where you can see how they joined your list, which forms they’ve subscribed to, what tags they have and which emails they’ve opened and acted upon. This is so helpful to see what each subscriber is interested in and to send more focused and targeted emails to them.

4 | Create Opt-In Forms in no time.
You can easily create forms and opt-ins for various blog posts or pages so that you can offer free downloads and grow your list. The whole procedure is very easy to do and takes just a few minutes to create and implement into your website. There is a variety of options for the way these forms appear (box, pop-up, simple etc.) and you can also personalise them, by changing the layout, the colours to match your website and so much more!
5 | Easy to set up Email Sequences.
You can create and plan email sequences fast and easy. I recently created my FREE 5-day email course - 'How to Set Up your Bullet Journal'. It was my first ever email sequence I created. ConvertKit made it so easy to plan and schedule, that I had it up and working in less than 5 days!

6 | Awesome Automation Rules.
Automation rules are the best feature of ConvertKit! They make everything so easy, and you don't have to do any extra work. With ConvertKit, it’s based on a very simple ‘if this / then that’ sequence. For example, if someone subscribes to my Free email course, then they are sent the email sequence of the course, they are sent a welcoming email and they are automatically subscribed to my newsletter.
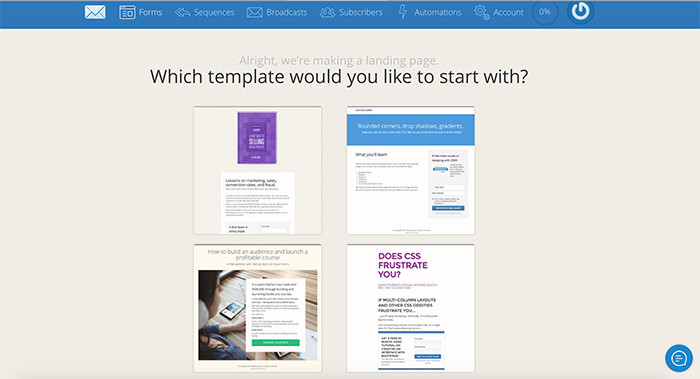
7 | Landing Pages.
Yes, with ConvertKit you can also create landing pages. If you want to be able to create landing pages without investing to another system, then ConvertKit is perfect for you! You get lots of options that you can personalise and make your own.
If you are looking to move from your current email service provider, or you want to take your email list more seriously, then I would definitely recommend giving ConvertKit a try. I’m very happy with the service and it has helped me to take my email list to the next level.
If you have any questions, I’d love to help. You can leave them in the comments below.
What email service provider are you currently using?
Christina x


How to use Acrylic Paint in your Bullet Journal
I love using colour in my bullet journal. Colourful pages makes me happy, put a smile on my face and funny enough help me focus more on the tasks I need to complete during the day. (weird, I know, but totally true!)
My regular tools that I like to use with my bujo, are my Pelikan coloured pencils and my Tombow markers. (Click here to see the list of all my favourite resources) However, I recently purchased a box of acrylic paint and I wanted to experiment with them in my bullet journal.
I love using colour in my bullet journal. Colourful pages make me happy, put a smile on my face and funny enough help me focus more on the tasks I need to complete during the day. (weird, I know, but totally true!)
My regular tools that I like to use with my bujo, are my Pelikan coloured pencils and my Tombow markers. (Click here to see the list of all my favourite resources) However, I recently purchased a box of acrylic paints and I wanted to experiment with them in my bullet journal.
Acrylic paint generally is a difficult medium to use, especially in journals with thin pages, without getting them ruined. Usually, the pages get wrinkled and damaged and the end result is not as neat and pretty.
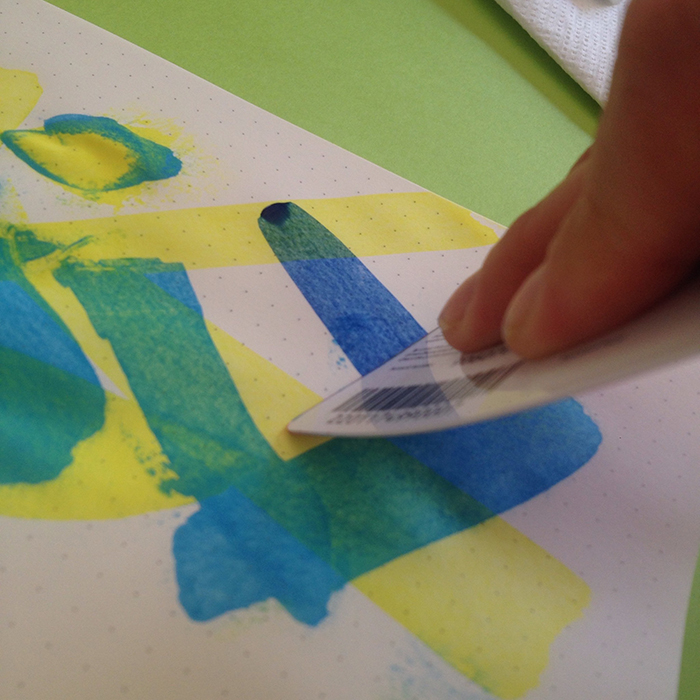
After doing some research online, I found that the solution to this is to place as less paint as possible on the page. And in order to achieve that, all you have to do is to use a plastic card. (* light bulb moment! *)
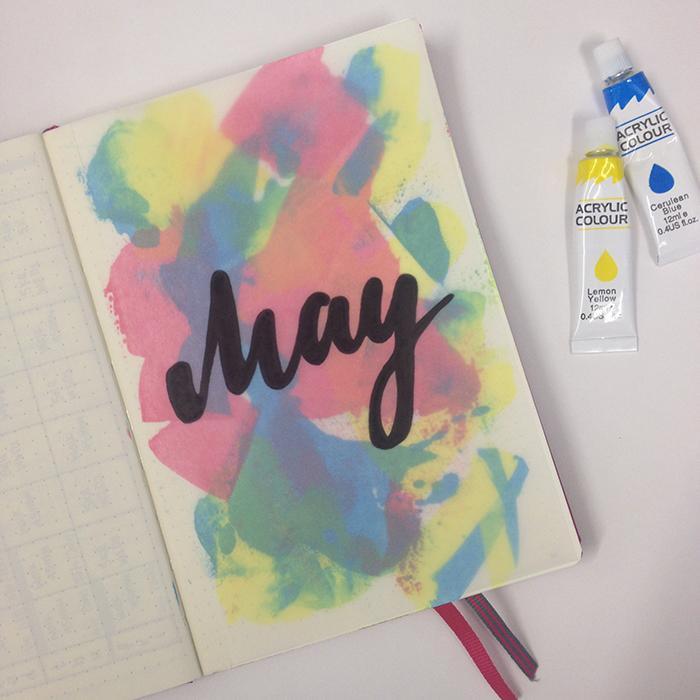
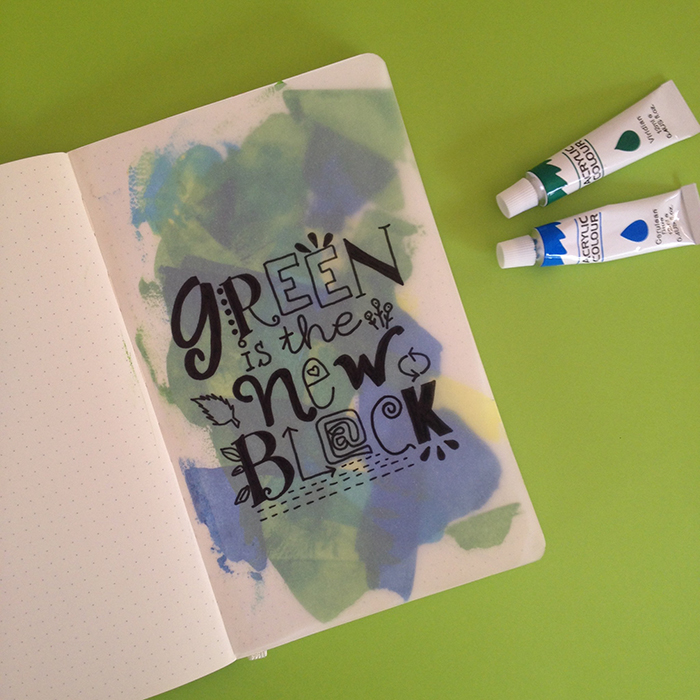
So, I started playing around and I’m in love with the result! I used this technique to create the front page of my May Set Up in my bullet journal.
How to create an abstract background with acrylic paints in your journal:
Before you start:
Choose the colours you want to use. Keep in mind that when a colour goes over the other, they will naturally create another shade. So, I’d advice to not use more than 3-4 colours.
Start with the lightest colour first. It’s easier to cover it, if you choose to change things around. A darker colour is usually more difficult to make changes on.
Don’t think about it. Just start creating and you’ll be amazed at what you’ll create ;)
What you’ll need:
Your journal, your acrylic paints and a plastic card.
How to do it step by step:

- Take your card and add a small amount of acrylic paint.

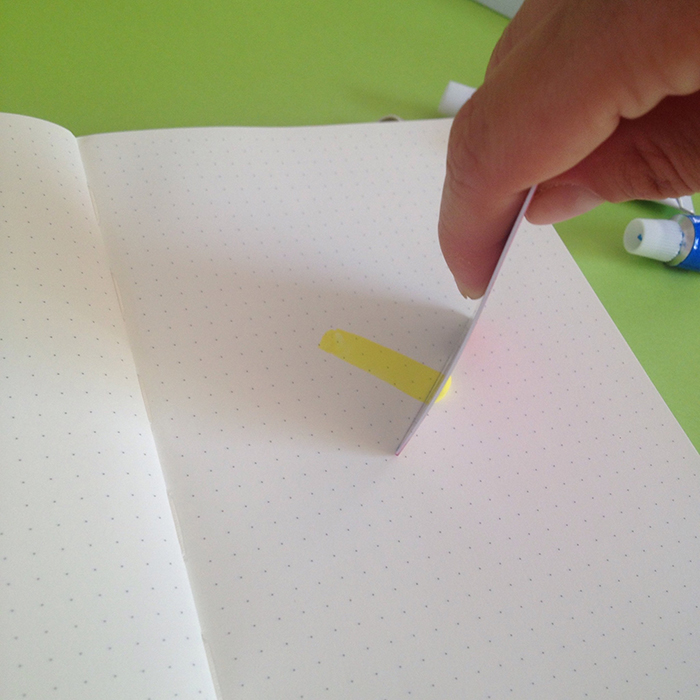
- Hold your card vertically on the page and drag along towards you.
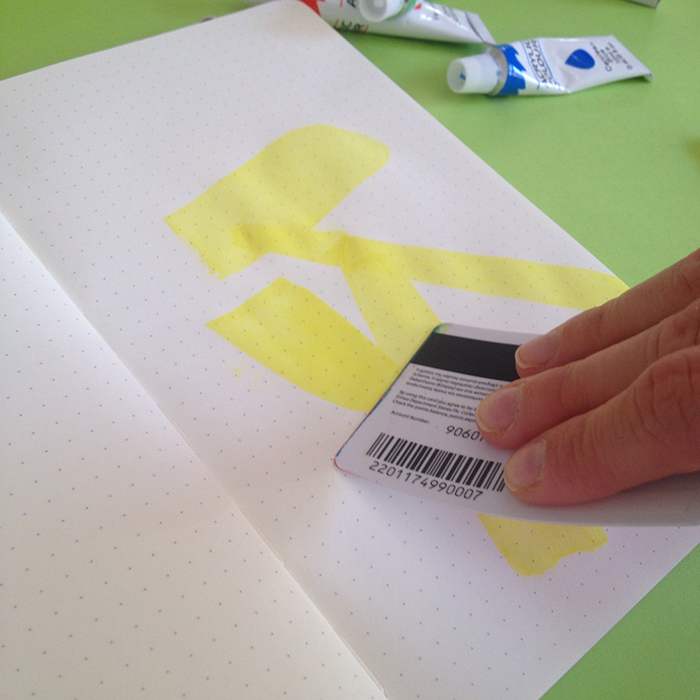
- Change the angle of the card to change the amount of paint you add on the page. The more upright and vertical you hold the card, the less paint you’ll get on the page. The more you tilt the card, the more the paint you’ll get.
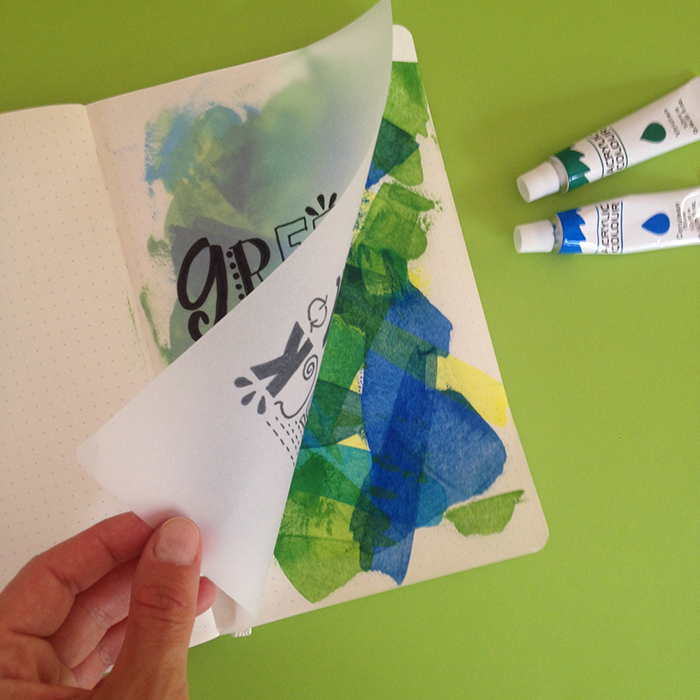
- Once you’ve finished with one colour, clean the edge of the card with some paper and add then next colour.

- Continue until you’re satisfied with the result.
- Give it 5-10 minutes to dry. Pat it with your fingers carefully to check.
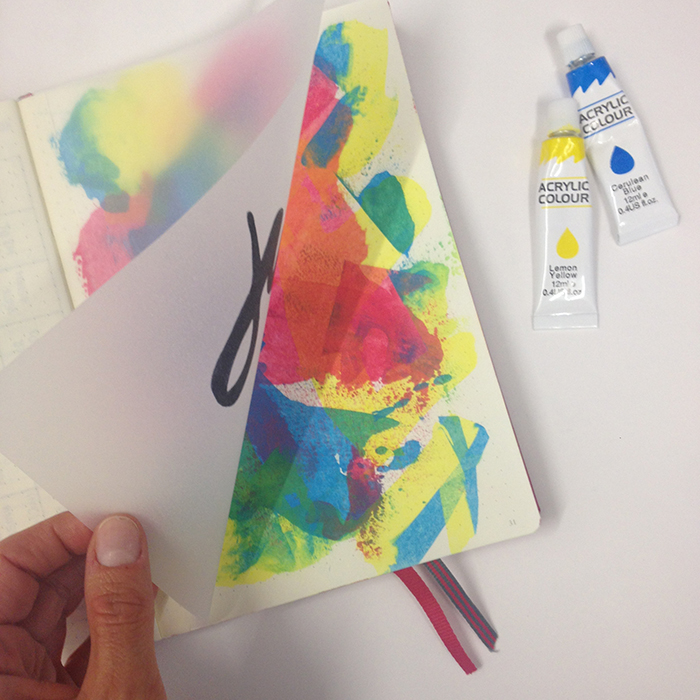
To add the tracing paper overlay:
You’ll need some tracing paper, double sided sticky tape and a marker.

- Measure the dimensions of your page and cut the tracing paper accordingly. I personally prefer the tracing paper to be a bit smaller than the actual page, so I made it approx. 2mm smaller on each side.
- Check that everything is correct and you’re happy with the dimensions of the page.

- Since it’s a tracing paper, you can copy anything you want on it. Go online, and find doodles, quotes or anything else you want to add to it. Print it and copy it on your tracing paper. (For this page, I copied a design by Kathy R. Jeffords). Of course, you can also be creative and make one of your own designs :)
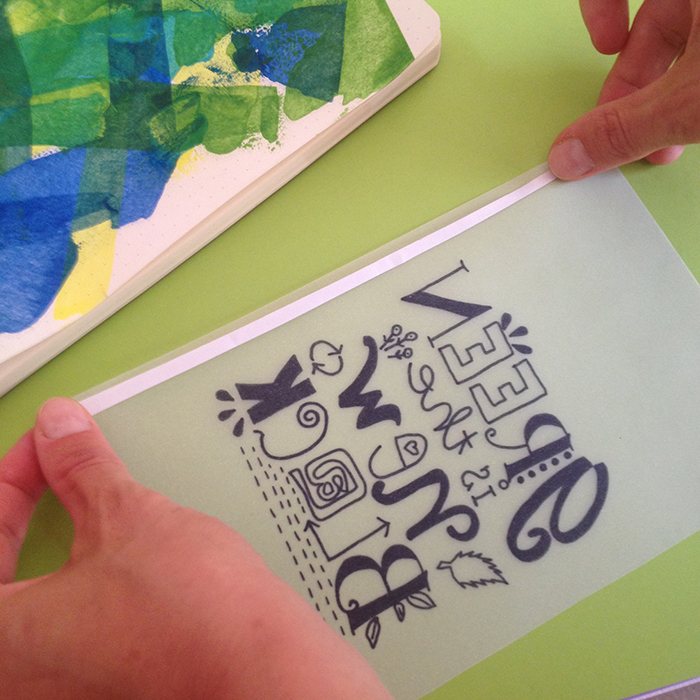
- Once you’re happy with the page, turn it around and add the double sticky tape on the edge. (be careful to do it on the right edge! - believe me I’ve been there and done this mistake myself!)
- Hold the page from both ends and stick it as close to the inside of the journal as possible, making sure it sticks properly with no bumps.
- Sit back and admire your creation!
If you try this technique in your journal, make sure to share with me your creations ;)
Have fun!
Christina x
I was thinking of creating Colouring Secrets: an e-course that will cover tips and techniques on how to colour using coloured pencils, markers and watercolours.
If you'd be interested in a fun and affordable ($20) e-course on colouring, enter your info below and I'll notify you when it launches!
COLOURING SECRETS E-COURSE
If this is a product you'd be interested in buying, enter your email below and I'll notify you when it launches!

How to use batch days to be more productive
Up until the end of last year I thought I had it all figured out. I had a weekly schedule, where I would spread all my tasks throughout the 7 days of the week. My thinking behind this, was that spreading the workload through the week, was going to make things easier for myself.
So, for example, I would set different parts of my housework for each day, i.e. Monday: hoover, Tuesday: dusting, Wednesday: Kitchen + Fridge etc. The same would go for my work and blog. I tended to add lots of little tasks every day on various topics and sections of my work - from website updates, to emails, reading articles I needed to catch up with, replying to comments, writing blog posts, promoting them, being active on social media etc.
This way of doing things, resulted in me having huge to-do lists every day with lots of little tasks on various areas. And while I was trying to stay on top of that list, I would start doing each of the tasks, and then move to the next one. But there was no cohesion. So, for example, I would start to dust the house, then sit down to reply to some emails, and then go and hang out the laundry. And it would continue like this. Also, most of the times I would get distracted by something else (like an incoming txt or email), resulting in me spending more time than I thought on each task.
At the end of the day, I would find myself exhausted, looking with bleary eyes at a half-done to-do list, surrounded by lots of post-it notes with things I needed to remember throughout the day, feeling deflated and near to tears!
Multitasking is definitely not good for my productivity!
But then, I came across the term ‘batch days’ and my whole world changed!
What is a batch day?
A batch day is when you dedicate one day (or part of a day) to work on a specific topic, with no distractions so that you have maximum productivity. By batching similar tasks together and minimising distractions, you’ll be able to focus more on the specific tasks, and finish them quicker.
What can you batch?
Everything! From your blog posts, emails and your social media, to your housework, reading, cooking, calls and errants. It’s really up to you!
How does it work?
You create a list of tasks and things you need to do on a specific topic/category. Once you’ve created your list then you allocate a specific day as your batch day for this list, and you add it in your calendar. So, when that day comes, you’ll know exactly what needs to be done.
But there are certain rules:
No distractions: During the time you are working on your list, you can’t look at your phone (put it on a ‘do not disturb’ mode), check your emails or social media accounts, and generally you can’t get distracted by anything that doesn't have to do with the tasks on the list. Use the time when the kids are at school or, if you can, hire a babysitter.
Make sure that you’re prepared and you have everything you need. Check your list from the day before and make sure all the equipment, tools and devices you may need to finish the tasks for the day are ready. Charge your camera, download the right workbook, have the notebooks and pens you'll need at hand. Generally, make sure that there’ll be no surprises, which may prevent you from finishing all the tasks in your list.
Prepare everything else in advance. Obviously, you may have more responsibilities during that day that you cannot avoid or postpone. For example, being a mother of two, I know that when my kids come back from school, they want to eat straight away. So, on my batch days I’ll make sure that I’ve prepared something for lunch from the day before. That way I don’t have to stop what I’m doing to start cooking.
Utilise your time efficiently. You can make sure that you use those hours even more efficiently by using the pomodoro technique, and further blocking out your set time.
Take breaks. You need to give yourself some time off in between the tasks to mentally rest, so that you have the energy to continue. Every hour or so take a 10-15 minute break. Get up from the computer and have a snack, go out in the garden, meditate. Do something else and for a few minutes change environment.
You can’t do anything that’s on that list before the set day - unless you have some spare time and you feel like doing so :)
How does it work for me?
Changing my routine hasn’t been easy, but since I started implementing the batch days to my schedule I’ve seen some great results and lots of checked off to-do lists!
The following are a few things that I am batching in order to make myself more productive:
Housework - While before I was spreading all the tasks throughout the week, now I do most of the cleaning on Saturday mornings. I know exactly what needs to be done, and I don’t schedule any other work for that part of the day. Obviously, there are still things that I need to do during the week like laundry, cooking etc., but generally 90% of my cleaning is done on a Saturday.
Blog - I try to write and schedule the blog posts of the week on Mondays, so that I don’t have to think about them for the rest of the week. I have to admit that this doesn’t always happen, especially the last few weeks that I was moving to Squarespace, but generally speaking, I try to allocate one day for the blog posts. My plan is to have at least two week’s worth of blog posts pre-scheduled in order to use that time to batch other things. ;)
Social media - I have to admit that I get so distracted when I check my social media accounts, it’s ridiculous! I can spend anything from 10 to 30 minutes without even realising it! So, in order to avoid this distraction as much as possible, I use Buffer and Hootsuite to pre-schedule my social media. I set one day every 15 days to pre plan my pins on Pinterest using Buffer, while I use Hootsuite once a week to plan, organise and schedule my day to day social media interactions on Twitter and Facebook for that week.
Planning - I plan all my week every Sunday afternoon, while I make my weekly spread in my bullet journal. It helps me to have a clear view of the week ahead, put my thoughts in order, plan as much as I can and set batch days for various groups of tasks.
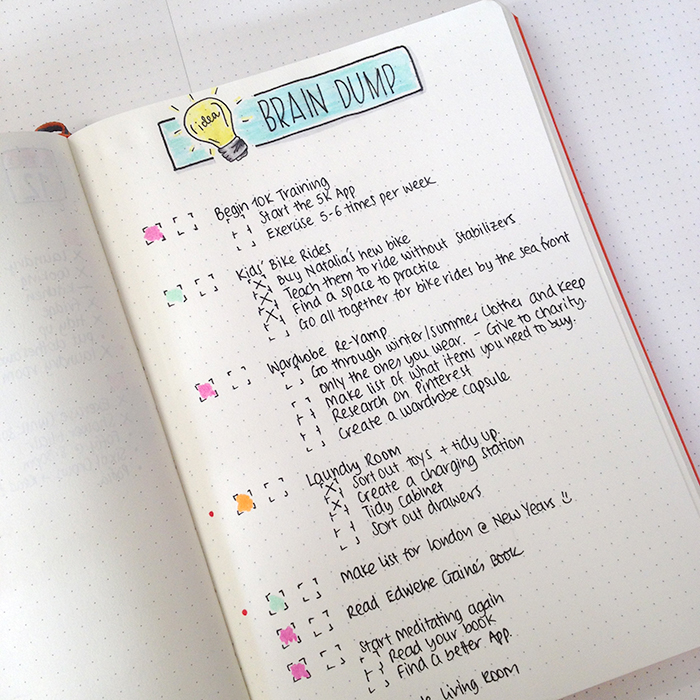
Brainstorming - I tend to set up 30-45mins to brainstorm ideas for my blog once every 15 days. It helps me put my thoughts on paper and come up with new things I can do. I tend to have a brain dump list in my bullet journal, where I can add ideas when they come up to me.
Errants - I’ve set every Thursday as my errant day. I know that I will dedicate that morning for all my shopping and errants, so that I won’t schedule any work for that time.
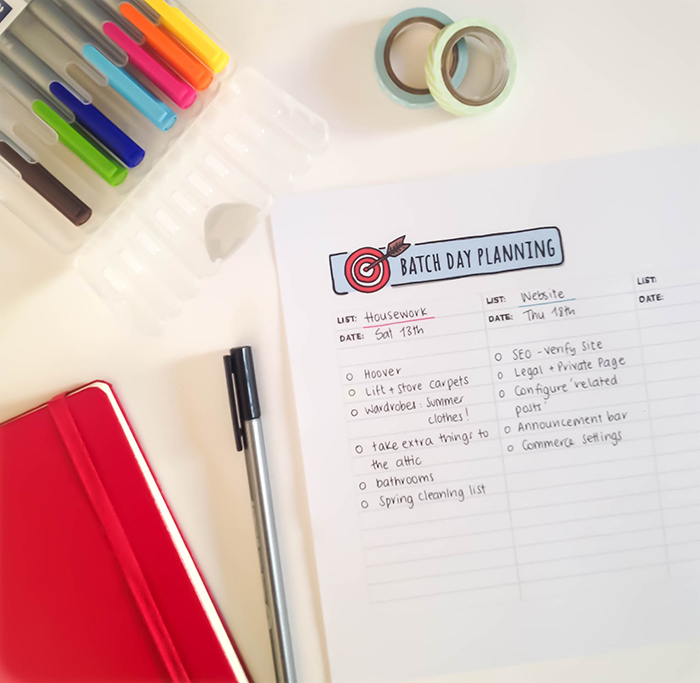
I’ve also created a FREE set of printables to help you when you plan your batch days. It’s a brain dump page and a batch day planning page. On the brain dump page you write all the ideas and tasks you think, without any order. This page is just to collect all your thoughts and empty your brain. The batch day planning page is where you group similar tasks from your brain dump page in lists, and you allocate a specific date as the batch day for them.
JOIN THE GANG!
Subscribe now to my Newsletter to download the FREE Printable.
Plus get access to the Resources Library!
Have you used batch days before? What are your thoughts? What other ways do you use to keep yourself focused and productive?


Bullet Journal: My May Set Up
I know I'm pretty late with my May Set Up, but the last few days have been crazy busy!! To tell you the truth I was contemplating whether to actually write this post or not. As you'll see, my May set up is very VERY minimum! I didn't know if it was worth it. But I wanted to continue doing the monthly set up series as I normally do, and to be honest, even though there's not much to share with you, I still believe that they are very functional pages and you could still get something out of this ;)

I know I'm pretty late with my May Set Up, but the last few days have been crazy busy!! To tell you the truth, I was contemplating whether to actually write this post or not. As you'll see, my May set up is very VERY minimum! I didn't know if it was worth it. But I wanted to continue doing the monthly set up series as I normally do, and to be honest, even though there's not much to share with you, I still believe that they are very functional pages and you could still get something out of this ;)
So, my very first spread for May is the front page of the month. I usually do my little doodle with the penguin, but this time I wanted to experiment with something new and different. And this is the result:

I used some tracing paper for the front part, where I wrote 'May' for the month. And I used double sided sticky tape to attach it to the page. For the background, I used various colours of acrylic paint as I mentioned before, and I used a technique to layer the colour very thinly so that it doesn't damage the page. If you'd like me to create a tutorial for this technique, let me know in the comments below.

The next spread is my monthly spread for May. I decided to change things around a bit and this is the end result.
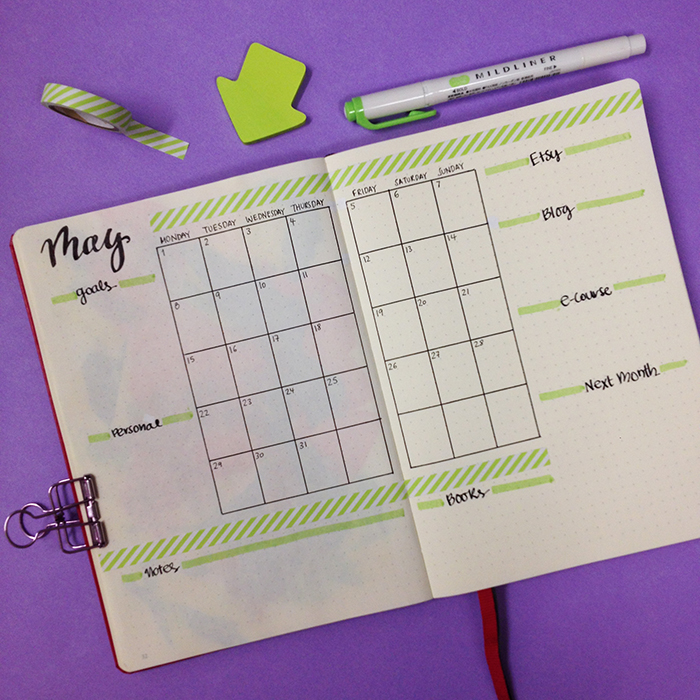
I added a smaller version of the month at a glance layout in the middle and lots of different categories around it. This way I have everything I need in one page and that really makes me focus and plan my month ahead. For this layout, I was inspired by @amanda_plans_ on Instagram.
I decided to not include any of my usual spreads this month. I've been so busy the last weeks that I never got around to even look at these spreads and fill them in during April. So this time, I decided to leave them out completely - just for May.
The only other spread I've created after that, is my weekly spread for the first week of May.

Believe it or not, it's the first time I'm using washi tape in my bullet journal! (shocking!!! I know!!!). I usually like to draw and doodle around, but this time I wanted to try something else. I got inspired for this layout by @bulletbyjulia on Instagram and for the little pictures idea by @studywithinspo.

I tend to prefer a vertical to a horizontal layout for my weeklies, and this turned out perfect for me. I might make some changes next week and add a bit more colour, but generally this is a very functional layout. :)
So, there you have it. My very minimal but still very functional and fun May Set Up in my bullet journal. What changes have you made this month?


How I've set up my 3rd Bullet Journal
I've finally moved to my 3rd Bullet Journal! Yay! My last one coincidently happened to fill up completely as April was coming to an end, so I managed to start a brand new bujo at the beginning of May! If you want to see how I set up my 2nd bullet journal, you can follow this link. For my 3rd bujo I decided to go for a berry A5 dotted Leuchtturm1917 and seriously I'm in love. This colour is amazing!
In today's post I'll share with you how I've set up my new bullet journal, what changes I've made and which spreads I've decided to transfer from my previous one. So, make yourself some coffee (or tea) and sit comfortably cause it's going to be a looooong post!
I've finally moved to my 3rd Bullet Journal! Yay! My last one coincidently happened to fill up completely as April was coming to an end, so I managed to start a brand new bujo at the beginning of May! If you want to see how I set up my 2nd bullet journal, you can follow this link. For my 3rd bujo I decided to go for a berry A5 dotted Leuchtturm1917 and seriously I'm in love. This colour is amazing!
In today's post I'll share with you how I've set up my new bullet journal, what changes I've made and which spreads I've decided to transfer from my previous one. So, make yourself some coffee (or tea) and sit comfortably, because it's going to be a looooong post!

I decided to continue using the Leuchtturm1917 notebooks, which are very good for bullet journaling. I love that they come in so many different colours and the plan is to choose a different colour each time I move bullet journals.

The first thing you see as you open the notebook is a spread with the words 'Live. Love. Sparkle. Ignite.' I love that these 4 words combine exactly how I want to live my life, so I wanted to add them in my new notebook.

On the opposite page, I played a bit with watercolours and some lines, and I created this diamond shape with a colourful background. There's no deep meaning behind this. I just got a bit creative and I love the result.
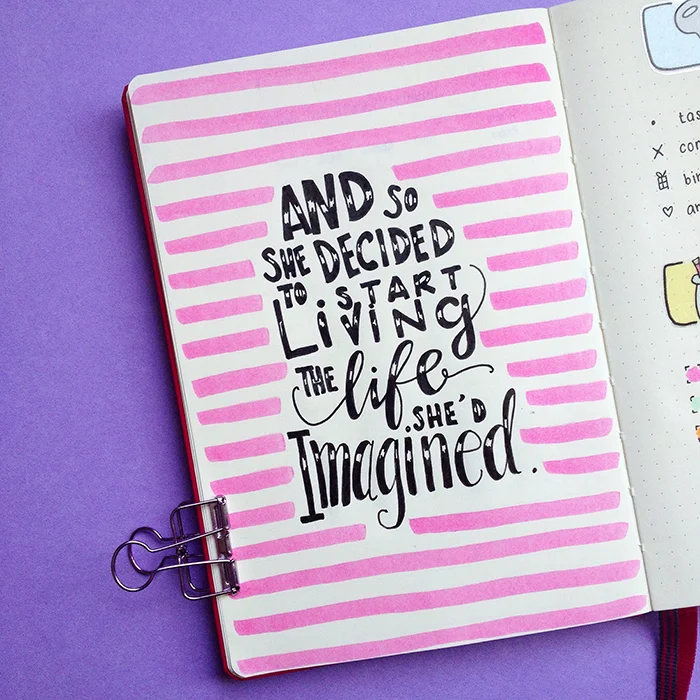
The first page after the Index, is this quote I wanted to include in the beginning of my journal. It says: 'And so she decided to start living the life she'd imagined'. The last 2-3 years I've taken control of my life and I try to live each day doing the things I love and trying to live as I've always wanted to, so that's why I like this quote, to remind me. I also find that quote pages can be very handy when you have single page spreads and you don't know what to add to the other page!

Moving forward, the next page has the Key and the Colour Code for the whole journal. These are the colours I've been using all the time and they make my dailies so much more organised. I managed to finish this page super quick, since I used these stickers from my Etsy Shop. 😘

I totally changed the layout for my yearly log of Birthdays and Holidays. I chose this circle design that I've seen a lot on Instagram and added lots of colour. I have to say that I really like how it turned out and I really enjoy trying new things and spreads.
I've created a FREE Printable of this Birthday and Holiday spread, both in black + white and coloured for you.
JOIN THE GANG!
Subscribe now to my Newsletter to download the FREE Printable.
Plus get access to the Resources Library!

I've also changed my Future Log layout as well. I like how colourful it is and so far it works pretty good for me. I've only added the next 8 months, since each bullet journal usually lasts me 6 months or so. Plus, I don't really plan that much ahead, and even if something comes up, I'll use the post it technique.

The next spread is my Annual Overview Planner. (You can find a printable of this as well in the Resources Library). This is where I plan all my projects and various tasks during the year. It helps me to see at a glance what I have to do each month. I like to write on this spread with a pencil, because I keep on changing my mind, or I like to move things/projects around! I usually try to add 1-2 big tasks/projects each month, and so far, this year has been one of the most productive EVER! Give this a try, I assure you you'll see results! 😉
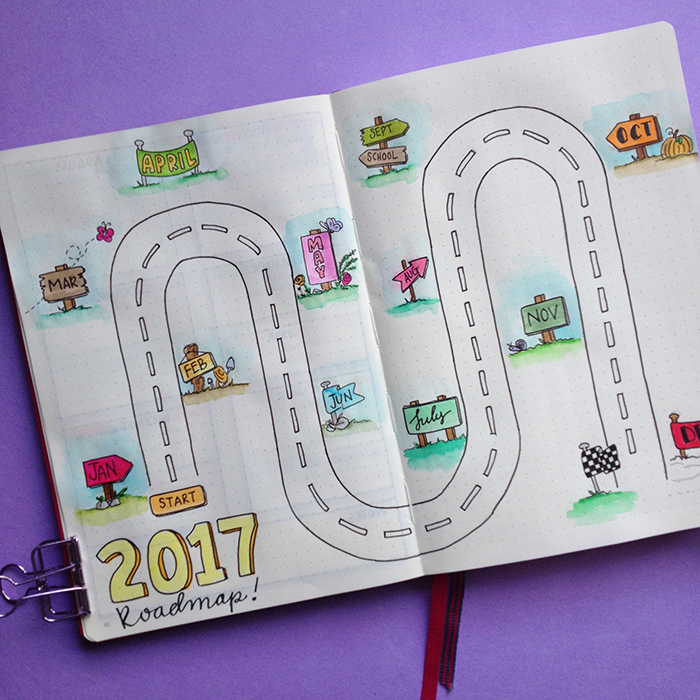
The next spread is really cool and I had so much fun creating it. It was inspired by the lovely @helloiamprince. It's a 2017 Roadmap. Basically the road represents the whole year, and each flag is one of the months. You use this spread to write down the best memories, events, successes and generally anything you want to remember from each month. I really really like it, and I love that I can see straight away what I've achieved each month!

Moving forward, I have my Reading Challenge List. I basically have made a challenge for myself over on Goodreads, to read 77 books this year. And on this page I write the title when I finish a book. I am a bit behind on that, not because I didn't have time to read, but because I couldn't find anything nice to read!!! However, right now I'm reading King's Cage and I love it!!!!

The next two pages have to do with books as well. The first one is all the new publications that I want to read each month. I like to keep track on that and it's also an easy way to find books to read. The second page is a list with past publications and books that I want to remember to read at some point. I haven't finish updating them yet, but May is looking pretty good!!! 😉
The next few spreads have to do with shopping and menu planning. I like to keep all these spreads together, because it makes my life sooooo much easier when I menu plan for the week and I make my shopping list!
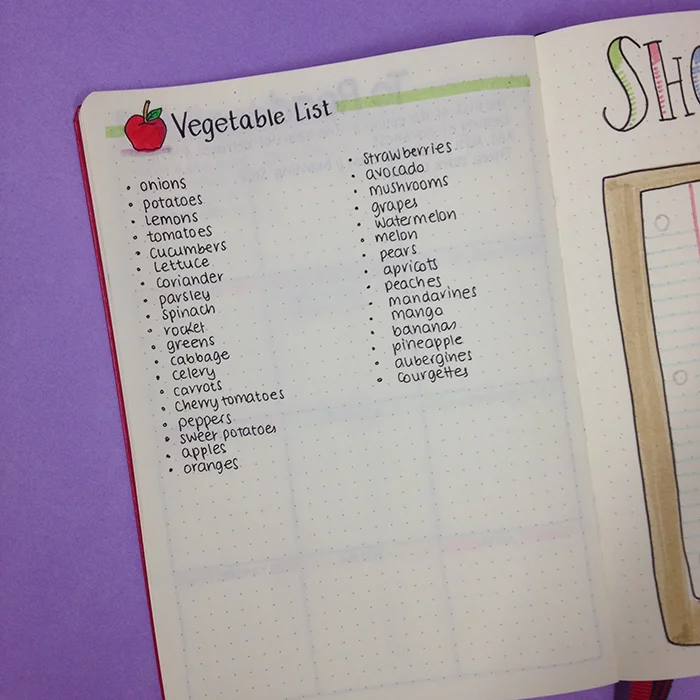
The first page is my Vegetable Shopping List. A simple list to remind me of the fruit and the veg I usually buy.
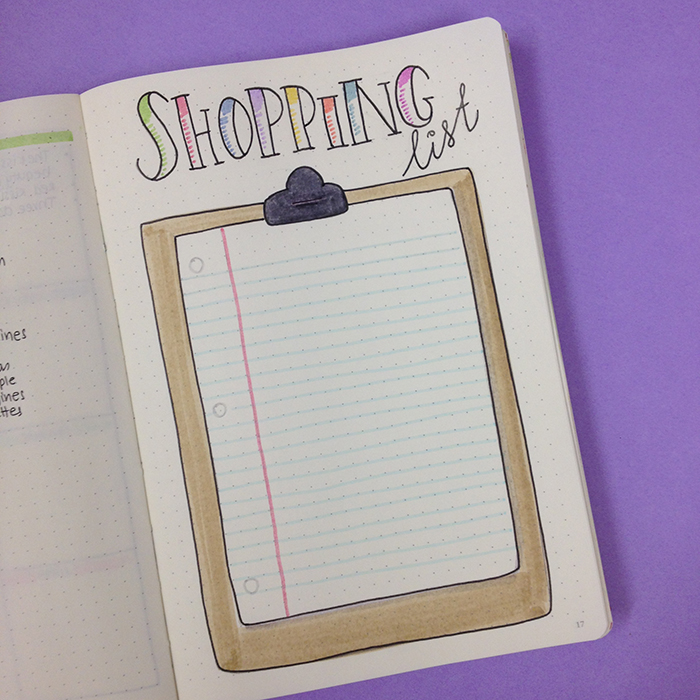
The other page is something that I saw Sarah Churchill do in her bullet journal and I thought it was such a great idea, that I had to recreate in my new bujo! It's basically a page for your Shopping List(s). I've drawn a notepad and on top of it you place your post it note(s) for your shopping list(s). Once the list is done and you're ready to go shopping, you simply take the post it with you! Genius!!!

After that, I added my Menu Planning. (I made a mistake there, cause I wanted to add my Supermarket List first, but what can you do???). I've used exactly the same layout as before, because I like how it looks and it's very functional.

Next comes my Supermarket List, which is by far one of the most used list in my bullet journals! This is the list I check to see if I have these things in my pantry/fridge/house when I am making my shopping list each week. No major changes here either, apart from the header.
The next few spreads are the ones that I've talked about in my Diet Loss Plan in my Bullet Journal II, so you can head over there to check them out.
So, this is the way I've set up my new bullet journal and I am very pleased with the result. One of the things I like about bullet journaling, as I've said before, is that you can change things around. So, I'm actually enjoying this whole process! If you want to learn more about how to transition to your next bullet journal, check out this post.
How many bullet journals have you used so far? Which are the spreads/pages/layouts you always transfer to the new journal?


Doodle Instagram Challenge: #doodlewithusinmay
Me and Alexandra (from @alexandra_plans) are celebrating our 1 year anniversary for the #doodlewithus Instagram challenge and we're inviting you to celebrate with us and take part in our #doodlewithus challenge for May.

Me and Alexandra (from @alexandra_plans) are celebrating our 1 year anniversary for the #doodlewithus Instagram challenge and we're inviting you to celebrate with us and take part in our #doodlewithus challenge for May. This past year has been incredible and we'd like to thank everyone who took part in the monthly challenges and has made the #doodlewithus Instagram Challenge so big and well known! There has been some incredible doodles and drawings and this comes to show how much talent there is out there. :)

Because we wanted to make it a bit special, we decided to turn it into a doodling competition for the chance to win some really cool prizes. The winner will get 1 pack of the Pelikan soft coloured pencils (that I love!) and 1 pack of Tombow Dual Brush markers.


It's going to be 31 days of doodles that will hopefully get you to be creative and have fun! The theme of May's prompts is 'Party Time', and I seriously can't wait to start drawing!!!
As we did before, all the doodles are part of one big comprehensive picture. Imagine each day to be one piece of the puzzle. So, at the end of the month you will have one big doodle picture! :)
If you decide to follow this way, you'll have to create a table with 5x6 +1 boxes and you shouldn't add the days on the top. You can also make the boxes and dates in pencil, if you don't want the lines to obscure the end result. It's totally up to you.
Of course, if you prefer to draw the doodles in the traditional way, that's absolutely fine as well. The important thing is to have fun!
You can also download a free printout with the daily prompts here.

For you to take part in the competition you have to:
- Follow me (Christina) @christina77star and Alexandra @alexandra_plans on Instagram..
- Draw something according to the day's prompt. You can take a photo of it, and share it with us on Instagram.
- At the end of the month you have to upload a picture on Instagram with all the doodles together (either in a comprehensive picture or separately)
- Don't forget to add the hashtag #doodlewithusinmay and spread the word.
- Whoever has the most likes on Instagram by 11:59pm EST on the 1st of June 2017 will be the winner.
- The competition is open internationally.
We're excited to see what you'll share, and good luck!
Thank you for joining in!


Bullet Journaling With Etsy
Ever since I started my Green Lime Designs, I seem to spend way too much time browsing through all the amazing products sold on Etsy, and I have to say that I am amazed by the quality and the variety that exists. In today's post, I'd like to share with you some of my finds on Etsy that have to do with bullet journaling and that are on my wish list! So, let's get started!
Ever since I started my Green Lime Designs, I seem to spend way too much time browsing through all the amazing products sold on Etsy, and I have to say that I am amazed by the quality and the variety that exists. In today's post, I'd like to share with you some of my finds on Etsy that have to do with bullet journaling and that are on my wish list! So, let's get started!

Notebooks
Even though Leuchtturm1917 is still my favourite bullet journal notebook, I've found some amazing dot grid notebooks on Etsy that are so cute and unique, that I really-really want to give them a try.
First stop is the Little Bird Singing shop and their lovely notebooks.

I love all their designs and that's what attracted me to their shop in the first place. But also the quality of the paper they use sounds really good. You can choose from blank, lined, dotted or grid pages. Each notebook has 60 pages with 100gsm and they come in 6 size options.
Another shop with bullet journal notebooks that caught my eye, is the Cognitive Surplus.

The design of their notebooks is so unique and different! They combine science with design in a very interesting way and I have to say I'm very intrigued with their notebooks. Each notebook has 112 dot grid pages that are 100% recycled and fountain pen friendly (80gsm).
Notebook Covers
I haven't used a notebook cover for my bullet journal before, but after seeing some of the designs on Etsy, I would love to give my bujo a little 'jacket' with a fun and cute design!
I really like the Luna Blue Bags designs.
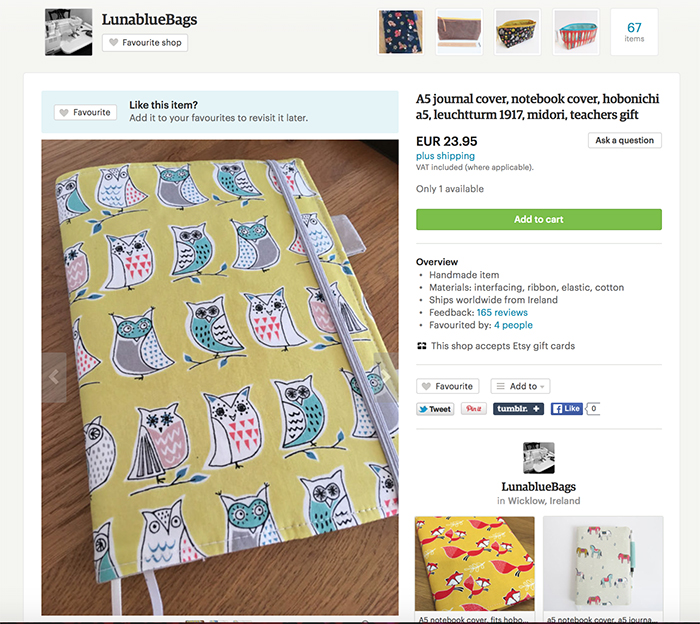
Apart from the design that is adorable, it also has ribbon bookmarks (extra bookmarks are always a plus for me), a pen holder and elastic closure.
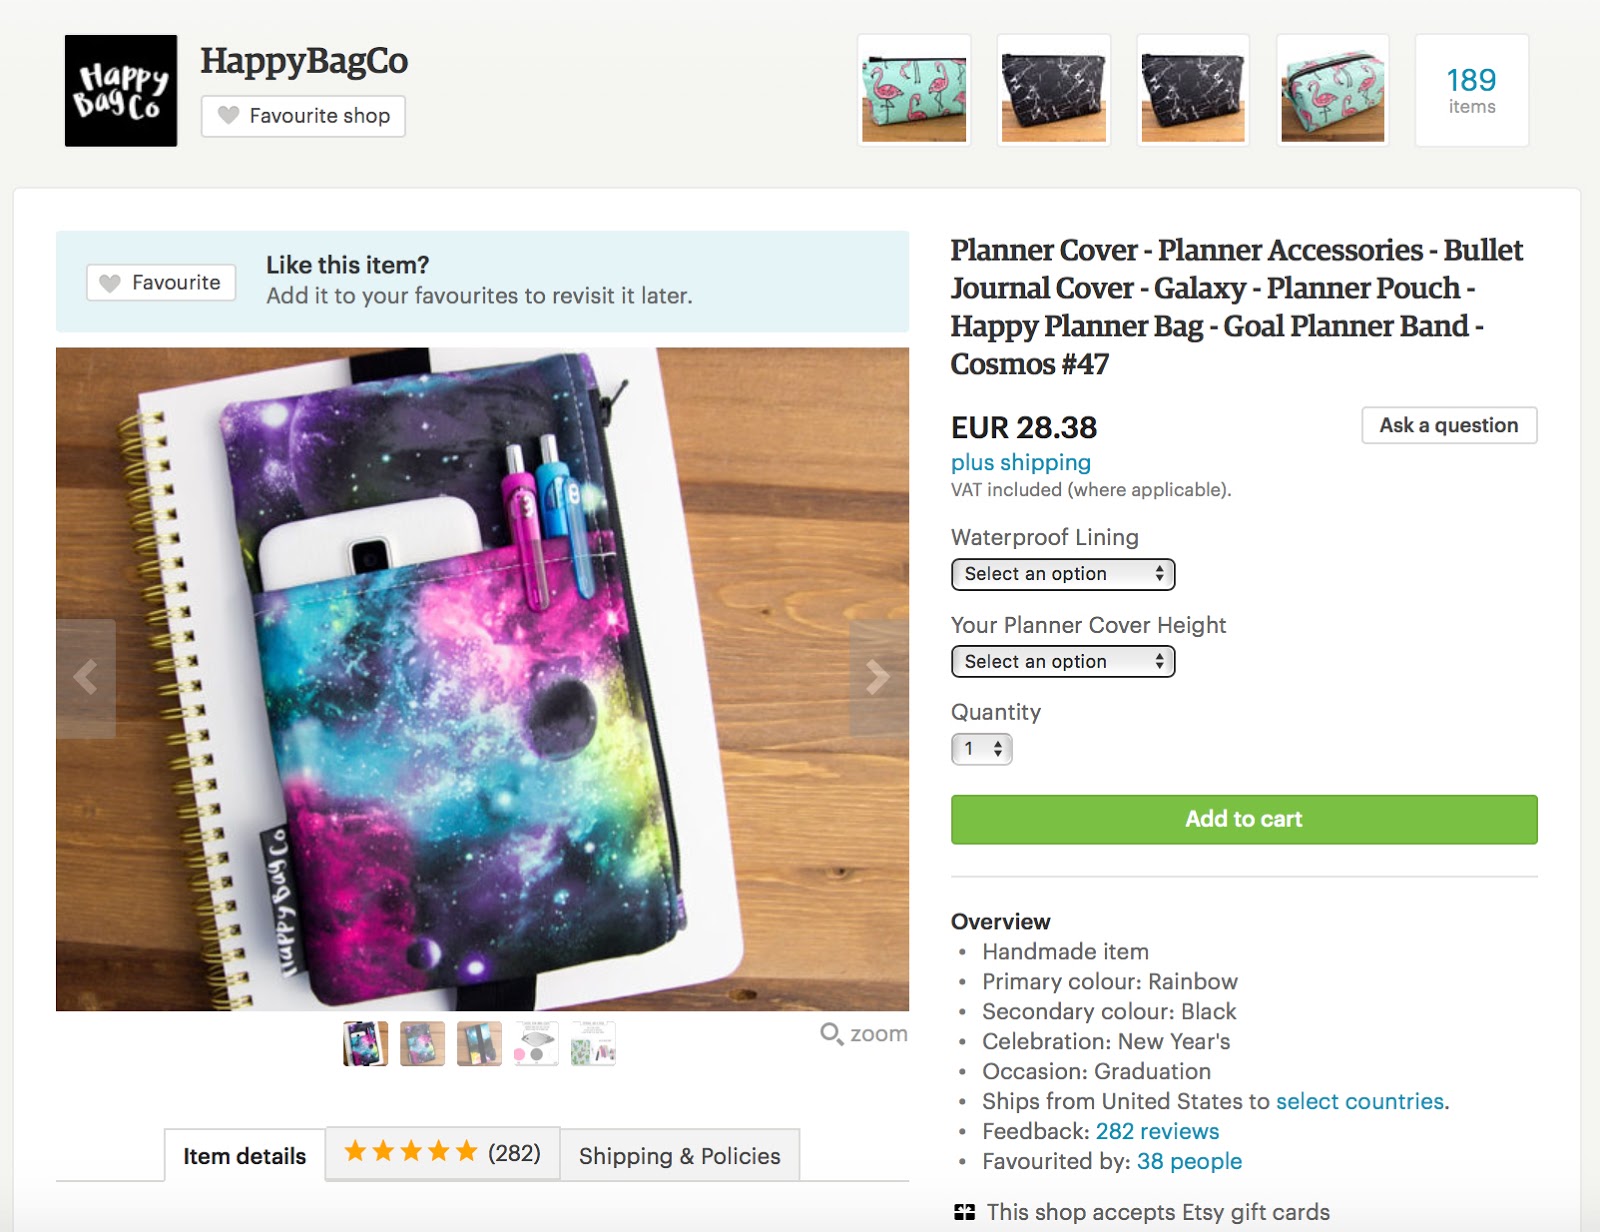
Planner Pouch
I didn't know something like this even existed, but I really like the look and practicality of it and I'm definitely getting one! The Happy Bag Co has some really cute designs (like this Cosmos one in the picture below).
Planner Band
If you're using a planner / notebook that doesn't have a planner band already, then you can find some really cute designs on Etsy. Like this feather one by Creations By Bold Chic.

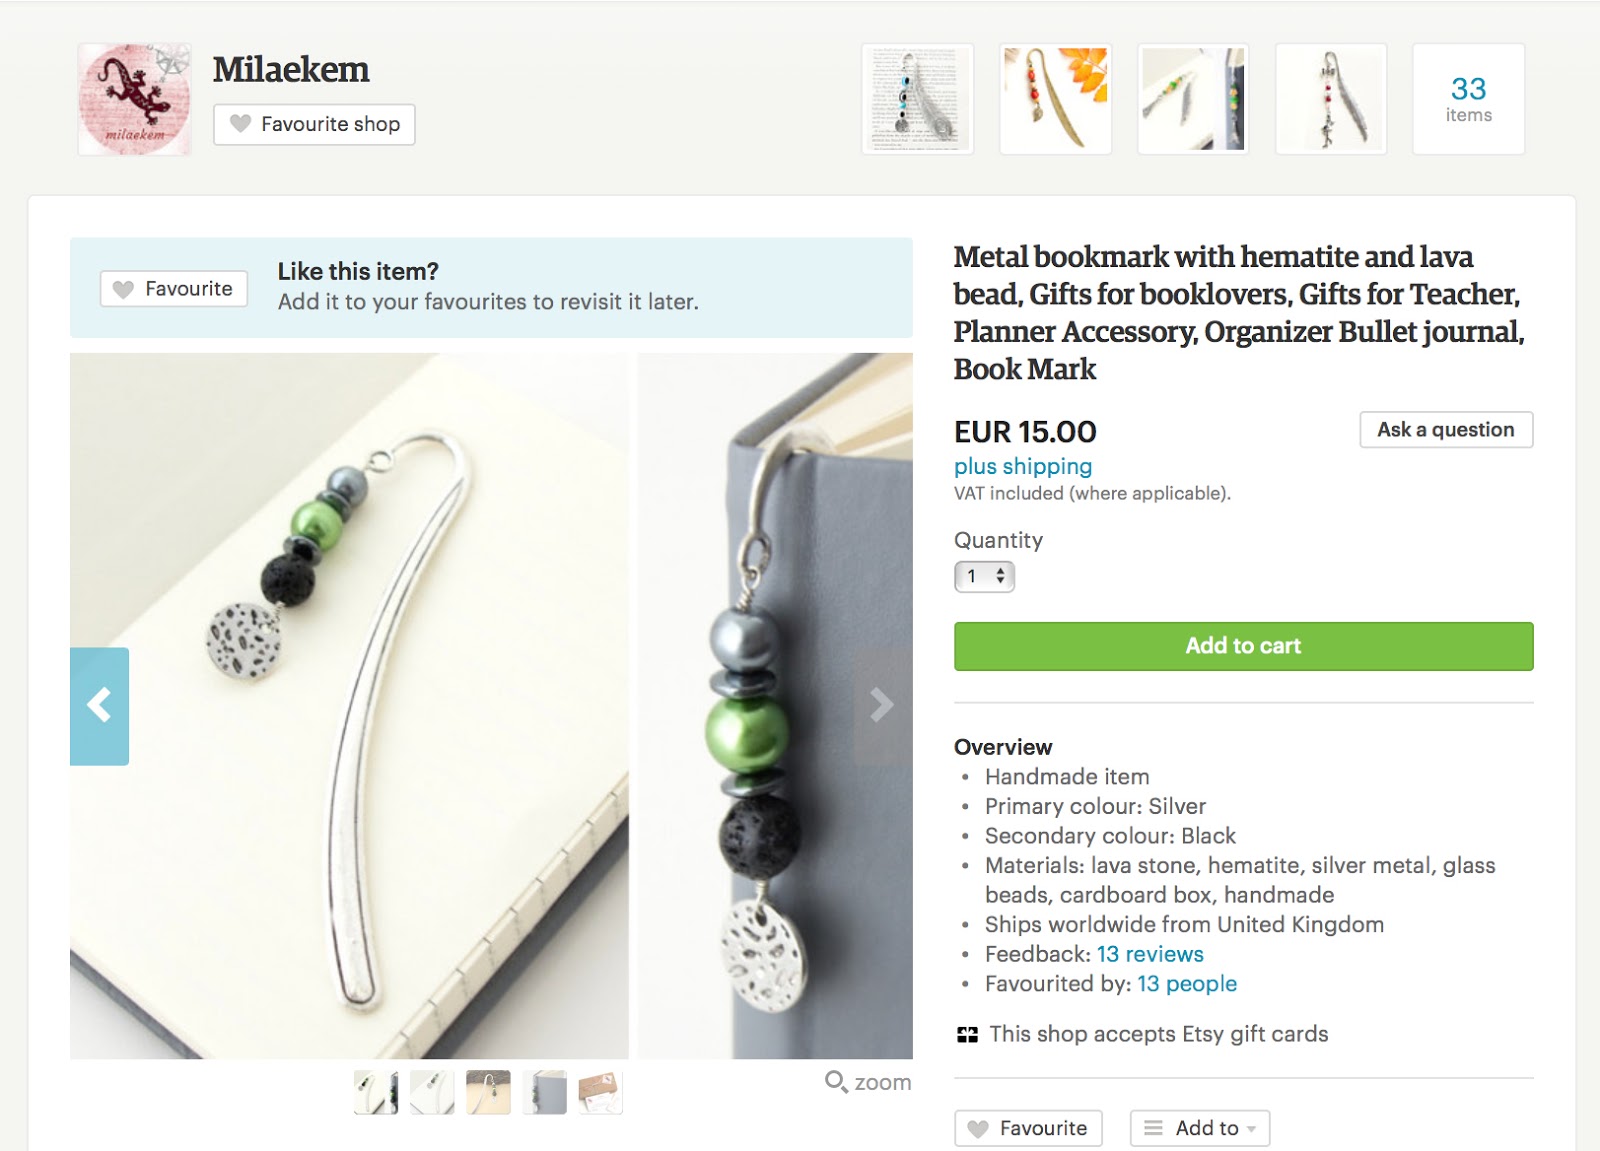
Bookmarks
I've also found some really nice bookmarks that I love the design. They look more like a jewel rather than an ordinary bookmark and they add an extra something to your bullet journal. Plus, they are practical too :) I love this one from Milaekem shop.
Stickers
Stickers is one of the easiest and quickest ways to add colour and design to your bullet journal! And of course I had to add the stickers from my Etsy Store: Green Lime Designs. 😉
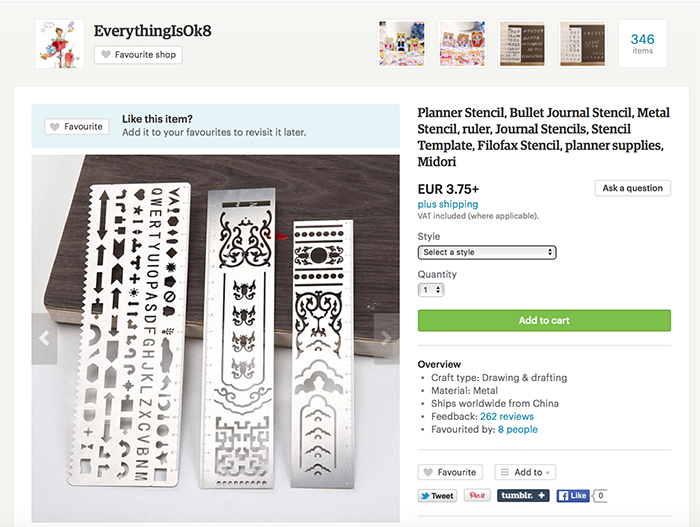
I think stencils can be very useful to create shapes and keep a clean look in your bullet journal. I really like the metal stencil rulers by Everything Is Ok 8.
Stamps
One more way to play around with shapes and design in your bullet journal is with stamps. I'm looking for some rubber stamps with useful everyday icons that I can easily add to my pages and save time from doodling around, like the ones below by KandeeMole.

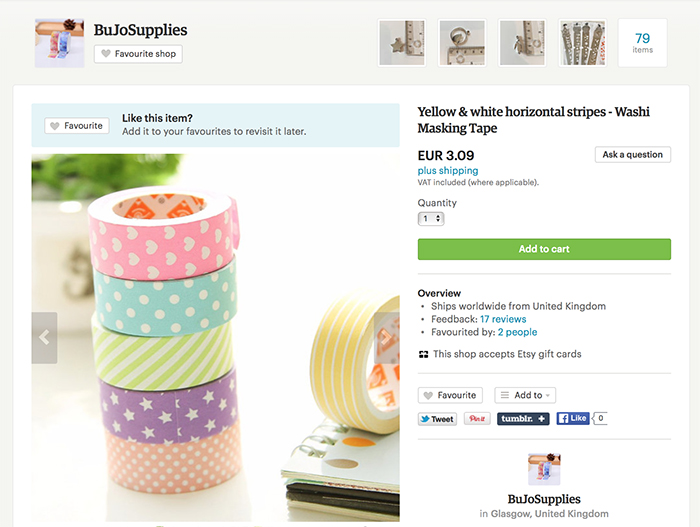
Washi Tape
Lastly, but by no means least, you can find some really cute washi tape designs on Etsy in very good prices as well. I really like pastel colours, so when I saw the ones in the picture below by Bujo Supplies they instantly made their way in my Wishlist (that gets longer by the day!😬)
Are you shopping from Etsy for your bullet journal? What are your best finds? Share with us in the comments below 😉


Diet Loss Plan in my Bullet Journal II
I have a confession to make: I haven't exercised for over a month and I've been binge eating constantly for the past two months. Naughty-naughty! I can definitely see the kilos piling up, and I felt AWFUL the other day when I tried my favourite pair of jeans on and realised that it felt quite very tight at the waist (and other places I don't want to think about!)!

I have a confession to make: I haven't exercised for over a month and I've been binge eating constantly for the past two months. Naughty-naughty! I can definitely see the kilos piling up, and I felt AWFUL the other day when I tried my favourite pair of jeans on and realised that it felt quite very tight at the waist (and other places I don't want to think about!)!
For some weird reason for the past two months or so, I've been trying to go on a diet and have been failing miserably!!! I start my day pretty good and when the afternoon comes I have these cravings for sweet things that I just give in to and then, since I've already spoiled the diet, I continue eating! And the same continues the next day!
But, I've had enough! Since the summer time is approaching really quickly here in Cyprus, and at one point I will have to wear my bikini (only the thought of that now gives me shivers!!) I knew I had to do something to take control of my eating habits and my workout schedule.
So, I opened up my Bullet Journal and started creating a diet plan for the next 8 weeks that will help me get back on track and lose all the extra kilos I've put on in time for the summer.

The first thing I did was to create a page where I track my progress. I find that seeing the results makes me try even harder, so it was really important for me to create this type of spread. Here I track my measurements in a table I created for the next 8 weeks. I also created a graph to track my weight loss progress. I can't wait to see the line go down!

On the next page, I created a general and simple Diet Plan. I want everything to be easy and simple so that I don't get discouraged with measuring quantities or complicated food. So, I have the general principles I've set for myself, and the foods I should stay away from in order to stick to the plan. I also created a list for each one of the meal categories, so that I can refer to this page each time I am meal planning or want to eat something and I need some ideas. There is not a big variety and that is on purpose. I want to give myself enough options so that I don't get bored of the same foods, but limit them so that my actions become automatic.

Lastly, I know that in order to succeed I have to get back to my workout plan. I want to start exercising 5 times per week (Monday to Friday) and I know I can do that if I put my mind to it. So, I created a very specific workout plan for the next 8 weeks in order to know exactly what I have to do each day. I might add some weights or other exercises as I go along, but this is the basic plan that I should follow.
I've also created some weight loss stickers to add to my bullet journal when I keep track of things or plan my week.

I also thought that it would help to talk about it online, in order to make myself accountable and give me that extra push that I might need. 😉 So, I'm starting on the 17th of April and I'll be finishing on the 12th of June.
How do you keep yourself motivated when you are on a diet? What spreads do you create in your bullet journal to help you along your journey?


** I'm not a dietician and this diet plan and workout schedule is created for my personal needs. You should consult your doctor before you start any type of diet plan.