How to keep your Collections separate from your Daily Spreads in your Bullet Journal
There's quite a few people that don’t like to mix their dailies and weeklies with all the other collections that they create in their bullet journal, and that's one of the issues they have with this planning system.
And even though bullet journaling is a planning system that shows you how to create your own planner one day at a time and to add spreads and collections as you go along, I have to admit that even for me, there are times that I would prefer to organise my pages in sections and categories instead.
So, here are some ways that can help you to overcome this issue:
1. START BACKWARDS
You can simply start and place your collections and various spreads you want to keep separate from your daily and monthly planning, at the back of your notebook and work from the back forwards.
This can be done either by having the notebook as normal and create as you go along, or you can flip it upside down and start creating that way. It all depends on what you prefer.
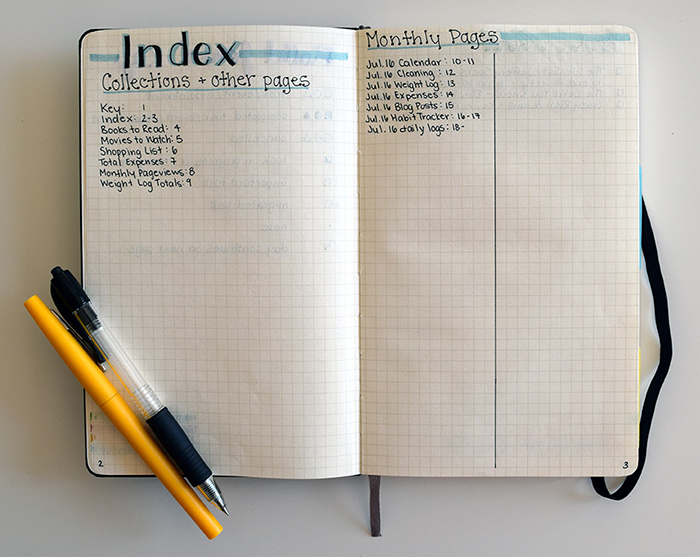
You can still use the index to archive your entries, so that you know where everything is. You can also choose to have a separate Index page for your spreads and collections, like Katie does with her Index Page. As you can see, she has one page dedicated to all the collections she creates and the other page to write down all the monthly entries.
CONS:
Some people might find this way a bit awkward, since they're not used to writing from the back to the front.
2. SEPARATE YOUR NOTEBOOK
You can choose to separate your notebook from the very beginning, and start adding all your collections at the last 1/3 of your bullet journal. This is based on how many pages on average you use for your daily planning and how many you use for your spreads and collections.
You can use your page markers or a separate tab to know where the collections part starts.
CONS:
You might end up having used up either one of the sections (i.e. your daily/weekly spreads or your collections part), while you have more pages left on the other section of the notebook.
3. USE A DIFFERENT TYPE OF NOTEBOOK
You can use a disc bound notebook or a ring binder notebook.
That way you can create sections and move around your pages as many times as you want. You can also keep the same collections and spreads and just change the daily / weekly / monthly pages as you go along. That way, you don't have to recreate your spreads every time you change a notebook.
There's lots of this type of notebooks online. I personally have used and love the William & Hannah notebook and the Jane's Agenda one, and I totally recommend them both.
CONS:
I’m talking more about the pros and cons of this type of notebook in this blog post.
4. USE TWO DIFFERENT NOTEBOOKS
I know some people might find this weird, but you can use 2 different bullet journals - one for your daily planning and one for your Collections and spreads.
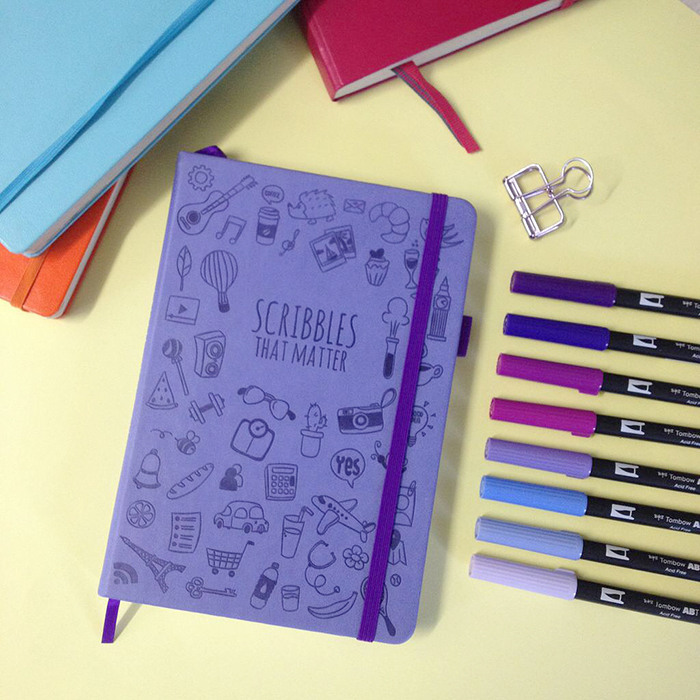
And even though this might not be practical for some, it does provide a solution to this problem, especially if you want to keep using bullet journal notebooks like the Leuchtturm1917 or the Scribbles That Matter ones.
CONS:
Having to carry around 2 notebooks instead of one.
Does mixing your day to day planning with your collections bother you? What do you do about that? Do you find any of the above solutions helpful?
Weekly vs Daily Spreads in your Bullet Journal
A lot of people have emailed me lately, asking me whether they should have both weekly and daily spreads in their bujo, and how can they make them work without re-writing tasks and events? So today, I’ve decided to talk about this topic more analytically and explain how I use those type of spreads in my bullet journal.
A lot of people have emailed me lately, asking me whether they should have both weekly and daily spreads in their bujo, and how can they make them work without re-writing tasks and events? So today, I’ve decided to talk about this topic more analytically and explain how I use those type of spreads in my bullet journal.
I’ll start by saying that the magic of bullet journaling is that you can adjust it the way you want. You basically start with an empty notebook, a blank canvas, that you can then turn into your ideal planner/journal. That means that you can add any spreads that are important and functional to you and your life. At the same time you don’t have to use any spread if it doesn’t work for you. So, you can have only dailies, or only weeklies, or you can use both. It’s totally up to you.
What is a weekly spread?
A weekly spread is basically an overview of your upcoming week that allows you to plan, schedule and visualise what you have going on for the week ahead. It usually consists of sections for the days of the week, but you can also add your weekly trackers, meal planning, weather forecast etc. You can adjust it and add all the things that are important to you.
Pros
- You set it up once a week and then you don’t have to spend any time creating layouts until next week.
- You can easily see what’s planned for the week at one glance.
- You have an overview of the upcoming week in just one page making it easy to distribute tasks.
- A planning stage for all the things you need to do that week.
- A way to break down your goals into smaller steps and distribute them in the week.
- You can easily see your progress and what you have done during the past 7 days.
- You can also see which tasks have been migrated.
Cons
- You have limited space to write for each day.
- Smaller to-do lists.
- Not much space to be creative.
- You can see only one week at a time.
What is a daily spread?
A daily spread (or daily log) is a place where you plan and record your tasks, events and notes as they occur throughout the course of the day. You usually have to create it the night before or first thing in the morning. You have plenty of space to add anything you want, from doodles to your daily journal.
Pros
- More space for more detailed to-do lists
- Lot’s of space to be more creative.
- Can have more of a journal style.
- You can focus on what is planned for each day without distractions.
Cons
- It’s usually done the night before, so you can’t pre-plan it earlier than that.
- You have to create the page every day.
- Usually you have to re-write some things over and over.
How do I use both spreads every week?
Personally I like to use both types of spreads every week. I find that this system helps me be more productive and focused on what needs to be done each day.
The weekly spread, even though is not part of the original bullet journal system that Ryder Caroll created, for me is one of the most useful ones. It is the only spread that I will add to my journal every single week. It's a way for me to ‘brain dump’ all the tasks and events I don’t want to forget to do in my weekly view, and start planning and shaping my week ahead. I can easily see which days are the busy ones, on which days I can add more tasks and so on.
On the other hand, I use the daily spreads for a more detailed view of the individual days. Here I like to separate the tasks/events in categories by colour coding them. I can break each task into smaller ones and tick them off as I go along. I also like to doodle and take notes.
For me and the way I plan my weeks, I prefer to use both types of spreads, especially if I have a very busy week ahead. But there are some (very) rare weeks that I’m not that busy, and on those weeks I prefer to use only my weekly spreads.
My Bullet Journal planning routine:
My planning routine using both types of spreads starts usually on a Sunday afternoon where I sit down with a cup of coffee (or tea, depending on the mood), and after I've created the weekly layout on the two pages, I start planning my week ahead.
- I check on my Future log, Monthly Log and the Birthdays and Holidays spread to see if there is anything planned for the week.Then I note them down on the appropriate days.
- I usually have a column named ‘This Week’ which works as a ‘brain dump’ of all the things I need to do that particular week. So, after I fill this in, I start allocating each item of this list on specific days.
- I look at all the projects I’ve set for myself and all the things I need to do for each one this week. I then check on which of the next 7 days I have spare time and I distribute these tasks accordingly.
For my daily spreads, I usually do them the night before. I like to get everything “off my head" before I go to bed, and have an idea of how my day is going to be tomorrow.
- I look at my weekly spread and see what I’ve set myself to do that day.
- I separate the tasks in categories with my colour code method. This helps me to visually see which of the tasks are going to happen on certain times during the day.
- I then look at the day before and see if I have left any tasks that I haven't finished. If I do, then I migrate them to tomorrow's daily spread. The migrated tasks are marked then with an arrow and the cancelled tasks with an “-“ .
I understand that by using the above method means that sometimes I have to write down tasks several times, and that might seems redundant to some people, but it does work for me and it doesn’t bother me.
Since I’ve started using my bullet journal I’ve noticed how much more productive I’ve become and how much this system has helped me to stay on top of things day in and day out.
How do you plan your days and weeks in your bullet journal? Do you use only weekly or daily spreads, or do you prefer to use them both? Let me know in the comments below.
Christina x
How to make a better to-do list
I like to make to-do lists. They keep me focused, organised and more productive. I prefer using pen and paper for my lists. Call me old school if you like, but I find that my brain functions better this way. I remember things easier and I'm more productive. I also like my to-do lists quite detailed, to make sure I don't forget anything. I'm always on a quest to find the best ways to create the perfect to-do list that will help me achieve my goals and be very productive. Today, I'll share with you some of the ways that I found to work for me.
I like to make to-do lists. They keep me focused, organised and more productive. I prefer using pen and paper for my lists. Call me old school if you like, but I find that my brain functions better this way. I remember things easier and I'm more productive. I also like my to-do lists quite detailed, to make sure I don't forget anything. I'm always on a quest to find the best ways to create the perfect to-do list that will help me achieve my goals and be very productive. Today, I'll share with you some of the ways that I found to work for me.
1. Create a Brain Dump List.
I found that getting everything off my mind and into paper, ensures that I don't forget to do things and it also empties my brain from constantly thinking about those things. You can create one list where you write everything, or you can make more than one list for various categories i.e. for work, housework, personal, family and so on. In the case that you want to create only one list, you can colour code it to separate the tasks this way. Me personally, I have two Brain Dump Lists: one for work, and one for everything else, which I then colour code, in order to make it easier to visually see the tasks that need to be done in each category I've created.
Every month I check my Brain Dump list and I choose 1-5 tasks to tackle on that month. I break each one into smaller more manageable steps and then, I allocate a few steps of each task for each week of the month. So, when I'm writing my daily to-do list, I check my weekly spread and choose what steps/tasks need to be done on that day.
2. Break the big tasks down into smaller more manageable tasks/steps.
You can do that directly on your Brain Dump list, or you can create a separate smaller list for the specific project or task with all the steps that you need to take.
3. Mark the Important tasks.
I break the tasks down into
Urgent if they are important or need to be done as soon as possible, or
Not Urgent if they can be tackled at a later date. What I do, is to place a little red dot next to the important tasks, so that I know straight away which ones I should do first.
4. Start with the most important tasks.
Each day I start by noting down the 3 most important tasks on my list. Again, I do that by placing a little red dot next those tasks. These are the tasks that have to be done no matter what. So, if I only do those 3 and nothing else, I can still consider my day quite productive.
Tackle your most important tasks first and don't waste time on trivial tasks.
5. Time everything.
I write an estimated time next to each task. I use this in conjuction with the time management bar to see when I have enough time during my day to allocate for each particular task.
6. Time yourself.
I find that whenever I use a timer when doing a task, I do it quicker and more efficiently. By timing myself for each task, I can also see if my time estimates that I mentioned above are reasonable. And funnily enough, while doing this exercise I found that I have a completely wrong sense of time and my time estimates were completely off! I also like to use the pomodoro technique.
7. Pick a time every day to write your to-do list for the next day.
I prefer to do this before I go to bed. I tend to spend anything between 10-20 minutes to plan my to-do list for the next day. I go through my future log, my brain dump list and my weekly spread to see what tasks I have to do for the next day.
The above steps / techniques have helped me immensely to plan ahead and to be more productive. Please share in the comments below any tips or tricks you use in order to create your perfect to-do list.


Creative Journaling Course
Step by step video lessons that will help you set up and organise your life in your journal.
My Bullet Journal Planning Routine
Having lots of spreads and pages in your bullet journal that help you with your day to day planning can sometimes be a bit confusing or you might find that you forget to check a page at one point. I try to keep on top of everything I create in order to help me with my future planning, but making a list to make sure you don't forget anything is always a good idea ;)
I break my planning into monthly, weekly and daily speads. That way I can keep track of any tasks, projects, appointments and so on. I also have a yearly spread with all my plans and goals for the current year, but I don't have to change that during the year.
-- MONTHLY --
So, my planning starts in the beginning of every month. I take a look at the previous month to see what I have accomplished and where I am now. Then I take a look at my yearly goals to see what I want to achieve by the end of the year and what needs to be done to get there. Lastly, I take a look at my Level 10 Spread , adjust the levels if needed and again see what I want to change and improve in my life and ways to do that.
All the above help me to choose which goals I want to tackle this month. And then I set up my monthly spread in my bullet journal where I write everything down. I tend to change my spread from time to time. I look at the previous month and see what has worked and what hasn't and then make the necessary changes. Or I might be inspired by a spread I've seen on Pinterest for example, and I might want to give that a try.
-- WEEKLY --
Moving on to my weekly planning, I create steps for each of the monthly goals I mentioned above, and then spread them in the time frame of the 4 weeks ahead. I decide which steps need to be done first according to importance, and I create my weekly spread in my bullet journal.
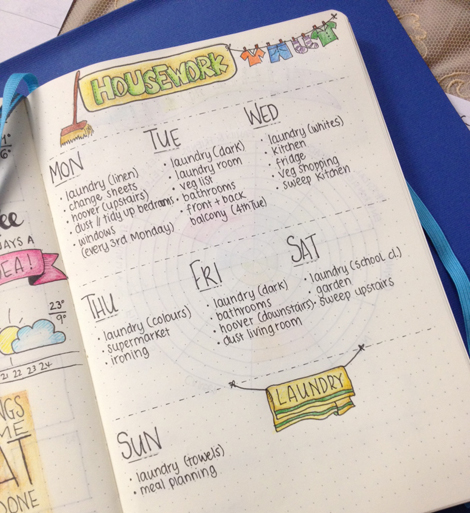
To help me with the reoccurring weekly tasks and so that I don't keep on repeating myself, I created a page for my housework routine and also a page for my blogging routine. That way I know what I have to do for these two categories every week, no matter what.
-- DAILY --
For my daily tasks I start from the night before. I fill in my trackers and my gratitude log , as well as any challenges that I might have done for the day. Then I go on to set up my new daily spread taking inspiration from my 'banner ideas' pages.
I've created a Free Printable for you with a few of the above daily date ideas.
Coming back to my planning, I then look at the day before and see if I have left any tasks that I haven't finished. If I do, then I migrate them to tomorrow's daily spread. The migrated tasks are marked then with an arrow and the cancelled tasks with an X.
Then I look at my Calendex to see if I have any appointments, bithdays etc., and I note them down as well. The next step is to take a look at my monthly and weekly spreads to see if I've noted something there that needs to be done specifically the next day. If not, then I will choose 1-2 steps from my goal setting list to add to my daily tasks. I also check my housework and blogging routine pages to see what I have to do for tomorrow.

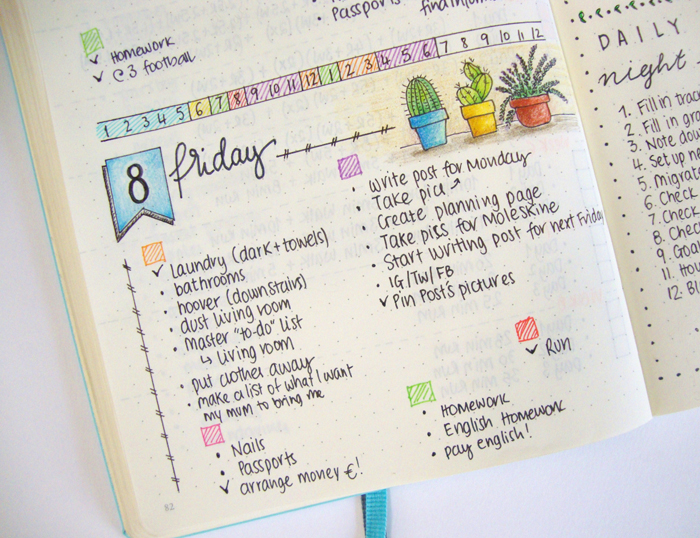
I've decided to put coloured boxes on top of the tasks. Each coloured box indicates a specific category (i.e. housework, kids, exercise, blogging etc.) and it also indicates the time I've allocated for each category on my time line. That way I see where I am during the day, and choose from that set of tasks what to do.
The following morning I'll review the tasks that need to be done that day, note the most important ones and add anything if needed. During the day I will tick off any tasks that are completed.

>> If you want to see my favourite Resources that I use every day with my Bullet Journal, click here to find out what I love to use.
So, that's my planning routine with my bullet journal. It might seem a lot of steps to some, but I'm so used to it, that it doesn't bother me at all. And it's not a lot of work anyway. I can honestly say that I haven't been more productive since starting this planning routine. How do you plan your day?


