The Advantages of using a Bullet Journal
Let me just start by saying: bullet journaling is amazing.
It has completely transformed the way I plan and organise my day to day life. It’s an amazing tool that has helped me to corral all my to-do lists, notes and ideas into one place, and it has offered me peace of mind.
Bullet journaling is an amazing planning system that I I've been using for almost two years now, and I keep on talking about it to anyone that cares to listen! In 2016 I ordered my first Leuchtturm1917 and I haven’t looked back since!
So, why do I love this planning system so much? What makes it so special?
1 | You can customise it according to your needs
The first thing that makes bullet journaling unique is that it's a customisable system that can be adjusted to your needs and wants, and can be re-adjusted or changed whenever you want. Different people have different needs, so having a single planner layout to satisfy everyone is impossible. Now you can personalise your bullet journal and add only the spreads and pages that are important to you.
2 | Very easy system to use
Bullet journaling in it's core is a very basic and simple system, that is also very functional. People get intimidated and scared with all those fancy layouts they see online, but things couldn't be further from the truth!
Join my FREE 5-day Email course and and I'll take you step by step through the basic original bullet journal system. I'll help you create very simple spreads, and I'll show you how this system works. All you need to start in one place.
3 | Everything can be organised in one notebook
I used to have 2-3 planners and notebooks for my daily planning, my journal and my notes. Plus let's not forget the numerous post-it notes that were literally everywhere!
But that's not the case any more! With my trusty bullet journal I was able to gather all my to-do lists, random slips of papers, notes, ideas, and recommendations into one place!
4 | The Index helps you find everything
The Index page is the core of your Bullet Journal. It's where you archive all your entries so that you can easily find them when needed.
However, not many people talk about the Index page and I know a lot of people neglect to fill in the entries as they create their spreads in their notebook.
You should take advantage of the Index in your bullet journal. You can fill it in as you go along, and you can make it even more functional with these Index hacks.
5 | Flexible - can change from page to page
When you start bullet journaling, you usually find yourself being bombarded with various styles and ways of doing things. You get inspired by your favourite Instagram accounts, or from posts you find on facebook groups. And that's totally fine!
In the end, you'll figure out what works for you and what doesn't. It's a simple case of trial and error.
And that's another thing that I love about bullet journaling - it can change.
If you try a spread one week and it doesn't work for you the way you thought it would, you can change it straight away. Simple!
6 | It can be your creative outlet
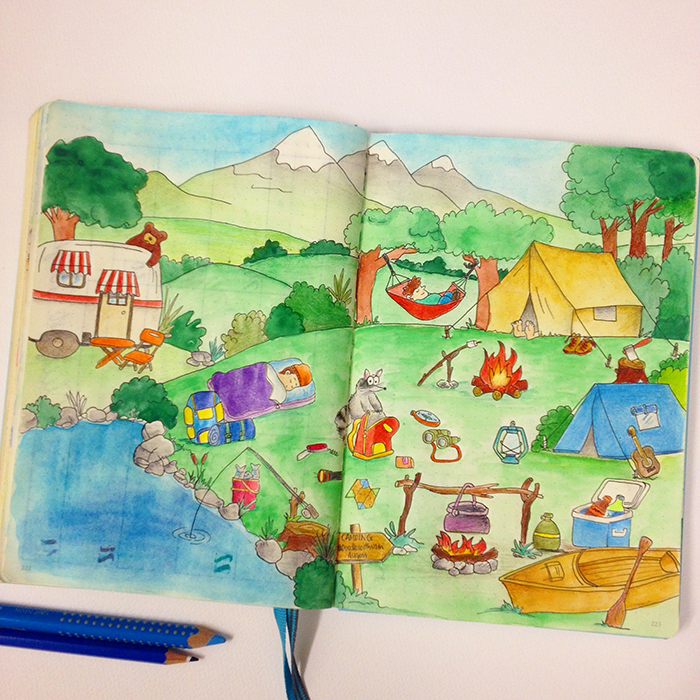
Bullet journaling allows you to express your creativity in your journal and you can decorate it and personalise it the way you want.
You can draw, doodle, add quotes, practice your handwriting or do anything else you want! You can use it as your daily creative outlet.
For example, in addition to keeping track of your day, you can spend a few minutes here and there to add a little drawing or practice your handwriting by writing a quote on your page. It's also great to doodle a little as you plan the things for the day in your bullet journal.
7 | It can be anything you want
Your bullet journal can be your notebook, your planner, your journal, your creative outlet or your to-do list. Or, if you want, it can be all those things and much more!
8 | You can be part of an amazing online community
There is an amazing bullet journal community out there, ready to welcome you and help you along the way!
Have you started bullet journaling yet? If yes, what do you love most about this planning system? Let me know in the comments below.
RELEVANT BLOG POSTS
If I knew I wouldn't fail I would...
Today's post is inspired by a post that Lisa from Market Your Creativity did a few years back.
Our fears can hold us back from doing the things we want. A lot of times we feel that we are not good enough or creative enough and therefore we are scared to unleash our potential. We constantly beat ourselves up, thinking that somehow we should be more, do more, be better, because we don’t measure up in our own mind.
I'm definitely one of those people that are constantly questioning themselves and their worth. I don't think I'm good enough (most of the times!), and even though I have many creative ideas, I'm scared of failure.
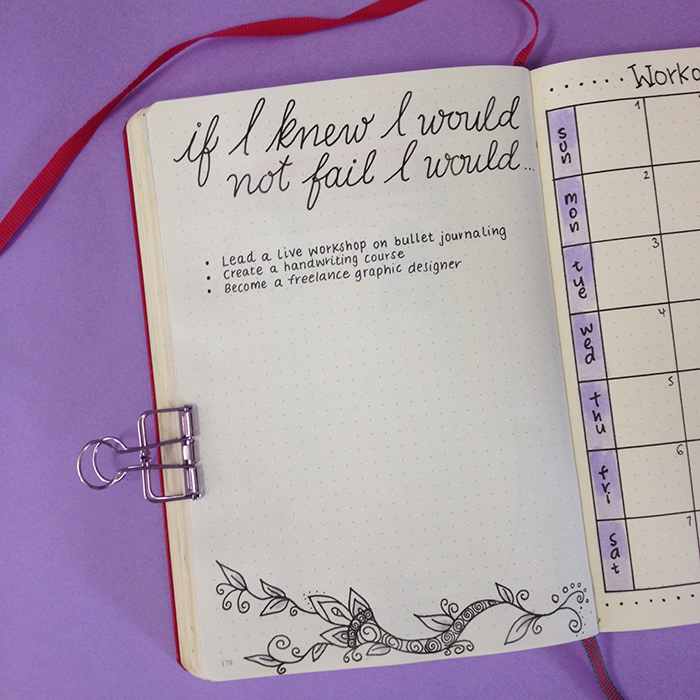
When I saw Lisa's post, I was instantly inspired to create a list in my bullet journal, where I'll write down all the things that I'd love to do but I hold myself back from. I didn't want to create a big list of things straight away. I wanted to give more thought to it, and treat it as a spread that I can go back to from time to time to either get inspired from, or to add more things to it. So, for the time being I've only added 3 things that I know I'd really love to do but I don't feel good enough.
So, if someone came to me and told me that I could do anything I wanted and it would definitely be a success, then I would...
- Lead a live workshop on bullet journaling
- Create a handwriting course
- Become a freelance graphic designer
How about you? What would you do if you knew that failure is not an option? Please share in the comments below :)
How to be Consistent with your Bullet Journal
I’ve been bullet journaling for about 2 years now and through this time I’ve been constantly contacted by people, that even though they want to start their own bullet journal, they seem to have certain problems or struggles with it. And one of the biggest ones is being consistent with it.
I’ve been bullet journaling for about 2 years now and through this time I’ve been constantly contacted by people, that even though they want to start their own bullet journal, they seem to have certain problems or struggles with it. And one of the biggest ones is being consistent.
So, in my emails I get comments like:
‘I just can’t seem to find the time to keep doing it…’
‘I am scared that I won’t have enough time to keep up with my bullet journal’
‘My main problem with setting up a bullet journal is not committing to it’
‘The biggest challenge I am having right now is keeping up with my bullet journal. I have stopped using my bullet journal because it was stressing me to put something in it every day. After a whole day of school and homework I didn't had the energy to update anything on it.’
‘My biggest struggle is forgetting to actually write in the bullet journal’
All the above are genuine comments I’ve received in the last few months. If you’ve been having similar thoughts and you feel the same way, then you’re at the right place.
Today, I’ll share with you ways to use your bullet journal consistently and effectively.
1. | Use the right tools
Choose the right notebook, pens or markers. Make sure that this is an enjoyable process and that you get inspired by your tools, notebook and your stationery. I truly believe that your supplies can affect your bullet journal experience.
For example, I've had various notebooks through the years that even though they were cute and fancy, the quality of the paper was not very good, and as a result my handwriting and sketching was affected as well. I found myself not motivated to write or draw in them. But all it took was a change of notebook and I was right back on track!
Useful material:
How to choose the perfect Bullet Journal for you
The battle of the Best Black Pen
2. | Have one planner
Many people choose to have separate planners for either their business, school and personal life. But this can lead to lots of frustration and struggle to keep up with them. Writing everything down in two (or more!) different planners can be confusing, time consuming and you might be tempted to give up.
Choose one planner for everything and use colour coding if needed to separate the different sections/categories. Be smart when you create your to do lists and include everything in one. You can also use a disc bound notebook if you really need to create sections with collections and therefore have a more organised notebook.
Useful material:
How to colour code your Bullet Journal
How to make a Better to-do List
3. | Create the planner that works for you
One of the best things about bullet journaling is that you can literally create the perfect planner for you. You can add any spreads and categories you want, and even if they don't work you can always change them or adjust them to meet your needs. If you take a look around online you can get inspired by other people's planners and the way they use theirs. But don't let yourself get stressed out over it. Some people need very structured systems to focus on while others choose a more flexible, free-form approach.
For example, when I first started bullet journaling I was doing both daily and weekly spreads. I found that there were days that I didn't have many things to do on my list, so my weekly spread was enough. Also, there were days where I was really not bothered to draw or create another daily. When I reviewed what worked and what didn't, I saw that the daily spreads were not really working for me. So, I decided to create only weekly spreads that had all the sections that I needed for my week. Since I made that change, my bullet journaling experience has become even more enjoyable, I feel more productive and I don't spend my time on things that I don't need.
So, take it slow and choose what works best for you. Your planner will change and evolve over time. You just need to give yourself some time to figure out what you need and what you don't.
Useful material:
Weekly vs Daily Spreads in your Bullet Journal
150 Collection and List ideas for your Bullet Journal
4. | Keep your planner accessible
Make sure you have your bullet journal accessible at all times and at a place where you can glance at it from time to time. It is proven that if you see your notebook you're more likely to actually write in it.
Keep it on your desk with all the supplies you need close by, in order to have easy access to them. Or, if you leave the house, take your bullet journal in your bag and carry it around everywhere you go. Make it a habit to check it regularly to find out about the next upcoming tasks or events.
5. | Have a backup plan
Have a back-up plan in place for those times when you've forgotten your day planner at home. You might need to have a mini notebook in your bag at all times, in case you need to write down any notes or appointments when you don't have your planner with you. Then, when you get back home, you can transfer everything in your bullet journal.
6. | Create a new habit
Make a habit every night to set aside 5-10 minutes in order to plan everything you need for the next day. Also, consult your planner every morning and throughout the day for any upcoming appointments, meetings, events or tasks you need to do.
Useful material
Daily Plan Bar for you Bullet Journal
My Bullet Journal planning routine
7. | Associate planning with pleasant thoughts
Do something pleasant when you consult your planner. Try not to think of it as a chore. Instead, think of your bullet journal as a productivity tool and try to associate it with positive feelings instead of negative ones. Every time you reach for your planner have happy thoughts and your brain will soon associate your planner with positive feelings.
8. | Give yourself a reward
Throughout the day cross off all your tasks and appointments as you finish them. Allow yourself a small treat for accomplishing a certain number of tasks. For example, you can treat yourself to a cup of tea or coffee when you cross off 5 items on your list. This will motivate you to use your bullet journal daily and accomplish your tasks at the same time too!
Also, you can feel proud of yourself when you look back at your planner at the end of the day and you see how much you've accomplished. :)
9. | Be patient
Give yourself some time. Setting a new habit can sometimes take 30 days (or more!). Until that happens, you might experience some days where you forget to check your planner or you might even not feel like planning on that particular day. Be patient and forgiving with yourself. Remember that habits take time to form, and that if you occasionally miss a day or two, that won't affect your planning experience.
There you have it! 9 different ways to keep consistent with your bullet journal. I'd love to hear your feedback on it.
How do you keep being consistent with your bullet journal? Did you find any of these tips helpful?
How to make a better to-do list
I like to make to-do lists. They keep me focused, organised and more productive. I prefer using pen and paper for my lists. Call me old school if you like, but I find that my brain functions better this way. I remember things easier and I'm more productive. I also like my to-do lists quite detailed, to make sure I don't forget anything. I'm always on a quest to find the best ways to create the perfect to-do list that will help me achieve my goals and be very productive. Today, I'll share with you some of the ways that I found to work for me.
I like to make to-do lists. They keep me focused, organised and more productive. I prefer using pen and paper for my lists. Call me old school if you like, but I find that my brain functions better this way. I remember things easier and I'm more productive. I also like my to-do lists quite detailed, to make sure I don't forget anything. I'm always on a quest to find the best ways to create the perfect to-do list that will help me achieve my goals and be very productive. Today, I'll share with you some of the ways that I found to work for me.
1. Create a Brain Dump List.
I found that getting everything off my mind and into paper, ensures that I don't forget to do things and it also empties my brain from constantly thinking about those things. You can create one list where you write everything, or you can make more than one list for various categories i.e. for work, housework, personal, family and so on. In the case that you want to create only one list, you can colour code it to separate the tasks this way. Me personally, I have two Brain Dump Lists: one for work, and one for everything else, which I then colour code, in order to make it easier to visually see the tasks that need to be done in each category I've created.
Every month I check my Brain Dump list and I choose 1-5 tasks to tackle on that month. I break each one into smaller more manageable steps and then, I allocate a few steps of each task for each week of the month. So, when I'm writing my daily to-do list, I check my weekly spread and choose what steps/tasks need to be done on that day.
2. Break the big tasks down into smaller more manageable tasks/steps.
You can do that directly on your Brain Dump list, or you can create a separate smaller list for the specific project or task with all the steps that you need to take.
3. Mark the Important tasks.
I break the tasks down into
Urgent if they are important or need to be done as soon as possible, or
Not Urgent if they can be tackled at a later date. What I do, is to place a little red dot next to the important tasks, so that I know straight away which ones I should do first.
4. Start with the most important tasks.
Each day I start by noting down the 3 most important tasks on my list. Again, I do that by placing a little red dot next those tasks. These are the tasks that have to be done no matter what. So, if I only do those 3 and nothing else, I can still consider my day quite productive.
Tackle your most important tasks first and don't waste time on trivial tasks.
5. Time everything.
I write an estimated time next to each task. I use this in conjuction with the time management bar to see when I have enough time during my day to allocate for each particular task.
6. Time yourself.
I find that whenever I use a timer when doing a task, I do it quicker and more efficiently. By timing myself for each task, I can also see if my time estimates that I mentioned above are reasonable. And funnily enough, while doing this exercise I found that I have a completely wrong sense of time and my time estimates were completely off! I also like to use the pomodoro technique.
7. Pick a time every day to write your to-do list for the next day.
I prefer to do this before I go to bed. I tend to spend anything between 10-20 minutes to plan my to-do list for the next day. I go through my future log, my brain dump list and my weekly spread to see what tasks I have to do for the next day.
The above steps / techniques have helped me immensely to plan ahead and to be more productive. Please share in the comments below any tips or tricks you use in order to create your perfect to-do list.


Creative Journaling Course
Step by step video lessons that will help you set up and organise your life in your journal.
Future Log for your Bullet Journal

For the past few months I've been using a new method for my future planning that - dare I say it - I prefer it from the Calendex method (shocking I know!!!). I saw it in Veronika's Instagram account and I knew straight away that I've finally found the perfect Future Log for me!!

It's a combination of Ryder Carroll's Future Log and Alastair's Method. Basically, you write down the monthly tables for the next 6 months on the top of the page. I started from July, since that's when I started using this technique, but of course you can start any time you want. Underneath the month tables, on each page you then create one long table. The first 3 columns are one for each month and are titled with the first letter of the month. That's where you write the date that refers to that spefic month for each event you want to note down. Then you create a column for the event/appointment with all the information, and another one for the exact time of the event. Lastly, you create a small column in the end, where you can tick off any events/appointments that have already taken place. Of course you can add any other columns that might help you with your future planning.

Once you've done that, you can then go ahead and add all your appointments/events to this table. Everytime you have a new event planed for the future, you can go straight to this page and add it with all the information needed. You can also create a colour code for each type of events, like I did, and mark them on the monthly tables on the top of the page. That way you can see straight away what you've got planned for the month. Genius!
What I really like about this method, is that everything is in one page. You don't have to go back and forth to different pages to see what's planned. And also you have 6 months at a time to plan ahead. Perfect!
Make sure you check out Veronika's Etsy Store where you can download this Future Log method. Also don't forget to check her website as well.
I'm so glad that I've found this future planning method, because it has really helped with the way I plan ahead. If you want more information on all the other methods you can use for your bullet journal, then you can check my post on future planning. Which method is your favourite?


How to Bullet Journal when you don't have time?

I've had some similar reactions lately from people I know, as well as from people I met online, about bullet journaling and how time consuming it looks. They regarded that it takes too much effort and that it might not be convenient for people with limited time. Others also mentioned the fact that they are not as artistic or creative, and that they can't draw or doodle the way I do. Therefore, they thought that bullet journaling is not for them.
Taking a step back and looking at bullet journaling from their point of view, I realised that it does seem like a lot of work and that this could deter a lot of people from having a bullet journal. So, I decided to create this post to show you that you can still bullet journal even if you don't have the time or the artistic skills.
I'll start by saying that bullet journaling in it's core is the way it's shown in the official website. It really is very basic and you don't have to draw or create anything like that at all. All you need is a notebook and a pen. That's it.
However, if you still want to make your bullet journal look pretty and add more colour to it, there are a few simple ways to do it without spending hours over it or joining a drawing class :)
Stencils
Create shapes and doodles in minutes with stencils. You can find anything you want, from to-do lists, banners, cute icons or the days and months. The sky is the limit!

Left: Stencil x bullet journal
Right: Journal Stencil
Stickers
One of the quickest and easiest way to add colour and personality to your bullet journal is with stickers. You can find anything from coloured dots, bullet journal symbols and dates, to cute animals. Any shape or colour you want. You can have themed weeks or months, or you can use them to colour coordinate specific categories.


Left: EBD350 Days of the Week
Right: complete BULLET JOURNAL sticker set
Washi Tape
One of the easiest ways to add colour and patterns to your bullet journal is with washi tapes. You can find an amazing variety online and on Etsy.
You can use washi tape to decorate your pages (look here and here), create sections (here), or personalise and organise your journal (here).

1 8 Whole Rolls of Assorted Washi Tapes
3 Grey Days of the Week Washi Tape
Find more ideas and inspiration on how to use all the above on Etsy and Amazon. Also you can follow me on Pinterest for more weekly and monthly spread ideas and collections.
Some more ways that can save you time while bullet journaling
-- Stick to one design
If you find a design or spread that works for you then stick to it and don't change it. For example, you don't have to change the design of your date header every day. You can have the same one for a week or a month!
--Pre-plan your spreads
During the month (or week) notice what works and what doesn't so that you know what things to adjust or add the next time. See how I adjusted my weekly spread in this post.
--Keep it Simple
If you don't have the time then don't choose complicated spreads. Just keep it simple. Like in the example below, you don't have to create an intricate drawing showing which books you want to read. You can just make a list and tick them off as you go.

--Minimalistic Approach
You can choose a minimalistic approach like Celine and create a set up for your bullet journal with black as your basic tint and one accent color for putting some extra focus on certain words or details.
--Use your time wisely
Plan ahead and create your weekly/monthly views during the weekend, for example, that you might have more spare time.
--Reference Pages
Create reference pages in your bullet journal with banner ideas, headings etc. That way you don't have to search every time to get inspired. You just choose one of the designs from your page. You can also create a Pinterest board with bullet journal ideas to get inspiration from time to time.
Bullet Journaling is a fun way to create you own calendar/journal. But it doesn't have to be complicated or time consuming. Give it a try and I guarantee that you're going to love it!


My Bullet Journal Planning Routine
Having lots of spreads and pages in your bullet journal that help you with your day to day planning can sometimes be a bit confusing or you might find that you forget to check a page at one point. I try to keep on top of everything I create in order to help me with my future planning, but making a list to make sure you don't forget anything is always a good idea ;)
I break my planning into monthly, weekly and daily speads. That way I can keep track of any tasks, projects, appointments and so on. I also have a yearly spread with all my plans and goals for the current year, but I don't have to change that during the year.
-- MONTHLY --
So, my planning starts in the beginning of every month. I take a look at the previous month to see what I have accomplished and where I am now. Then I take a look at my yearly goals to see what I want to achieve by the end of the year and what needs to be done to get there. Lastly, I take a look at my Level 10 Spread , adjust the levels if needed and again see what I want to change and improve in my life and ways to do that.
All the above help me to choose which goals I want to tackle this month. And then I set up my monthly spread in my bullet journal where I write everything down. I tend to change my spread from time to time. I look at the previous month and see what has worked and what hasn't and then make the necessary changes. Or I might be inspired by a spread I've seen on Pinterest for example, and I might want to give that a try.
-- WEEKLY --
Moving on to my weekly planning, I create steps for each of the monthly goals I mentioned above, and then spread them in the time frame of the 4 weeks ahead. I decide which steps need to be done first according to importance, and I create my weekly spread in my bullet journal.
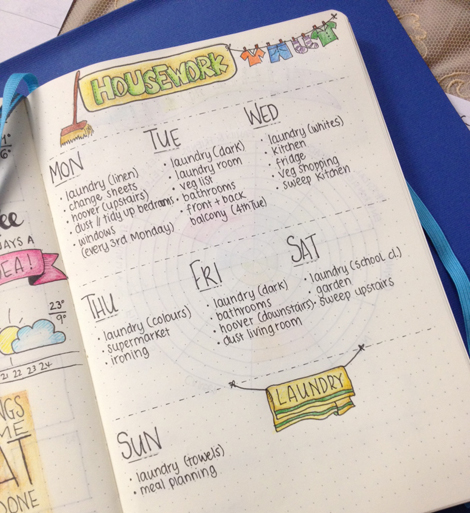
To help me with the reoccurring weekly tasks and so that I don't keep on repeating myself, I created a page for my housework routine and also a page for my blogging routine. That way I know what I have to do for these two categories every week, no matter what.
-- DAILY --
For my daily tasks I start from the night before. I fill in my trackers and my gratitude log , as well as any challenges that I might have done for the day. Then I go on to set up my new daily spread taking inspiration from my 'banner ideas' pages.
I've created a Free Printable for you with a few of the above daily date ideas.
Coming back to my planning, I then look at the day before and see if I have left any tasks that I haven't finished. If I do, then I migrate them to tomorrow's daily spread. The migrated tasks are marked then with an arrow and the cancelled tasks with an X.
Then I look at my Calendex to see if I have any appointments, bithdays etc., and I note them down as well. The next step is to take a look at my monthly and weekly spreads to see if I've noted something there that needs to be done specifically the next day. If not, then I will choose 1-2 steps from my goal setting list to add to my daily tasks. I also check my housework and blogging routine pages to see what I have to do for tomorrow.

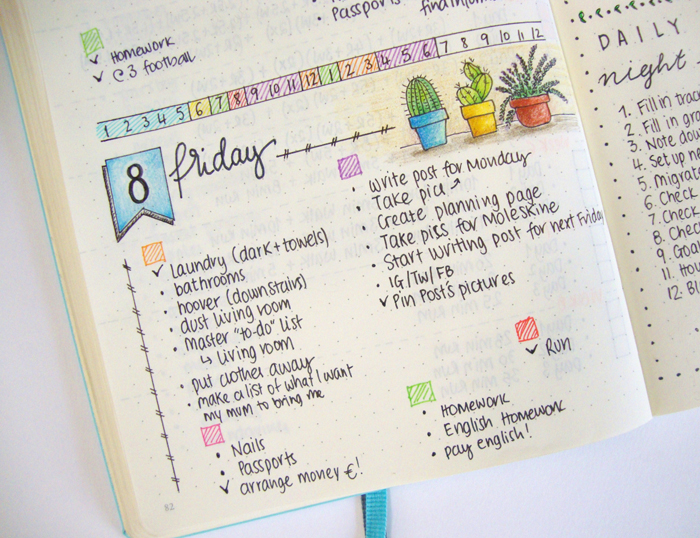
I've decided to put coloured boxes on top of the tasks. Each coloured box indicates a specific category (i.e. housework, kids, exercise, blogging etc.) and it also indicates the time I've allocated for each category on my time line. That way I see where I am during the day, and choose from that set of tasks what to do.
The following morning I'll review the tasks that need to be done that day, note the most important ones and add anything if needed. During the day I will tick off any tasks that are completed.

>> If you want to see my favourite Resources that I use every day with my Bullet Journal, click here to find out what I love to use.
So, that's my planning routine with my bullet journal. It might seem a lot of steps to some, but I'm so used to it, that it doesn't bother me at all. And it's not a lot of work anyway. I can honestly say that I haven't been more productive since starting this planning routine. How do you plan your day?


One Month Bullet Journaling: What I've Learned
If you've been following my blog for a while now, you must have noticed that I have a small addiction as far as my bullet journal is concerned! Put it plainly, I'm obsessed!!!
If you've been following my blog for a while now, you must have noticed that I have a small addiction as far as my bullet journal is concerned! Put it plainly, I'm obsessed!!!
Before I go on, a quick reminder of what Bullet Journaling is, for anyone that doesn't know:
It's an analog system for the digital age. It helps record the past organise the present and plan for the future. It can be your to-do list, sketchbook, notebook and diary and all the above.

That's how the creator of this system, Ryder Carroll, describes it in his very informative website that you must visit to see all the information and the detailed videos that thoroughly explain his system.
For me, bullet journaling has been an amazing experience so far! I found that it made me be more organized and focused on the tasks that needed to be done. It makes me be more creative and I also find it to be very therapeutic. At the same time, it worsens my addiction for pens and stationery - if that was possible!!!
A PEAK INTO MY BULLET JOURNAL
I'll add here some pictures of a few of the pages that I've created in my bullet journal this month. I can't show everything, but I've made a selection of the ones that I haven't shown before and that I really like. :)
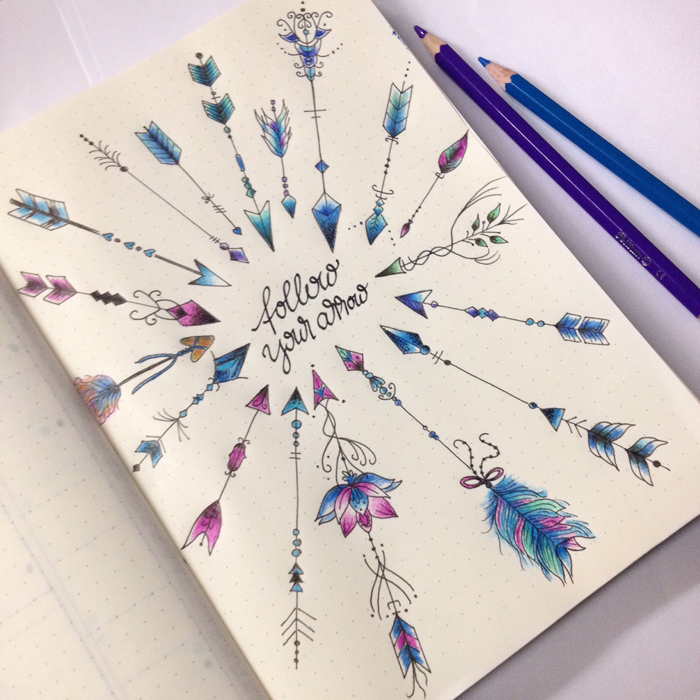
After the 3 index pages the first page you come up to is one of my favourites. It's my word of the year and my mission statement. I like to come back to it and remind myself what my focus should be on this year.
I also decided to add a 'Useful Numbers' page. Moving to a new country means learning everything from scratch, including all the emergency//useful numbers :) It puts my mind at ease to know that I have this page in my bullet journal, plus my kids are old enough now to know what to do in case of an emergency.
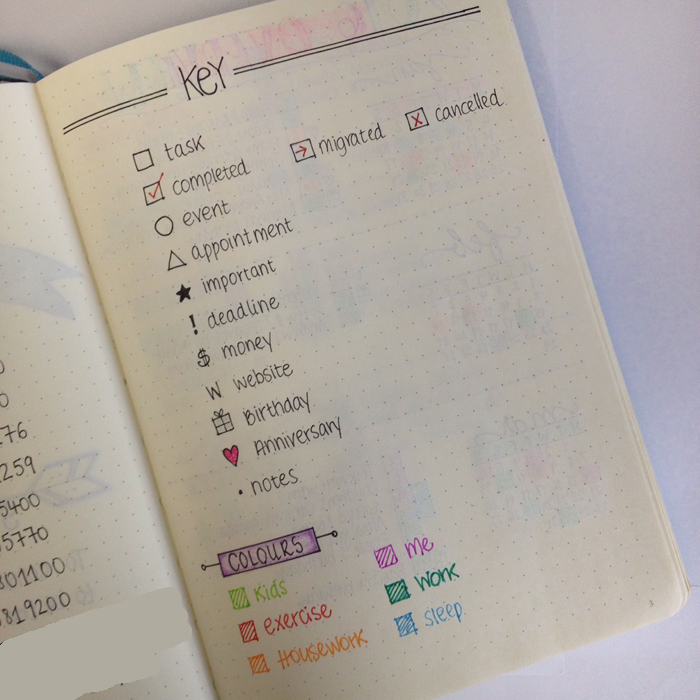
A key page is one of the basic pages that you're supposed to add in your bullet journal. It basically shows the symbols and the colours you use in your bullet journal to indicate different things. While I've been using it I realised that some things were not working for me. For example, now for the tasks I prefer to use a dot instead of the box, because I found that all those little boxes made my pages look too crowded. I've also changed some of the colours because they didn't work for what I wanted (especially the turquoise I used for 'work' was bleeding through the pages so it had to be changed ASAP!).
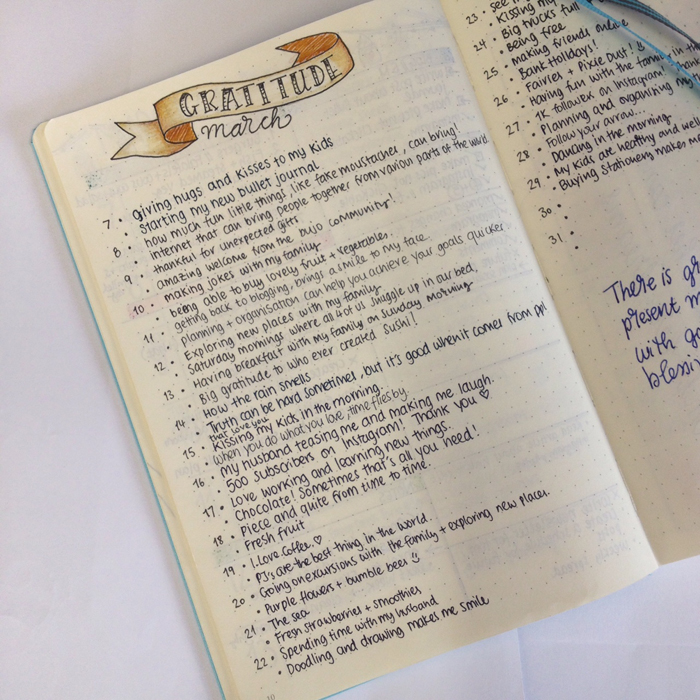
One of my most favourite pages in my bullet journal is my gratitude log. When I started writing it, I wasn't sure what to add to it every day. But pretty quickly I tuned into it and now I can't wait every night to think through of my day and add the two things that I'm most grateful of.
For my first month I also decided to create a doodle a day page, where I would draw something that reminds me of that day. It's been really fun and I love how colourful it looks.
I have been uploading lots of pictures with the progress of my bullet journal as I'm filling it in, so don't forget to check out my Instagram and Facebook accounts. You can also join my Newsletter!
THINGS THAT I'VE LEARNED
Even though I've been bullet journaling for only a month, some things became apparent to me straight away.
- Just Start
My bullet journal arrived a bit late in the post and the month had already started. So I was contemplating in the beginning whether to wait for the next month so that I start on the 1st, or not. I'm very happy that I started when I did and my advice to you is to just start! Don't wait. I promise you, you'll love it!
- Keep it Simple
When you first start bullet journaling, you might find yourself in the beginning being bombarded with various styles and ways of doing things. That can make you feel a bit overwhelmed and you might don't know where to start. Just keep things simple and start slowly. You don't have to add everything in your bullet journal straight away. There is no right order. What I did, was that I made a list of the things that I'd like to include in my bullet journal, and I've been adding them as I go along. The basic thing for me was to have a yearly, monthly, weekly and daily spread, so that I don't miss appointments and keep up with my everyday life. The rest can be added slowly.
- Trial and error
You just have to try and adjust the different methods available to suit your needs. That way you'll figure out what works for you and what doesn't. It's a simple case of trial and error. That's what has happened to me, especially with my weekly spreads. And if nothing works for you the way you want it, then create your own!
- Get Inspired
There is so much inspiration and creativity on line, it's unbelievable! You only have to do a search and you'll be amazed. By far, Instagram and Pinterest are the best places for BJ inspiration! The following IG accounts are some of my favourite: @boho.berry , @passion.themed.life, @maryj13, @tinyrayofsunshine, @therevisionguide, @write_it_on_the_wall, @wundertastischdesign ... and the list goes on!
- Community
There is an amazing bullet journal community out there, ready to welcome you and help you along the way! If you're interested in bullet journaling then you should totally check out the Bullet Journal Junkies group on Facebook.
- It doesn't have to be perfect
Whether your lines are not straight or you've made a mistake while writing down your daily spread, just don't worry about it! It happens.
You either use Pentel Presto and erase it or just ignore it like I did!
- Have Fun! :)
Enjoy your time while bullet journaling!
This pretty much sums up my first month with my bullet journal. Can't wait to start setting up for April. ;)


