

Improve Your Handwriting Challenge - February 2019
I'm back with one more "Improve your Handwriting Challenge"! ✨
This challenge is a fun way to practice daily, keep a photo archive of your handwriting and see how you've improved through time. You can also interact online with other people doing the same challenge, and also you can get inspired by others' handwriting too.
For February it's going to be 28 days of handwriting prompts that will hopefully get you to start practicing your handwriting every day. The theme for this month's words is ‘Countries'. So, for February we can use the names of countries to practice our handwriting. But also, I thought it would be a fun way to see where everyone, that takes part in the challenge, is from. 🗺 So, if your country is not on the list, then on the day that the word starts with the first letter of your country, you can choose to use the name of your country instead, as a prompt for your practice. Therefore, if you share it on Instagram, we can all see where everyone is from. 😊

HERE'S HOW TO PARTICIPATE:
Follow me (Christina) @christina77star over on Instagram.
Each day there is a corresponding prompt, that you simply have to write on a piece of paper. You can also choose to have a dedicated notebook for your daily handwriting practice. Try and focus on the word and the letters as you write them. You can repeat the word as many times as you want. Look at the way that you wrote the word the first time and the way you wrote it the last time. Is there a difference? Do you think you need to work on a specific letter?
Take a photo of your practice and tag it with #improveyourhandwritingchallenge, so that it gets added to the feed.
At the end of each month look back at your practice pages and see how you've improved.
Make sure to encourage each other and have fun!
Please share this post to spread the word and invite others to join in the fun and improve their handwriting as well!
Thank you for joining in!
Christina x

Plan With Me: My February 2019 Setup in my Bullet Journal
Hello everyone!
February is just around the corner and that means of course that it’s time to plan our month in our bullet journal. I don’t know about you, but lately I tend to create less and less spreads in my bullet journal. I prefer to create only the ones that I like to use every month, and that help me with my productivity. For me simplicity is the key. So, I like to stay away from fancy layouts, trackers and all that.
For February I chose to use a theme that you might have seen in my Etsy shop. I love my little robots and I thought that February would be the perfect month to incorporate them into a theme for my bullet journal. So, let’s see the spreads that I’ve created in my bullet journal for February.
Make sure you scroll down to the bottom of the post, because there's also a video, where I'm showing you exactly how I've created each spread.

As always we start with the Cover Page of the month. I think the little robot is adorable and cute, and it puts a smile on my face every time I look at this page.

I chose to use more grey and pastel pink and blue colours. As always you can find the list of all the supplies I’ve used at the end of this post.

It might surprise some of you, but I chose to not create a monthly spread this month!!! * gasp * I find that my monthly layout is a page that I rarely use during the month, and since I’m creating all my weekly spreads from the beginning of the month, I don’t really need it. Therefore, the first page after my cover page is my Notes (which, by the way, is my most used page of my monthly setup!). I’m using again the same layout with the grey lines and I’ve added one more cute robot at the bottom of the page.

On the page opposite I added my Monthly Goals, which are separated in 4 categories: Me, Work, Relationships and Fun. I’m thinking of adding more categories to my goal planning, because I truly believe that the more specific and detailed you are when you plan things ahead, you get to achieve more goals and quicker.

And then we jump straight into my first Weekly Spread. As I mentioned above, I kept my setup really simple and minimal for this month, and I only added the most used pages. It’s nice to be creative and to add spreads and pages into your bullet journal. However, some months you just need to focus on more specific things, and any extras can be excluded from the setup that month.
Even the layout that I chose for my weekly spread is quite minimal with only that cute robot added to match the theme of the month.
SUPPLIES USED:
Tombow Dual Brush Markers (673, 452, 451, 800, 491, N89, N75, N95, N15, N45 and N79)
Sakura Gelly Roll White Pen 08
And that is the February setup in my bullet journal. I hope you liked it and that you’ve found some inspiration. Let me know in the comments below what theme you’ve chosen for February.


Bullet Journal Ideas: 4 Weekly Spread Layouts for January 2019
Happy New Year everyone! ✨
I’m wishing you all an amazing 2019 full of love, laughter, incredible possibilities and precious moments. This is the time to start fresh, and take this opportunity to plan new beginnings and new ideas! I love January, because it’s the time of the year that I always push myself to try new things, and plan the rest of the year. Of course my bullet journal is always there to help me put my head in order and make planning and organising so much easier for me. 😊
One of the things that I love to do in the beginning of each month is to plan my weekly spreads, so that I have them ready to fill in all the information, appointments etc. That way I save time and I have space to plan everything. The theme for January is 'Coffee' and you can see how I've setup my bullet journal for the month in this post, or you can watch the video here.
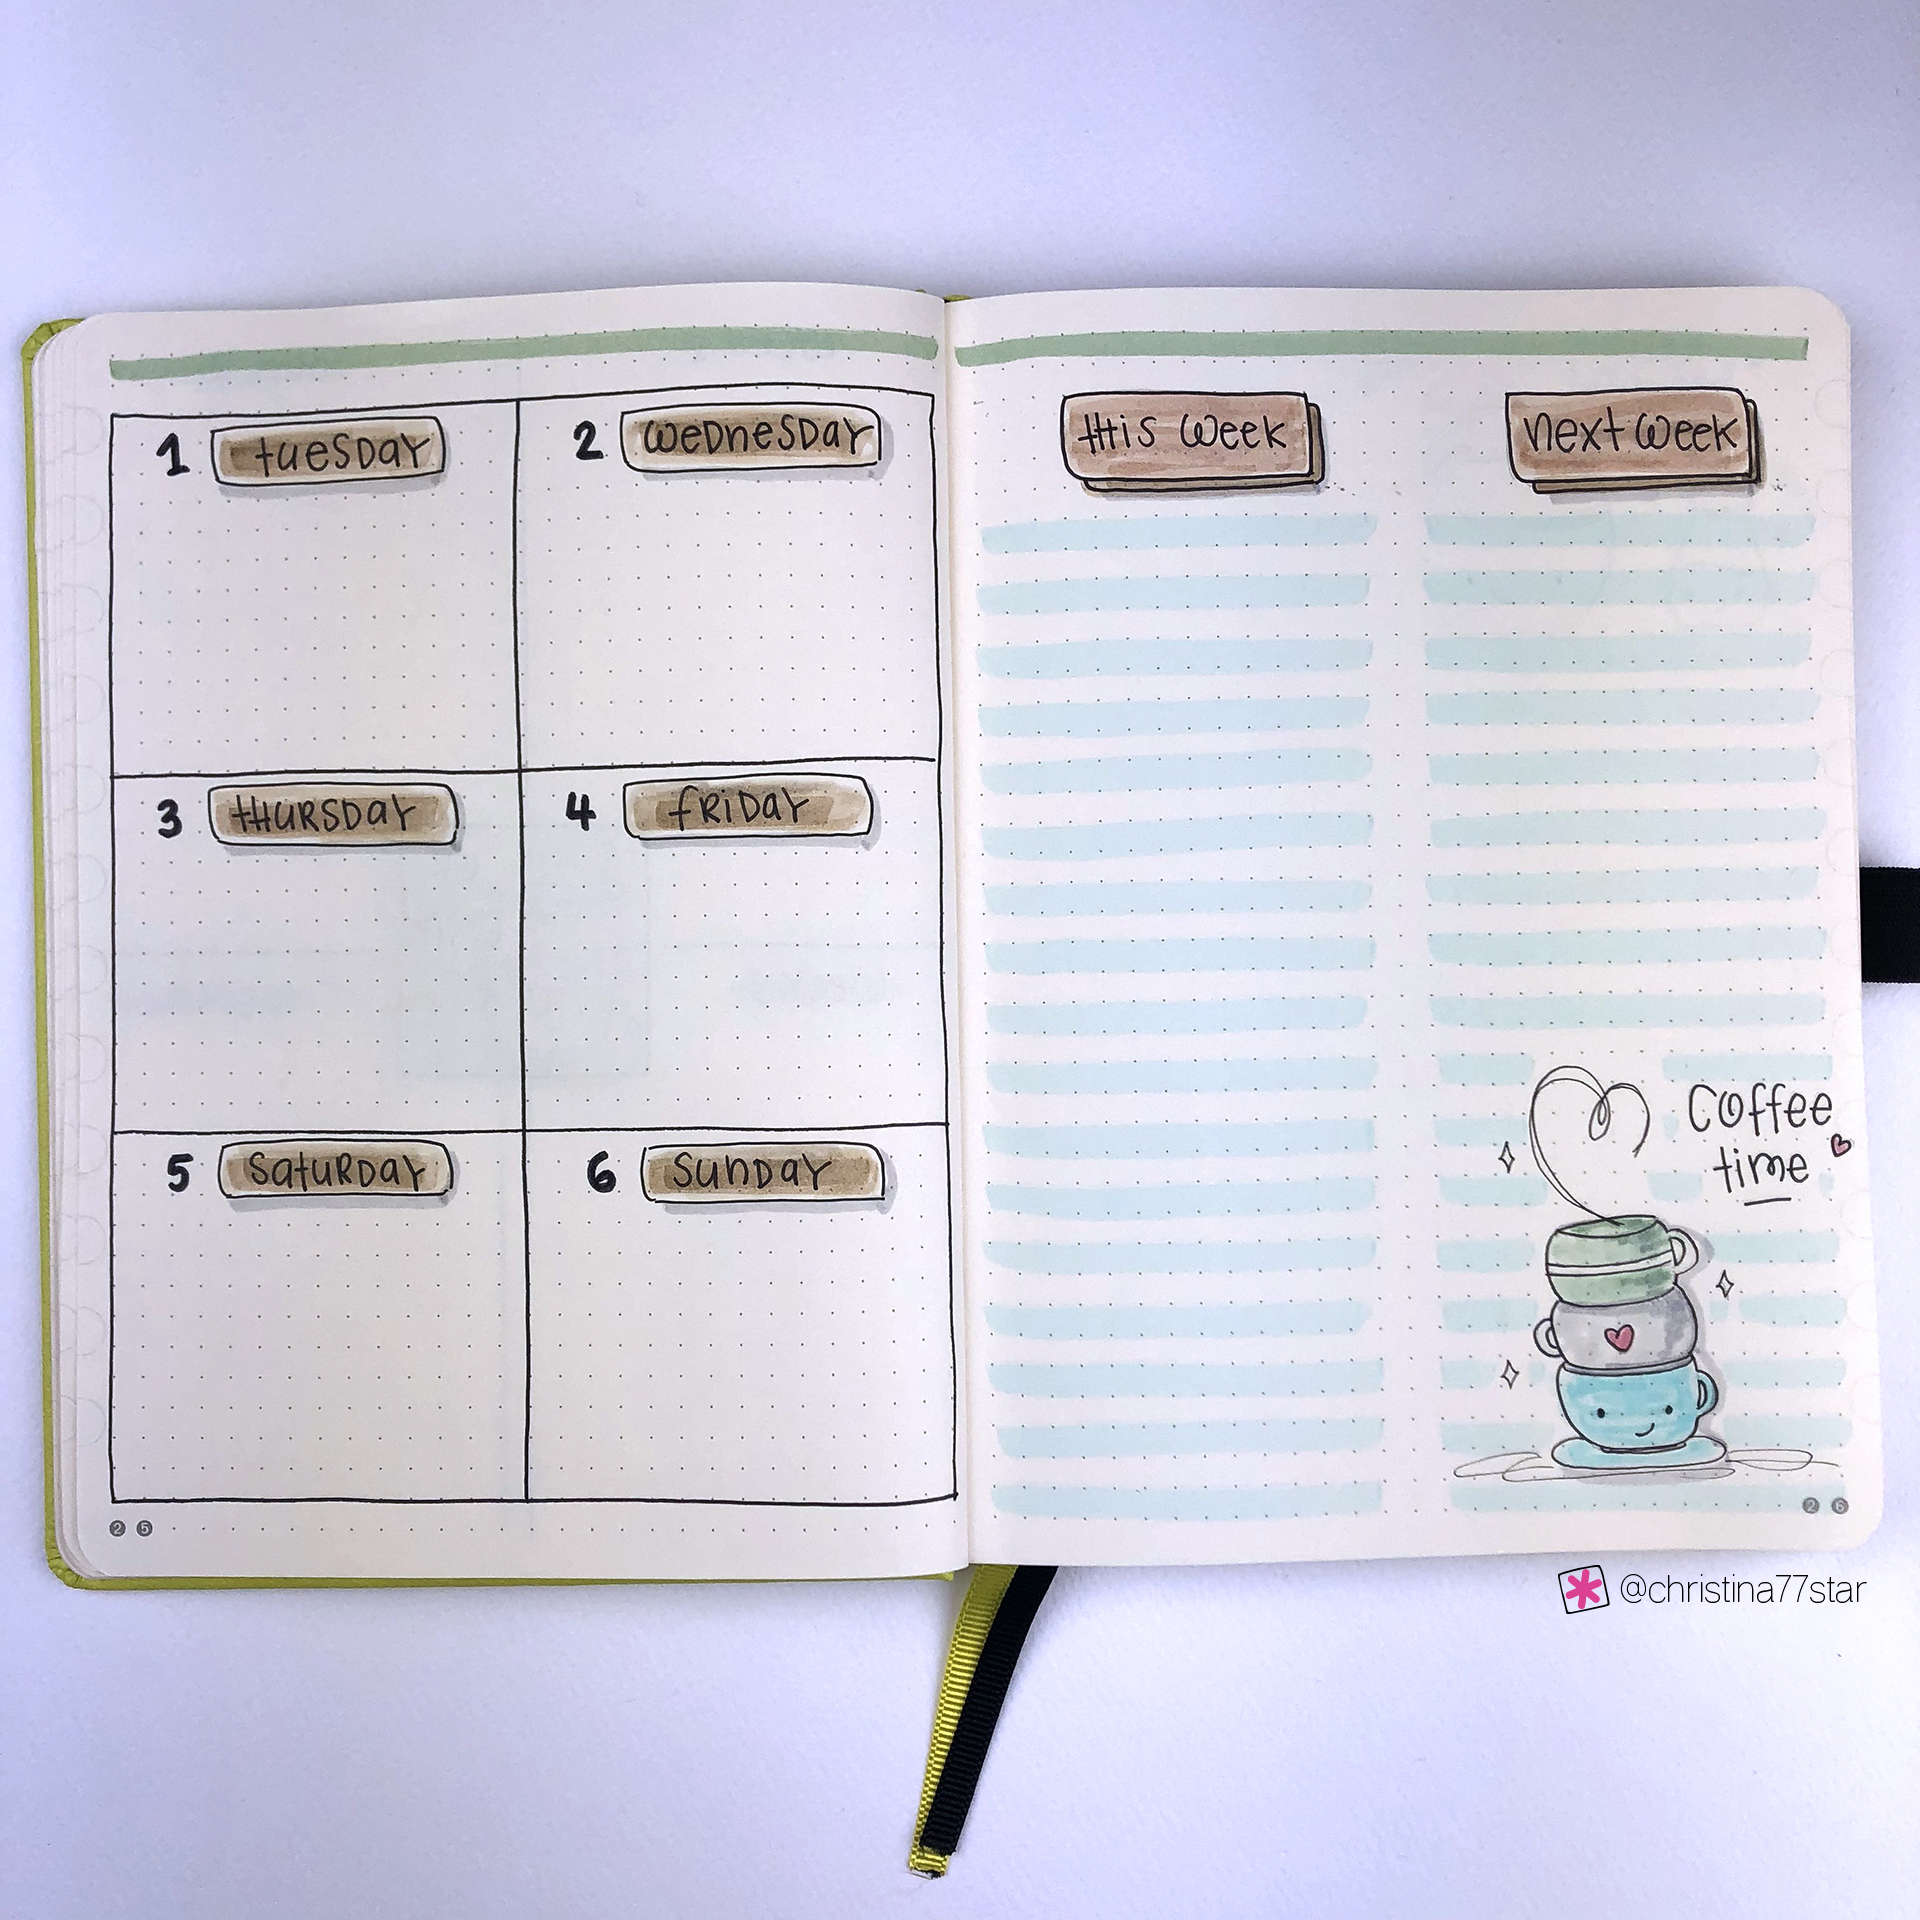
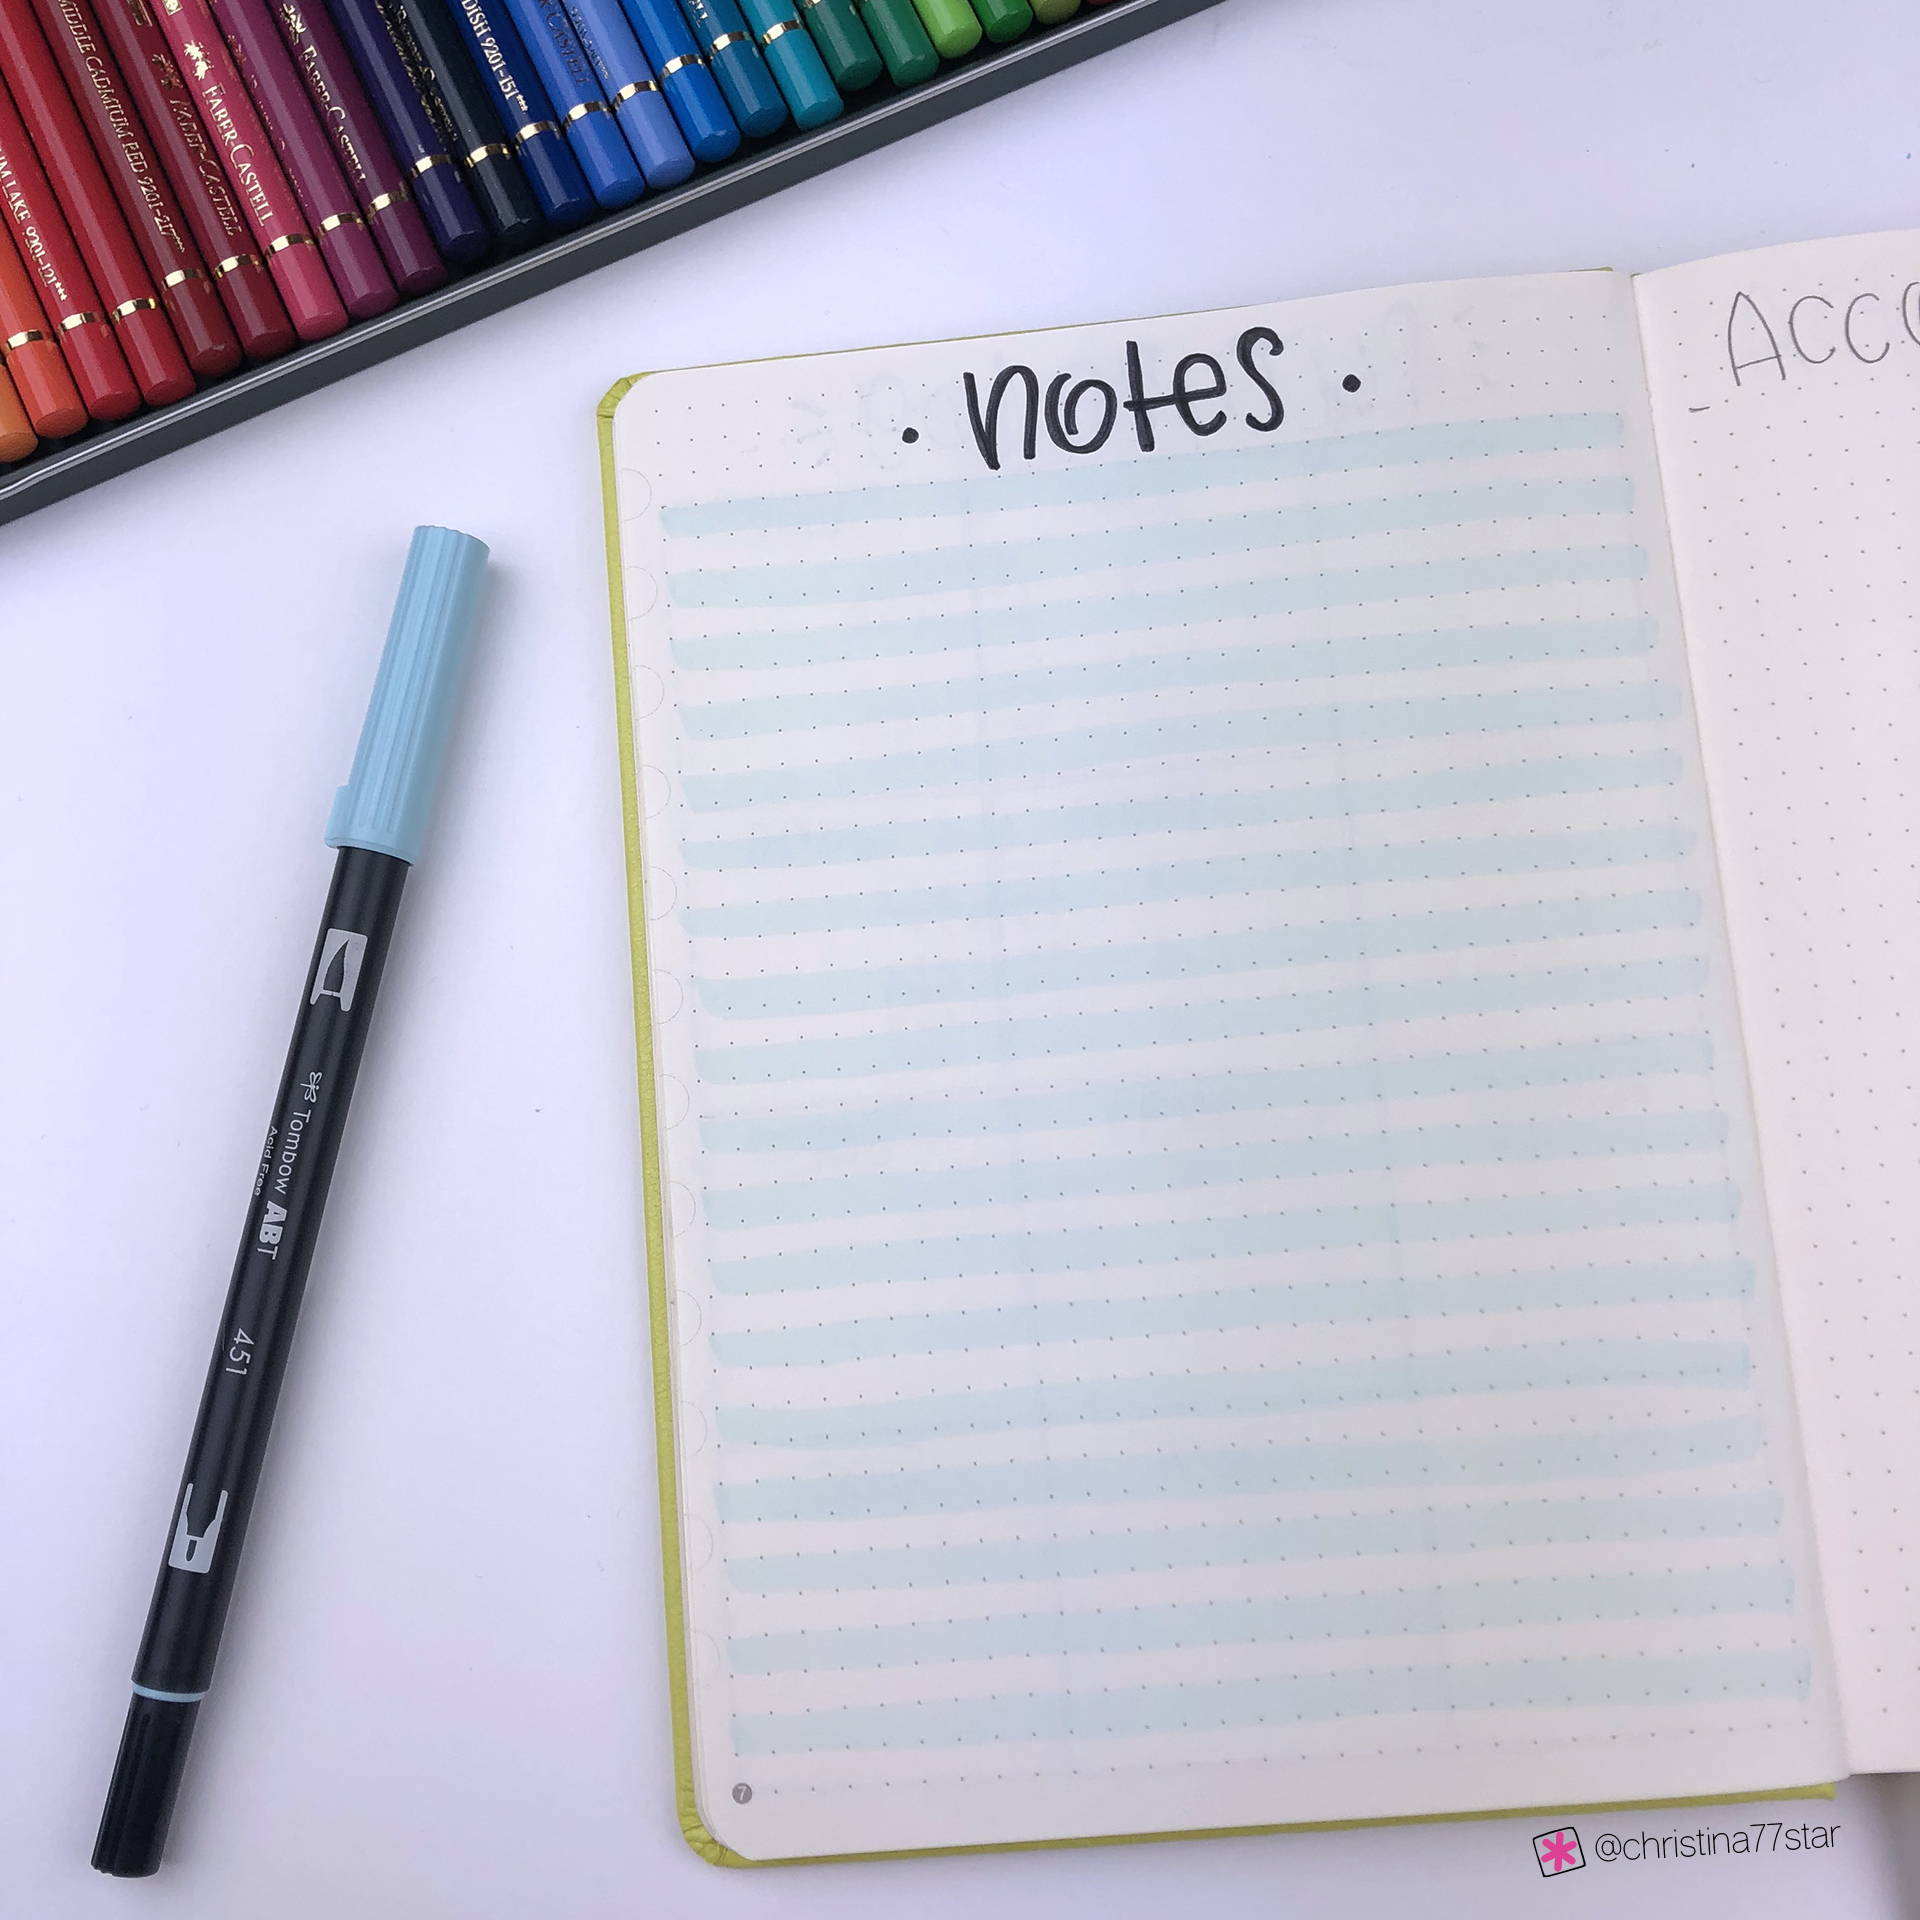
For my first weekly spread I decided to use an older layout, that I used to use in my second bullet journal. I took advantage that I only wanted to add 6 of the 7 days of the week, and that layout is perfect for that. On the right there is enough space to plan and brainstorm for this and next week, which I think is important to have for the first week of the year.

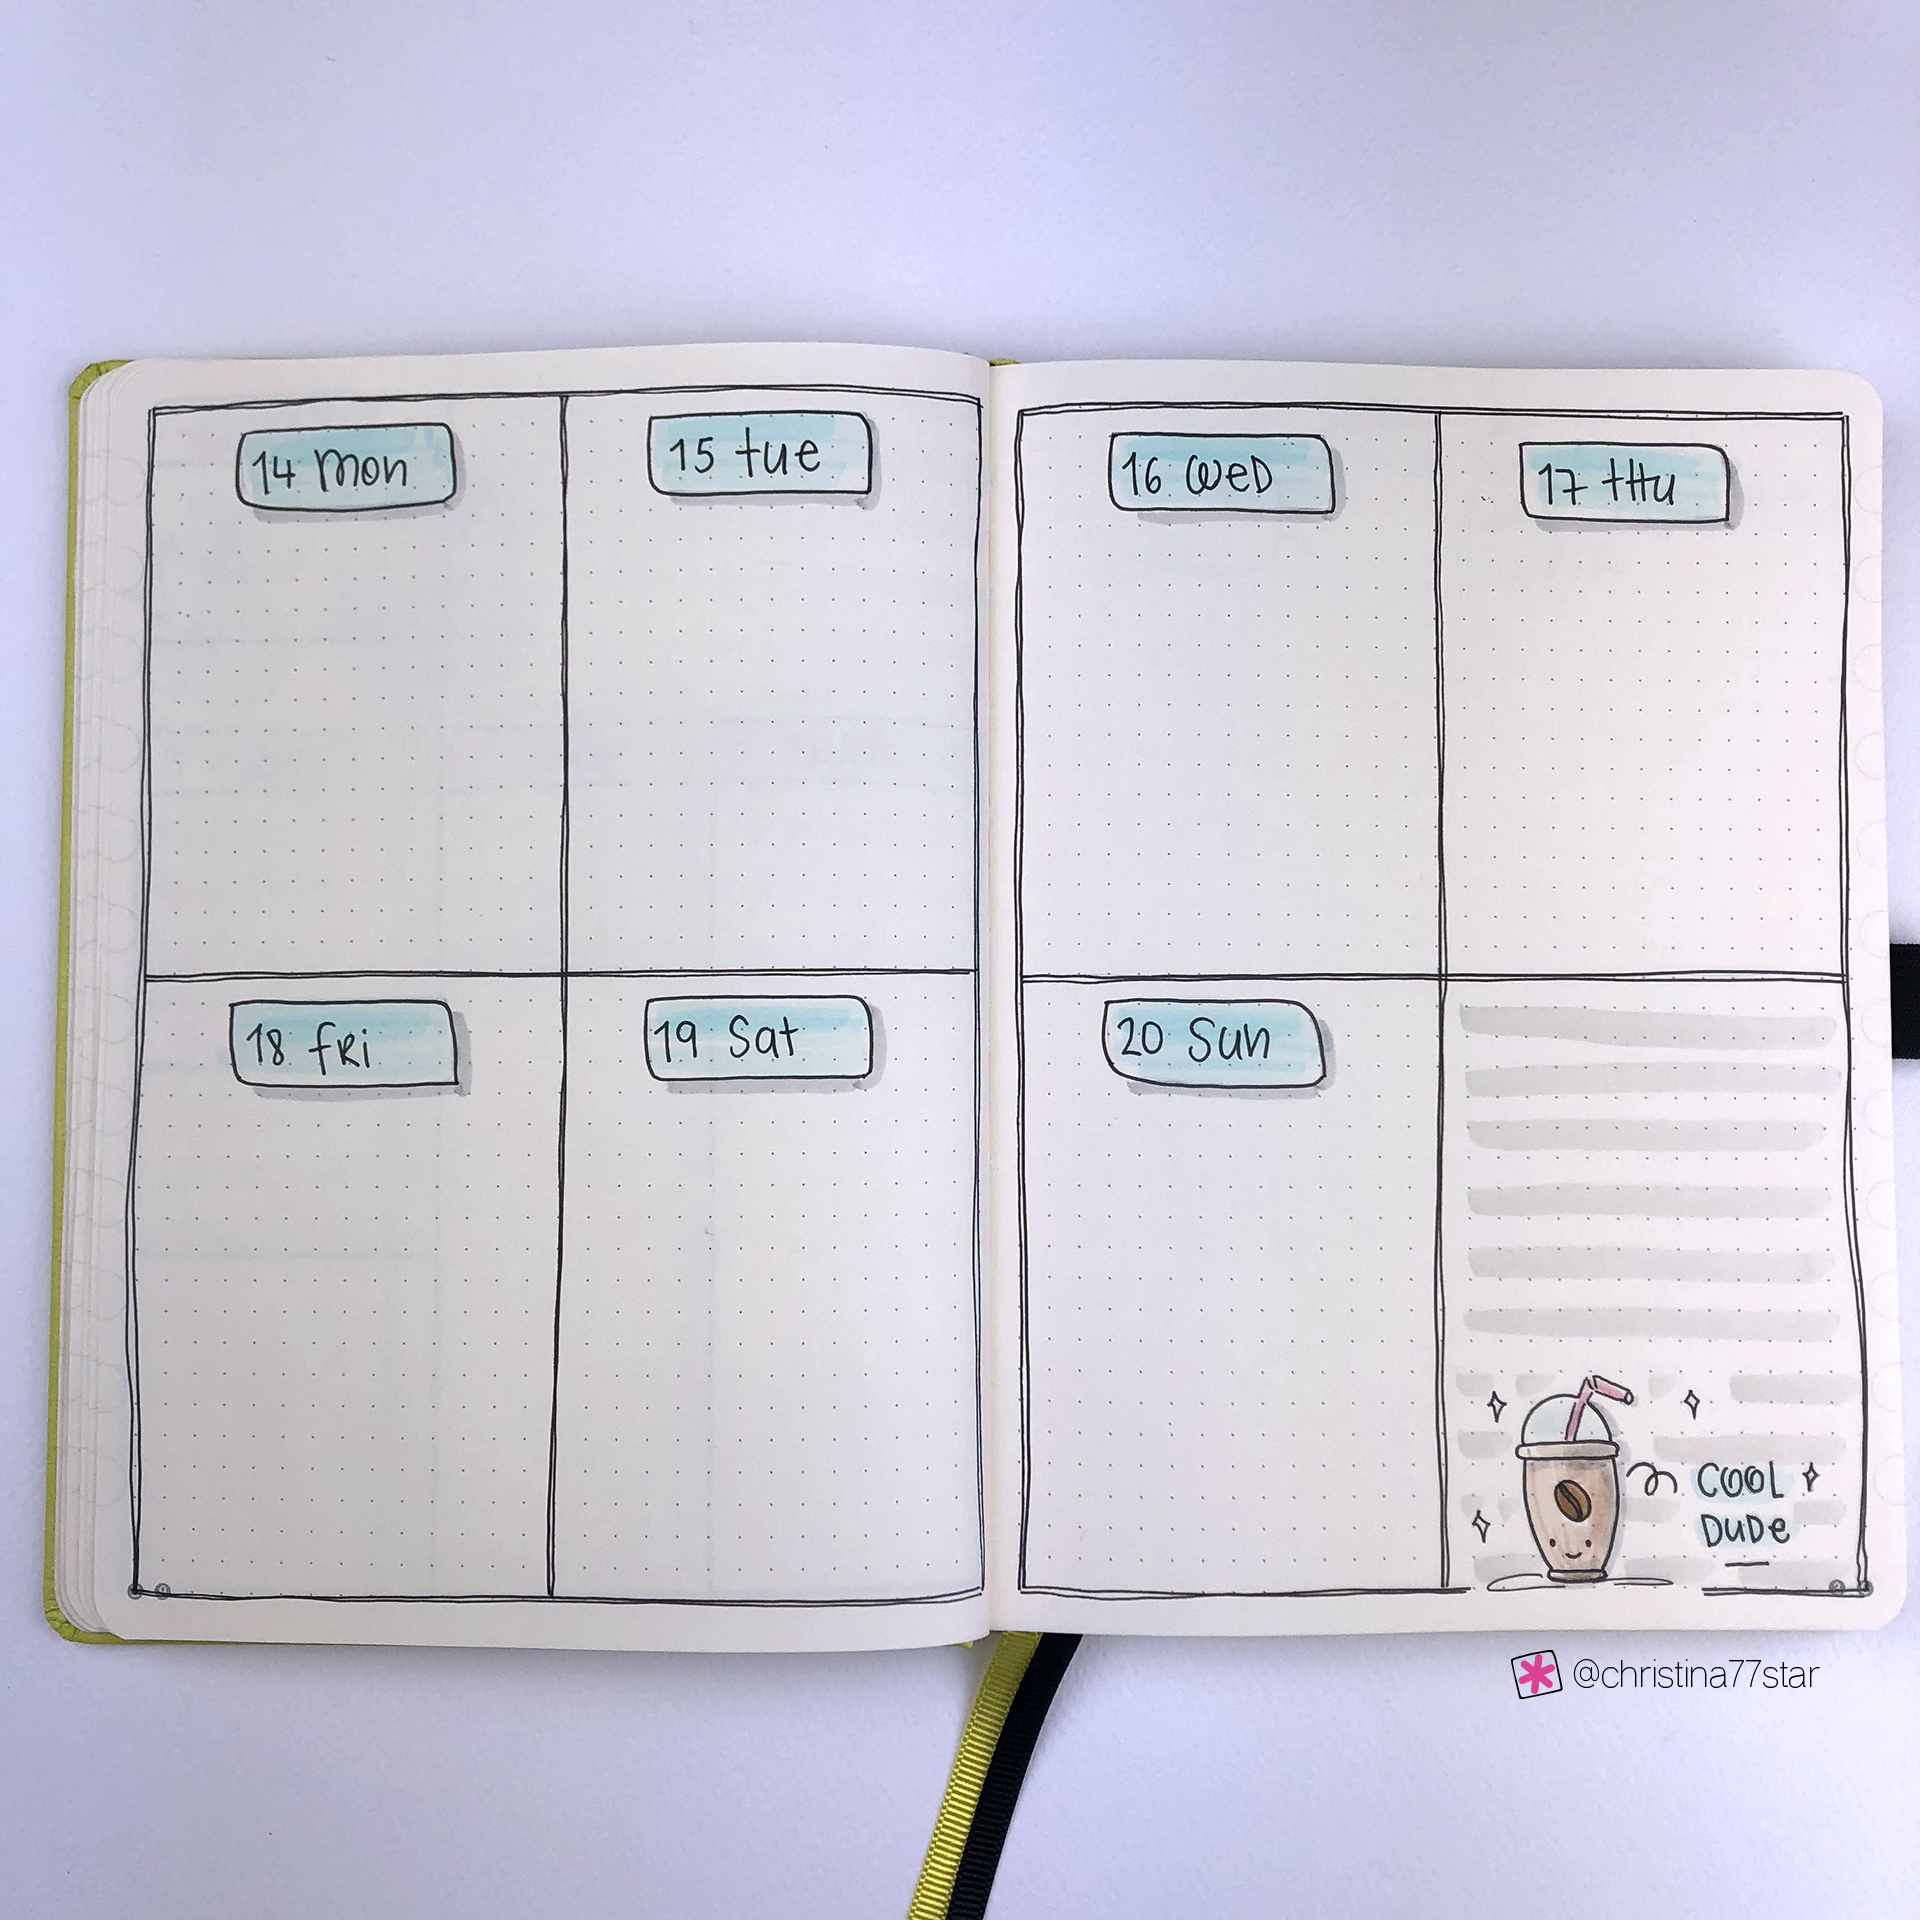
For the second weekly spread I chose one of the layouts that I used in December as well. I love the way the space is arranged in this layout. Also the section above each day with the grey lines can be used for so many things: daily menu, top priority tasks, happy thought, appointments and so on. In December I used it to write down all my self-care tasks that I had for each day, but I think for January I want to add affirmations to set the mood of that day ☺️.

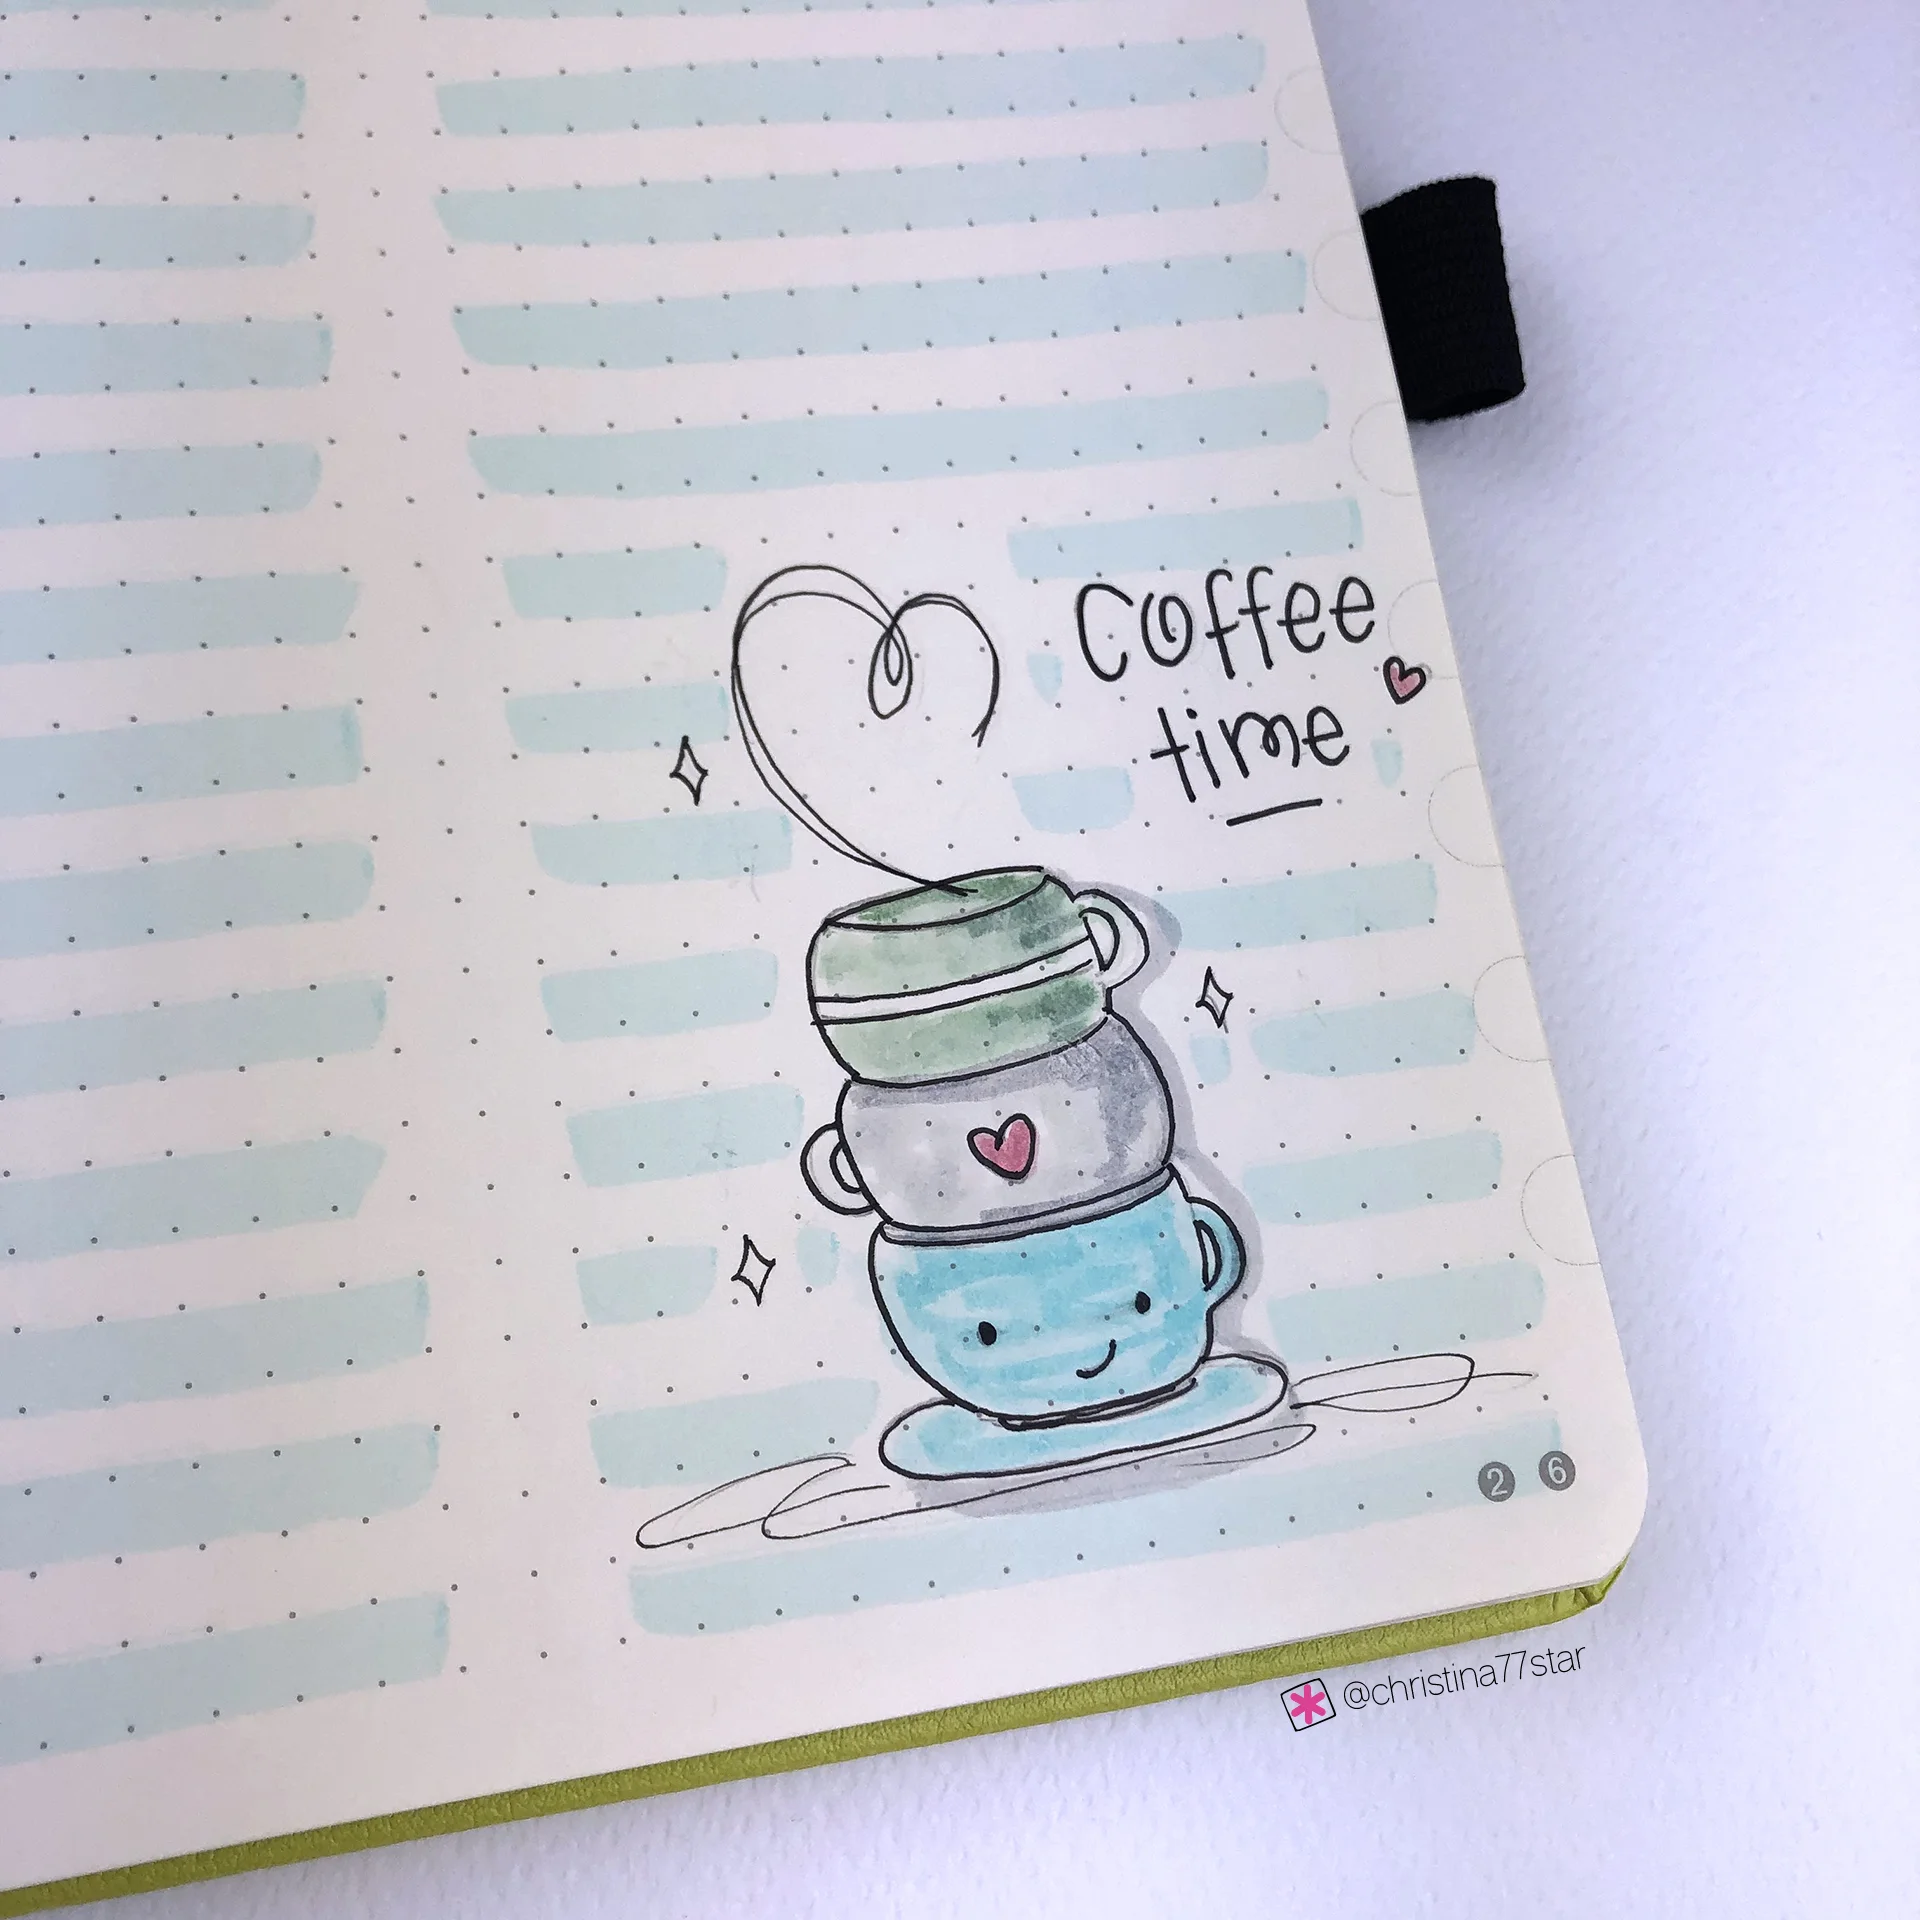
I love how the doodles and the theme of the month turned out! I wanted to add more cute and funny drawings and I think I managed to do that with the cute faces I added on each doodle and the titles I gave to each one.
For the third week of January I applied one of my most used weekly layouts. This simple grid that you can separate in any category you want, has saved me many times. It’s so simple to create and still functional. So, if I don’t have time to do fancy and complicated layouts, this is my go to one. ☺️

I decided to add this cool dude as well in my notes section! 😂 Living in Cyprus you get to drink cold coffees most of the time, so I knew I had to include a cold coffee (Frappe) in my spreads too.
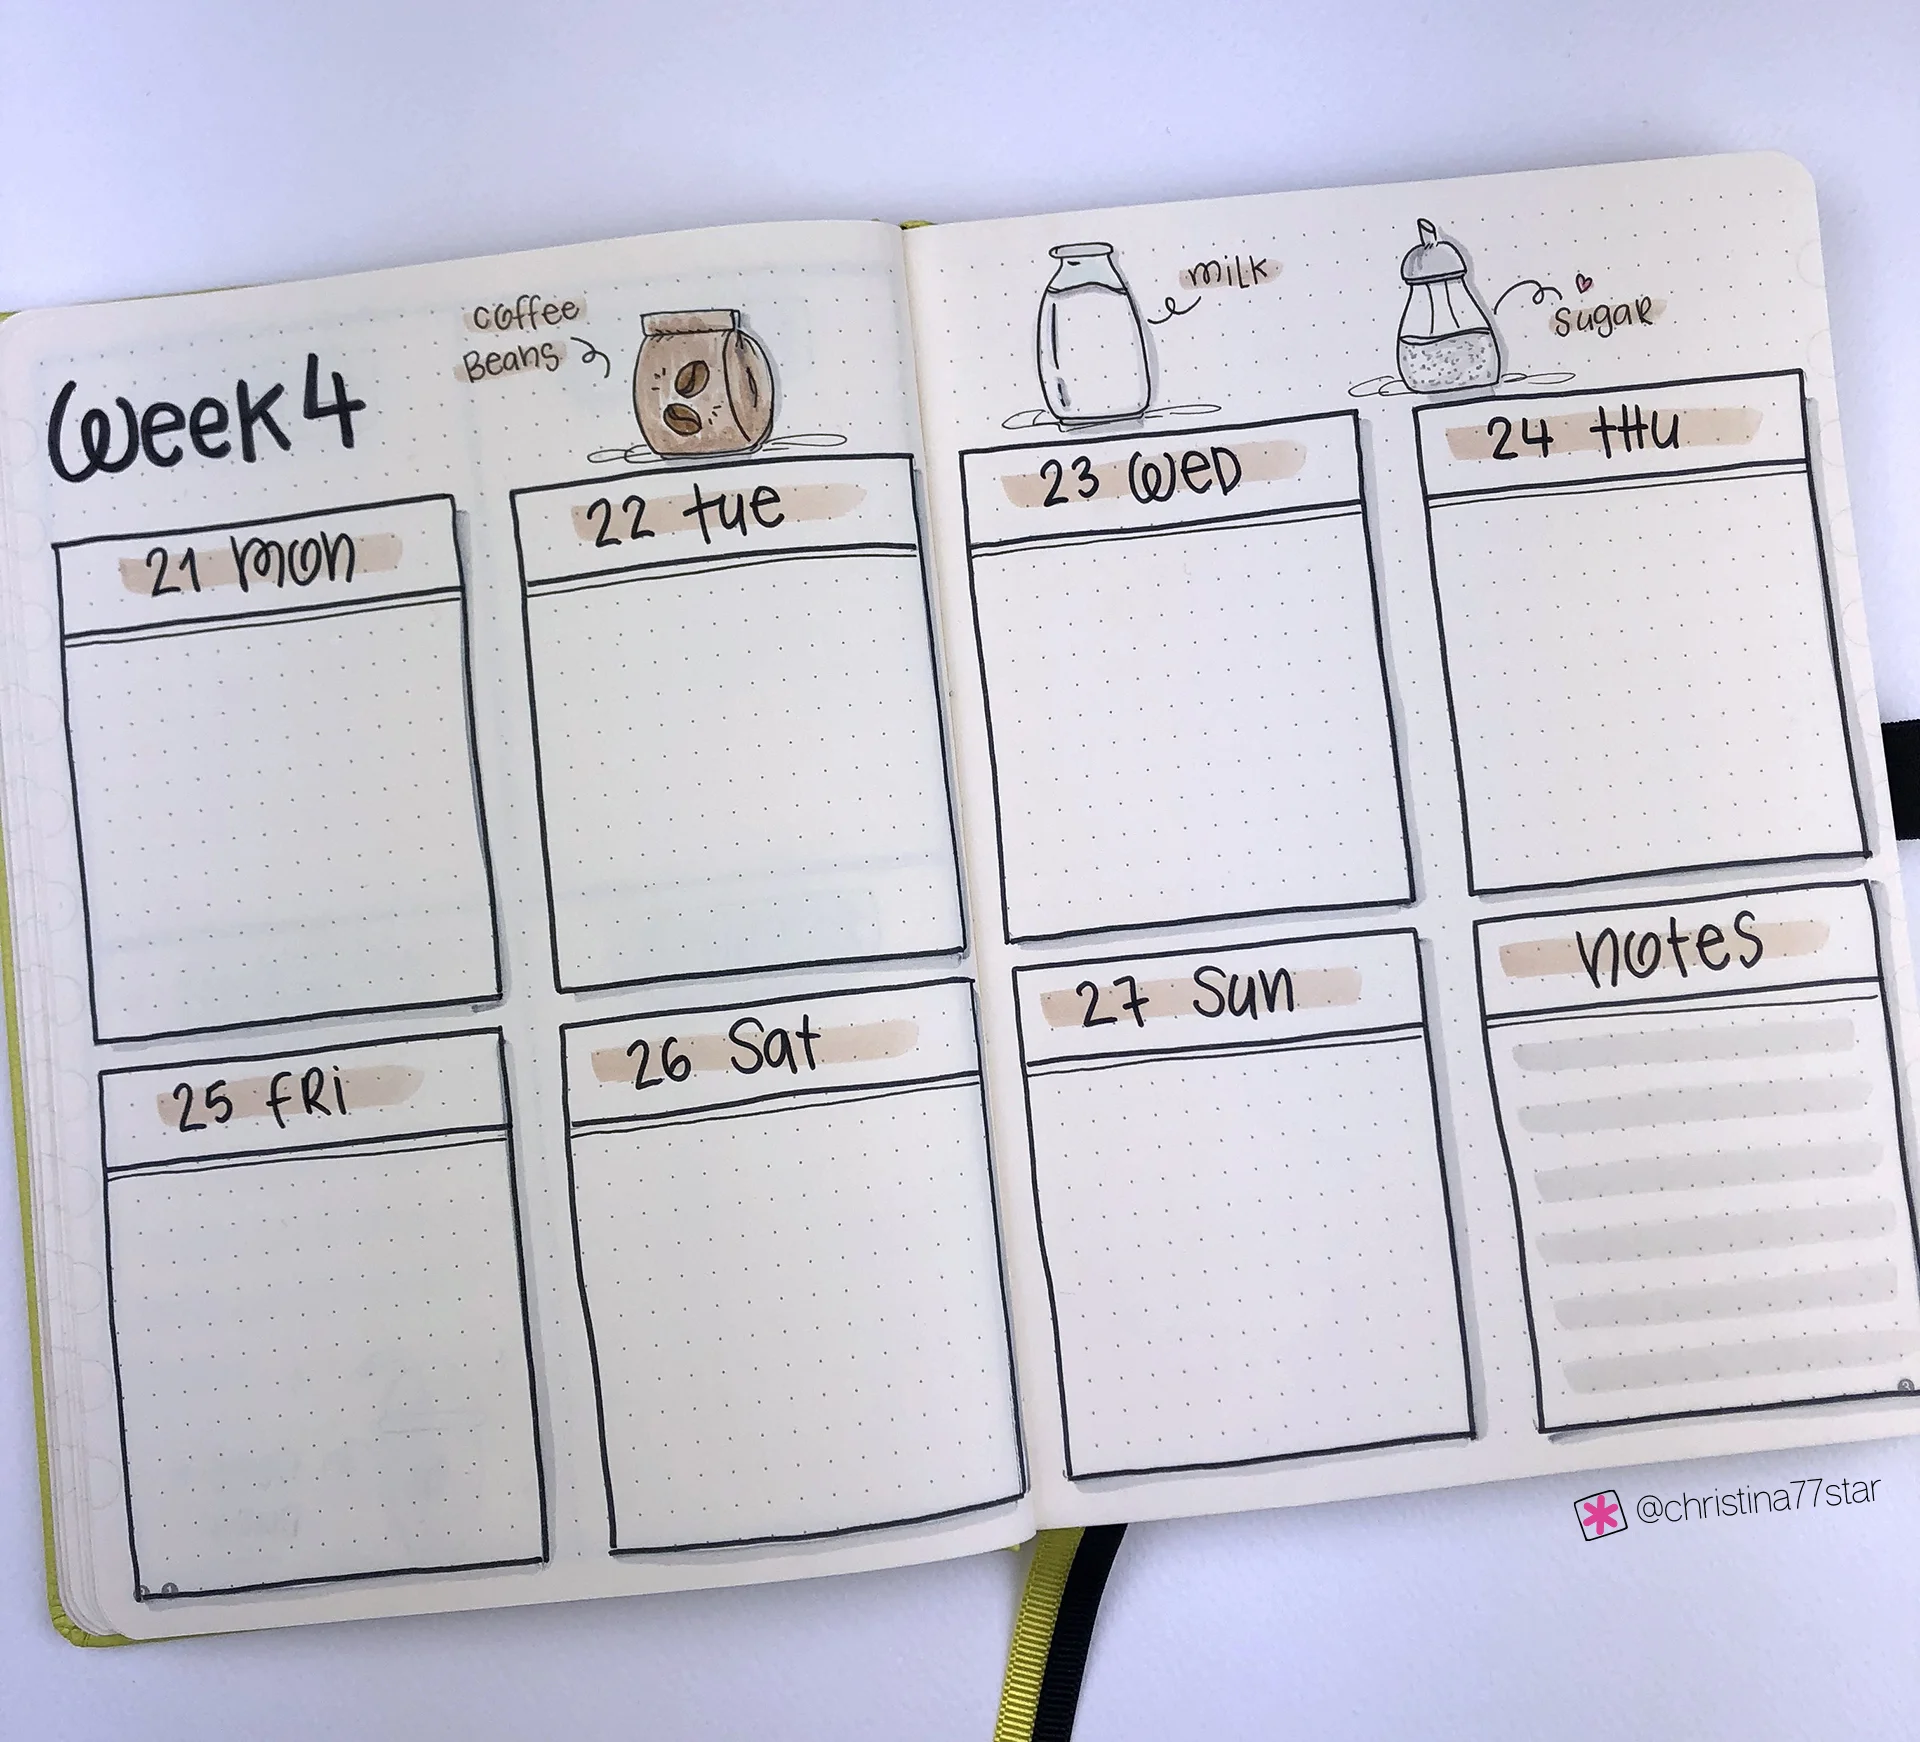
I think the fourth weekly spread of January is my favourite one of all! I love the colours, the use of space. And the doodles make it even more adorable! 😍

I seriously can wait to start using it and start planning my day in these boxes!
SUPPLIES USED:
Tombow Dual Brush Markers (947, N15, N89, 977, 451, 452, 772, N75, 942, 992, 990, 192)
So, these are the 4 weekly layouts for January and the first ones of 2019! I hope you liked this post and that you found some inspiration for your own weekly layouts. If you liked the theme and you'd like to recreate it, please send me some pictures. I'd love to see your pages!! You can always contact me at christina77star@gmail.com


Improve Your Handwriting Challenge - January 2019
I'm back with one more "Improve your Handwriting Challenge"! This is going to be the first handwriting challenge for 2019 and I’m super excited!!! ✨
This challenge is a fun way to practice daily, keep a photo archive of your handwriting and see how you've improved through time. You can also interact online with other people doing the same challenge, and also you can get inspired by others' handwriting too.
So, for January it's going to be 31 days of handwriting prompts that will hopefully get you to start practicing your handwriting every day. The theme for this month's words is ‘Words of the Year'. I wanted to make this one a bit more special and meaningful. I always like to choose a word for the year, so I thought to turn the challenge into a list of possible words that you could choose, in order to give you some inspiration.

HERE'S HOW TO PARTICIPATE:
Follow me (Christina) @christina77star over on Instagram.
Each day there is a corresponding prompt, that you simply have to write on a piece of paper. You can also choose to have a dedicated notebook for your daily handwriting practice. Try and focus on the word and the letters as you write them. You can repeat the word as many times as you want. Look at the way that you wrote the word the first time and the way you wrote it the last time. Is there a difference? Do you think you need to work on a specific letter?
Take a photo of your practice and tag it with #improveyourhandwritingchallenge, so that it gets added to the feed.
At the end of each month look back at your practice pages and see how you've improved.
Make sure to encourage each other and have fun!
Please share this post to spread the word and invite others to join in the fun and improve their handwriting as well!
Thank you for joining in!
Christina x

Plan With Me: My January 2019 Setup in my Bullet Journal
The countdown has really started! With only 5 days till Christmas and 11 days till the New Year, everybody is crazy busy trying to plan and organise everything for the holidays. And don’t forget those last minute presents… oh, boy I don’t even want to go there! But even if you are incredibly busy, and caught up in the festive whirlwind, you need to set aside some time to plan and organise for 2019. It’s the best time to setup your bullet journal for the new year, and to plan January.
For January I wanted to try something different from the typical layouts that are related to winter. So, the theme I chose for this month is ‘Coffee’. I wanted to make this theme cute and fun, and I think that I managed to do that through my doodles and the little comments on them. I had so much fun creating these pages, and now I can’t wait to start using them.
Make sure you scroll down to the bottom of the post, because there's also a video, where I'm showing you exactly how I've created each spread.

I started my setup for January with something completely different from what I’m used to do. I’ve noticed that the last single page of each month was not being used. So, I decided from now on to add my Notes page there. That way I don’t waste any pages and it’s actually easier to find it. I added my usual beige lines on the page and I also included a cute little coffee doodle with the phrase ‘But First Coffee’. That coffee cup is way too cute! 😍

The next page is the Cover Page of the month. I decided to add lots of hanging mugs and cups and I also included a cute little coffee maker at the bottom of the page. The quote I chose to add really sets the tone of the theme and puts everything together. I used my Tombow markers as watercolours for some parts of this page. You can see all the supplies I’ve used at the bottom of this post. I really like how they turned out and this is one my favourite cover pages, for sure!

The next spread is my Month at a Glance. I went back to my smaller one-page layout that I really like, but I wanted to add another cute doodle page on the left.

I decided to keep it simple and I created this cute little cup that will remind me to smile throughout the month!

Next comes my page with the Monthly Goals. As I mentioned in my 2019 Setup post, for this year I want to make sure to ignite my life and live it to the fullest. I want to intentionally create and pursue more fun moments and make sure to be happier and laugh more every single day. So, with my monthly goals I wanted to be more specific and that’s why I’ve added 4 instead of 2 categories: Me, Work, Relationships and Fun. It’s important to set the tone and your intentions from the very beginning and to program your mind according to what you want to achieve.

Like in December, my weekly tasks have moved to the page opposite and now it’s very easy to see what I need to do and allocate a specific timeframe for that task. Since I started using this method, a few months back, I have seen such a big improvement in my productivity! I finally get more things done! I also decided to use the same grid layout that I used for my monthly goals. It makes the two pages look and work better together.

I also added a tea and a coffee cup in the middle of each page respectively, in order to continue with the theme. Let me know in the comments below, do you prefer tea or coffee?

Lastly comes the first Weekly Spread of the month. I used an older layout that I used to use a lot in my 2nd bullet journal. Since I wanted to include only 6 of the 7 days of the week, this layout was perfect for that. And it conveniently has a lot of space on the right for me to plan this and the next week.
To keep up with the theme of the month, I added those cute little mugs at the bottom of the page that make everything even more adorable!
SUPPLIES USED:
Tombow Dual Brush Markers (947, N15, N89, 977, 451, 452, 772, N75, 942, 992, 990, 192)
And that is the first month of 2019 planned in my bullet journal. I’m wishing you all a very Merry Christmas to spend with your loved ones and a Happy New Year. May 2019 be inspiring and productive year for all of us, filled with precious moments.✨

Setting Up my Bullet Journal for 2019 (+video)
With the New Year fast approaching, now it’s the perfect time to setup our bullet journals for 2019! I like to take this time to reflect on the year that is almost over and to plan ahead for the new one that’s coming. It helps me to put my head and thoughts in order and to get a head start before the 1st of January. Even if you’re not starting with a brand new notebook, it’s nice to dedicate a few pages in your journal to denote the new year.
Make sure you scroll down to the bottom of the post, because there's also a video, where I'm showing you step by step how I've setup each spread for 2019. 😉

I’m actually starting a brand new bullet journal for 2019. I’ve chosen the Dingbats* Earth Lime Yasuni Journal, in A5 size and of course dotted style. I am in love with these notebooks ♥ This is my second Dingbats notebook that I’m using and I highly recommend them! I was almost finished with my previous notebook and because there’s not many pages left, I thought it would be better to setup for 2019 in a new notebook, instead of creating my spreads for the new year in a journal that I would just use for a month or so. But, don’t worry, i’ll still use my previous notebook until it finishes.

The first page I always make is a Review page for the year that ends. It’s nice to reflect and to actually see what you’ve done during the year, what worked and what didn’t, your accomplishments and your mistakes. All these will help you to plan better for the next year. You can change your strategy and the way you’re doing things in order to be more successful and to achieve everything you want. Like last year, I decided to include some questions on little notes that I drew on the page. That way, it looks more fun and the different categories are highlighted better.
I used my Tombow markers and my Polychromos coloured pencils to get the desired effect. As always you can check all the supplies I’ve used at the end of this post.

The next page is a Quote page that I like to add in the beginning of all my notebooks. I found this nice quote on Pinterest and I thought that it was the perfect one to add to my new bullet journal. I like to see the new year as a new beginning full of opportunities and adventures! I used my Tombows as watercolours to get the desired effect. I also chose to add different fonts for each line to highlight the quote even more. I love how it turned out and it makes me feel really excited every time I look at this page!

The next page is dedicated to my Word of the Year. My word for 2018 was ‘believe’ and it was the perfect word for me! During this year I believed more in my dreams and myself and that word would always remind myself to believe more in what I do. So, for 2019 I chose the word ‘ignite’. That word has so many meanings for me and I’m sure it will help me to move forward and to ignite my life in more ways than one! I have a blog post on how I choose my word of the year each time, if you’re interested.
So, I used my watercolours to create the background and then I added the word in the middle of the page with my thick black pen. The page responded really well, even though I added lots of water on it. If you see that your page goes a bit wrinkly, add a piece of paper on top of your design, close your notebook and add some weight on top of it. Let it sit for some time and once it’s completely dry you’ll see that your page is straight again.

The next page is one that I always include in my journals. I like to have a Year at a Glance page to plan things, but also to refer to when I’m setting up my bullet journal each month. So, I printed one of my layouts on a sticker paper and added it on the page. That's a much quicker and cleaner way, than to write all these months by hand! You can find the 2019 Year at a Glance on my Etsy Shop.

Next comes my Future Log. I decided this time to use a simple grid and to turn it into a one-page layout. This is enough space for me to plan ahead if I need to. I’ve noticed in previous notebooks that I wasn’t using this spread as much, so I thought to make it more simple and adjust it to my needs. I also kept it very simple with the colours and I used only light blue and grey.
I also added a Notes page after my future log, to add any miscellaneous notes or any future plans that might need more space to right about. That way I’m covered whatever happens.

This is my Accomplishments page. I created a grid, like before and I added all 12 months. I use this spread to write down the best memories, events, successes and generally anything I want to remember from each month. I love that I can see straight away what I've achieved all through the year, and this also pushes me to try harder in order to add something for every month.

Next come two pages that work together, hand in hand. The first one is my Goals page. I’ve separated it into 4 categories: Me, Work, Relationships and Fun. You can add any category you want and that is important to you. You can also add more or less sections, depending on what you want to achieve. I decided to keep it simple with only 4 categories, and I added the things that I want to focus more during the new year. I made sure to include a category for ‘fun’. As part of my ‘ignite’ word and theme of the year, I want to make sure to ignite my life and live it to the fullest. I want to intentionally create and pursue more fun moments and make sure to be happier and laugh more every single day.

So, after I set my goals per category, I go to the next page which is the Actions per Month page, and I write steps and actions that will help me achieve the goals I’ve set up for myself. That means that every month, I have to do at least one thing that will get me closer to each one of my goals. That way I keep myself accountable and I don't lose track of what I want to achieve during the year. I intentionally kept everything simple and grey, so that I don’t get distracted by colours and doodles.

Then next page is dedicated to Birthdays. I actually use this page to write any birthdays, name days, anniversaries etc. that I need to remember each month. I like to keep those separate from my event and task planning. So, they have their own special page, which I check in the beginning of each month while I do my monthly planning.

Moving on, the next page is my Reading List. This is where I write any new publications per month, or any new book I want to read. I try to read 4 books per month and this list always helps me to keep track of my reading and to plan what book to read next.

One of the most functional spreads in my bullet journal is my Shopping List spread. This is where I have created a master shopping list for both my supermarket and my vegetable shopping. The way I use it is to go through it, while I’m creating my shopping list each week, in order to make sure that I don’t forget anything. Simple and practical and one of the few spreads that I’ve kept in all my 6 bullet journals so far!

The next two pages have to do with my bullet journaling. I created a page for my Theme ideas and another one for my Videos. I’d like to start creating more videos during the month, and this will help me to brainstorm ideas and plan ahead my videos and monthly themes.

And the last spread I created in my new bullet journal is my YouTube Workflow. A workflow is a chart where I create a list of each step of my work process horizontally and then I can make another list, with all the different projects where this process can be applied to, vertically. Then I just cross off each step as I’m doing it. That way, I can take on multiple projects and keep up with everything that needs to be done. I apply this to my freelance work, all the time. Therefore, I decided to use this type of spread for my YouTube videos as well. There’s a series of steps I have to do for each video and it’s nice to see how many things you’ve done and what’s still left to do.
SUPPLIES USED:
Tombow Dual Brush Markers (N00, 451, 673, 800, 452, 620, 243, 533, N15, 025, 062, N95 and N75)
Sakura Gely Roll White
So, this is the way I've setup my bullet journal for 2019. I hope you found some inspiration and that you apply some of the layouts in your own bullet journal. If you do, please tag me @christina77star. I’d love to see your recreations!

Bullet Journal Ideas: 4 Weekly Spread Layouts for December 2018
I love this time of year! Everything is in Christmas and New Year’s spirit. Festive lights are being strung around the neighbourhood, holiday music is playing at my favourite shops, and the season of giving has definitely begun!
December marks a time of reflection while we enjoy all the lights, sounds and smells of the holidays. I really can’t believe that we're in the last month of the year. 2018 is coming to an end, and it has truly been an amazing year. I’m grateful for all the opportunities that were presented to me and all the amazing moments and memories I had the chance to create. But I’m also grateful for all the problems and difficulties that came up as well, because they made me come out of my comfort zone and try harder.
As always one of the things that I love to do in the beginning of each month is to plan my weekly spreads, so that I have them ready to fill in all the information, appointments etc. during the month. That way I save time and I have space to plan everything. The theme for this month is 'Gingerbread Cookies' and you can see how I've setup my bullet journal for the month in this post, or you can watch the video here.

Happy December everyone! 🎄
I love this time of year! Everything is in Christmas and New Year’s spirit. Festive lights are being strung around the neighbourhood, holiday music is playing at my favourite shops, and the season of giving has definitely begun!
December marks a time of reflection while we enjoy all the lights, sounds and smells of the holidays. I really can’t believe that we're in the last month of the year. 2018 is coming to an end, and it has truly been an amazing year. I’m grateful for all the opportunities that were presented to me and all the amazing moments and memories I had the chance to create. But I’m also grateful for all the problems and difficulties that came up as well, because they made me come out of my comfort zone and try harder.
As always one of the things that I love to do in the beginning of each month is to plan my weekly spreads, so that I have them ready to fill in all the information, appointments etc. during the month. That way I save time and I have space to plan everything. The theme for this month is 'Gingerbread Cookies' and you can see how I've setup my bullet journal for the month in this post, or you can watch the video here.

The first weekly spread is the one that I’ve been using for the past few months and I love! I kept it pretty simple with a few Gingerbread Cookies on top and red lines instead of black.

For the second weekly spread I took an old layout that I’ve been using a lot, and made some modifications to change things up and make it even more useful. I added a section for weekly notes at the top and a mini calendar. I made the boxes for the weekend bigger and I also created a section with grey lines for each day. That section can be used in many ways: daily menu, top priority tasks, happy thought, appointments and so on. I haven’t decided yet what I'll use mine for 🤣 but I’m really happy with the result!
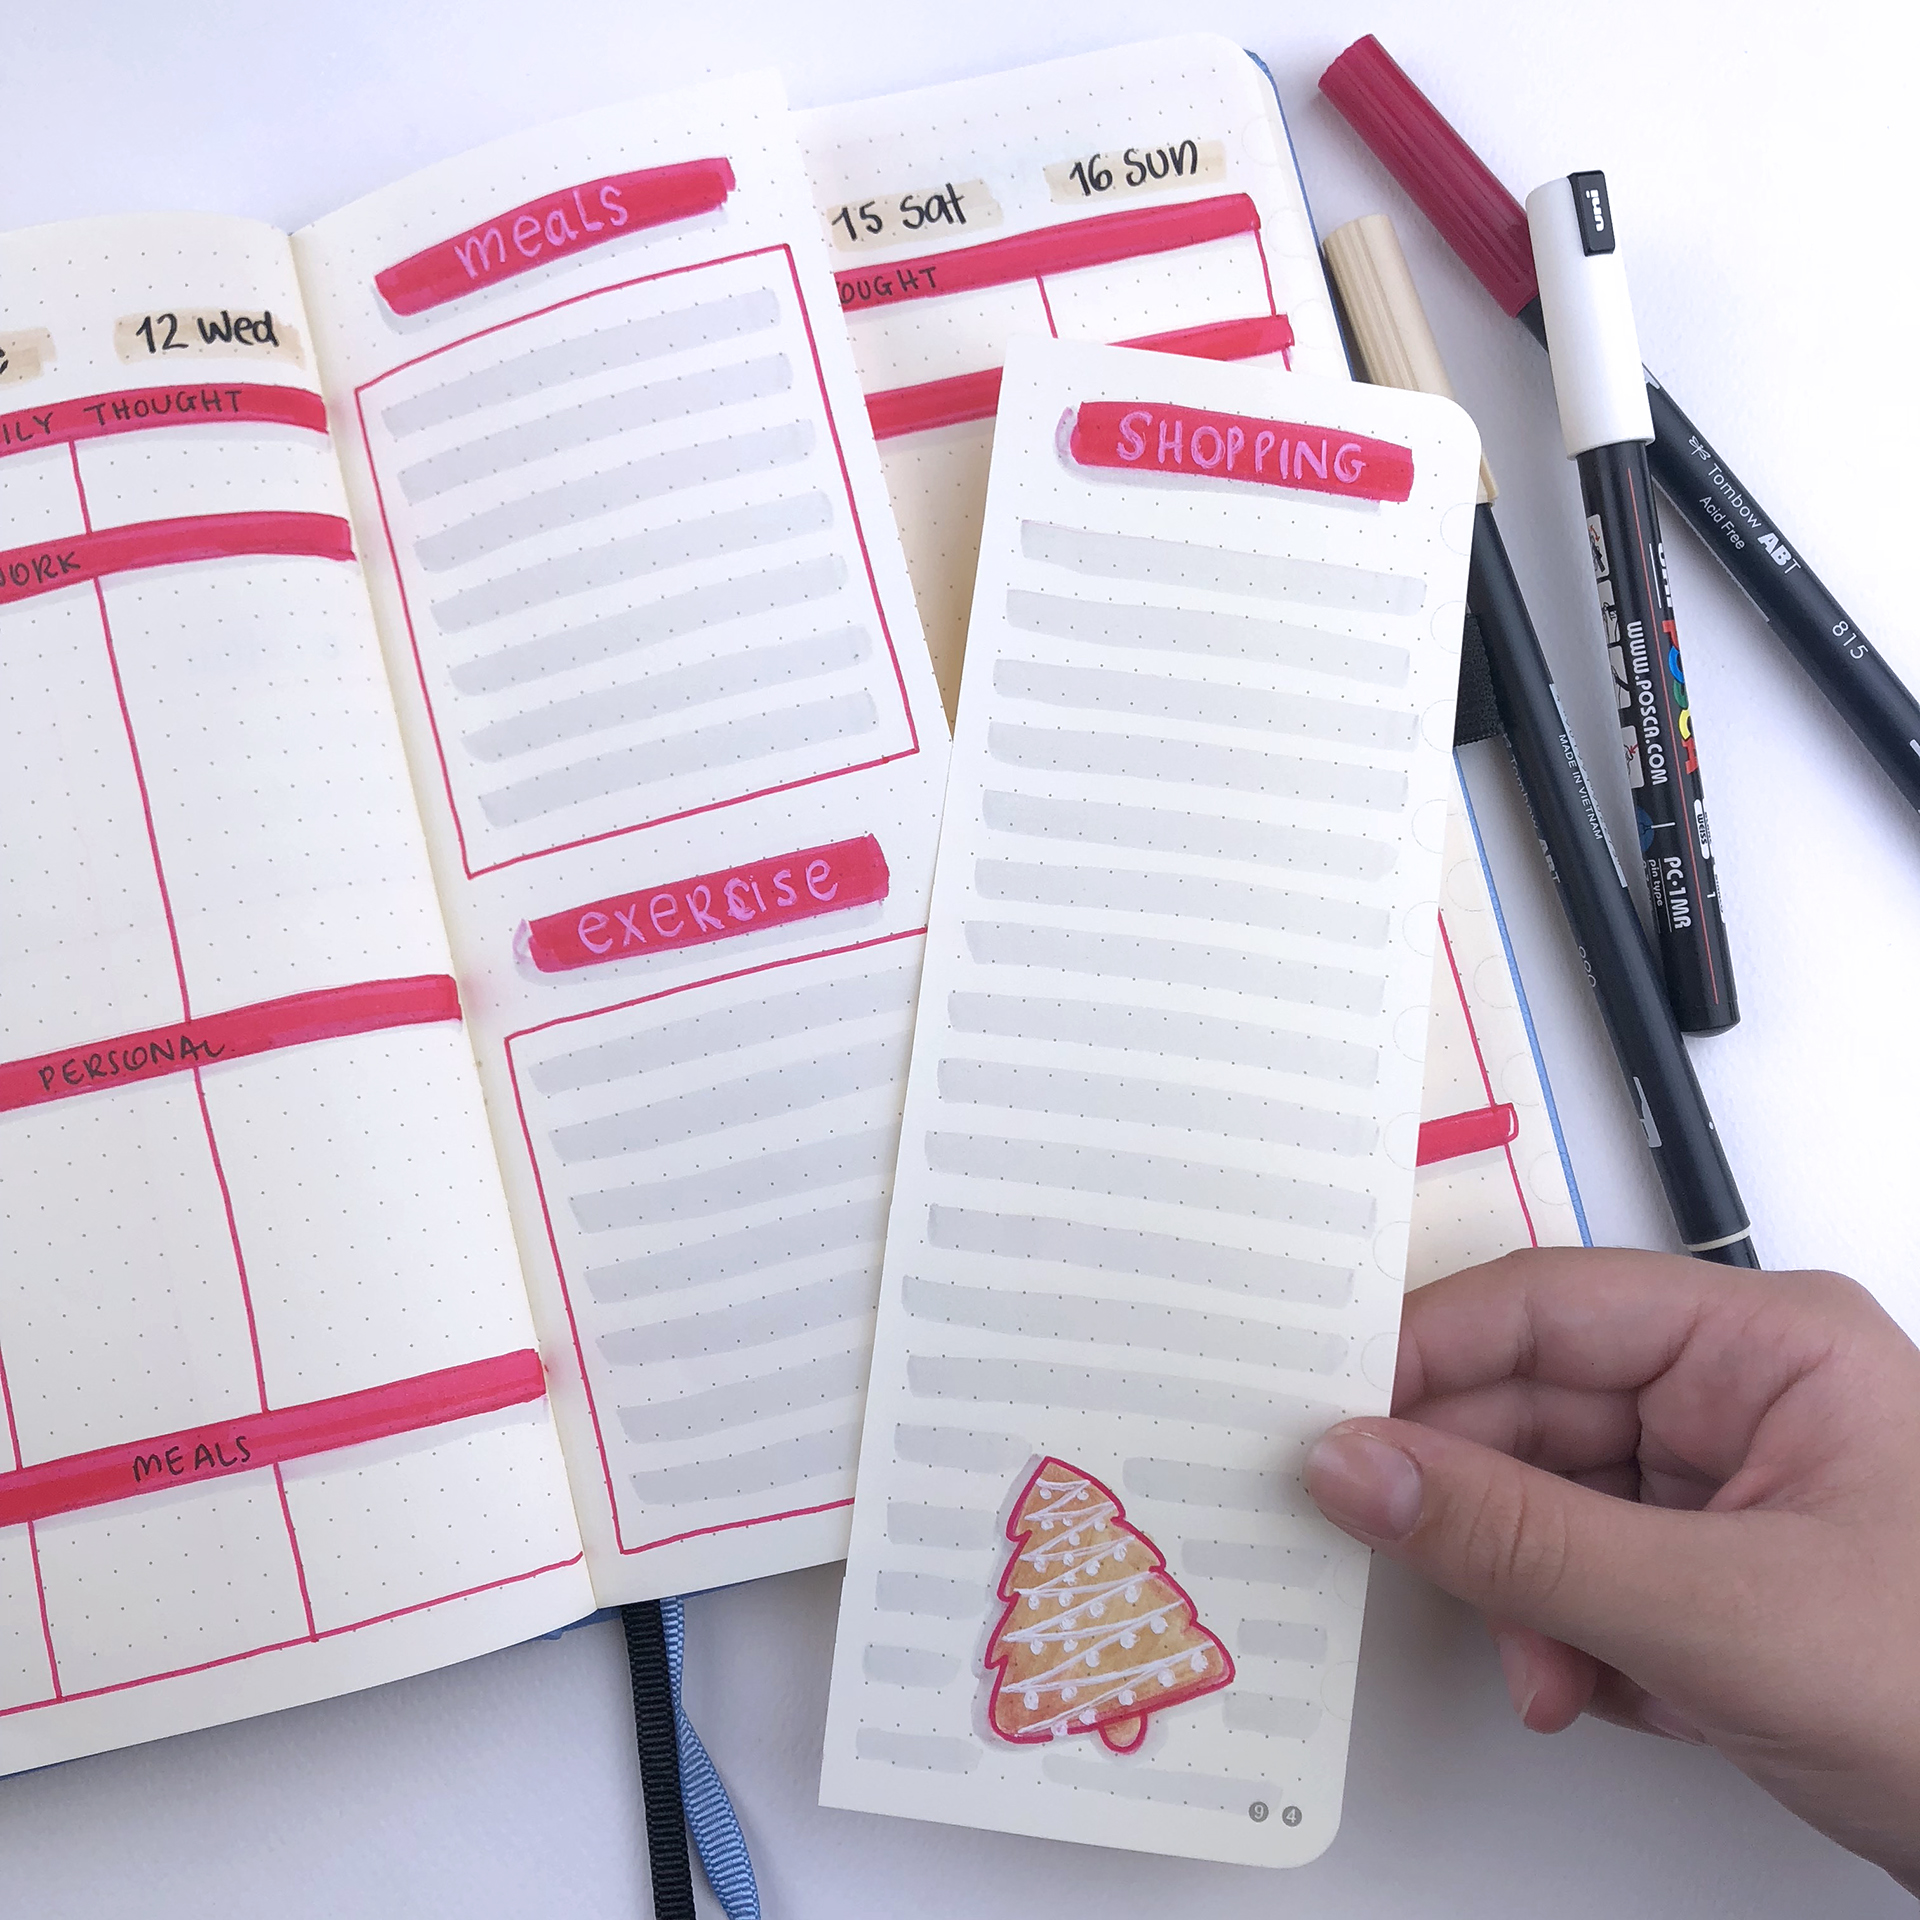
The third weekly spread for December is a dutch door layout. I find this layout so functional and versatile, that I have to use it at least once each month! As I did in November, I used the section of the page that I cut off as my shopping list. That way I don’t waste any paper and it proved to be such a clever thing too, last month! 👏🏻 (you can even use it as your Xmas shopping list 😉)

I used mostly red and grey that adds so much colour and vibrance to the page! I love it! 😍 For the middle page section I created sections for the weekly meal plan and my exercise routine, at the front.

And at the back I added boxes for this and next week’s notes and to-do lists.

The fourth weekly spread is a very simple layout that turns very festive with the colours and the cute gingerbread man! Not much to say here. I’ve used this spread time and time again and I love the simplicity of it. It’s my go to weekly spread, when I don’t have too much time to be creative.

And the last weekly spread of the month is basically the same layout with the 4th one. However, I added less red lines and I created some sections for each day with the grey lines. I also skipped the notes section at the end, and I added the last day of the year, that falls on a Monday…! I wanted to include all the last days of 2018 in one weekly spread and this looks perfect to me!
SUPPLIES USED:
So, these are the 5 weekly layouts for December and the very last of 2018! I hope you liked this post and that you found some inspiration for your own weekly layouts. If you liked the theme and you'd like to recreate it, please send me some pictures. I'd love to see your pages!! You can always contact me at christina77star@gmail.com

Improve Your Handwriting Challenge - December 2018
I'm back with one more "Improve your Handwriting Challenge"!
It's a fun way to practice daily, keep a photo archive of your handwriting and see how you've improved through time. You can also interact online with other people doing the same challenge, and also you can get inspired by others' handwriting too.
So, for December it's going to be 31 days of handwriting prompts that will hopefully get you to start practicing your handwriting every day. The theme for this month's words is of course 'Christmas'. And I thought it was very appropriate for this time of year 🎄

HERE'S HOW TO PARTICIPATE:
Follow me (Christina) @christina77star over on Instagram.
Each day there is a corresponding prompt, that you simply have to write on a piece of paper. You can also choose to have a dedicated notebook for your daily handwriting practice. Try and focus on the word and the letters as you write them. You can repeat the word as many times as you want. Look at the way that you wrote the word the first time and the way you wrote it the last time. Is there a difference? Do you think you need to work on a specific letter?
Take a photo of your practice and tag it with #improveyourhandwritingchallenge, so that it gets added to the feed.
At the end of each month look back at your practice pages and see how you've improved.
Make sure to encourage each other and have fun!
Please share this post to spread the word and invite others to join in the fun and improve their handwriting as well!
Thank you for joining in!
Christina x